The right fix for quiet PowerPoint narration depends on where the volume drops. If the microphone test is quiet too, raise its input level and check the selected microphone.
If only an existing slide recording is quiet, check that clip's playback volume first.
If speech suddenly fades, check the microphone controls. If the video plays clearly on its own but sounds quiet over Zoom, check shared computer audio instead of recording it again.
In this guide
1. Check the slide recording before the exported video
Replay one narrated slide in the desktop PowerPoint app. Then play the exported movie at a normal listening level. Use the same headphones or speakers so a different output device doesn't confuse the comparison.
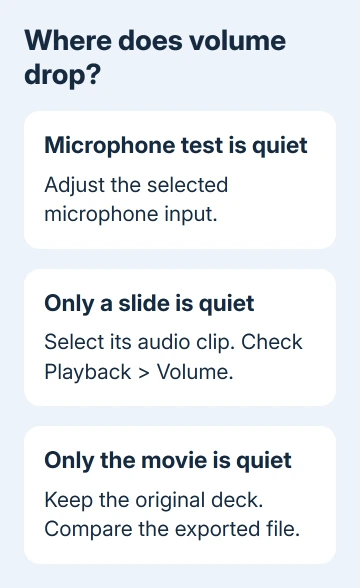
If both versions sound quiet, start with the microphone input or the clip's playback volume. If PowerPoint sounds normal and only the movie is quiet, focus on the exported movie. Keep the original deck so its recordings remain available.
For a slide with an audio icon, select it in Normal view. Open Playback, choose Volume and try High. Older ribbons may show Audio Tools > Playback after the audio object is selected.
Play the slide again at the same speaker volume. If the clip becomes easier to hear, its playback level needed changing. That adjustment doesn't change which microphone is used for the next recording.
If the slide has a recorded camera object or different recording controls, replay it from the recording screen. Don't assume every recording displays the older speaker icon described in a 2021 answer.
Microsoft says the audio playback settings include a Volume control. If the original speech is faint or distorted, check the microphone before trying to boost the movie's volume.
2. Set the Windows microphone level using normal speech
Connect the microphone or headset before opening PowerPoint's recording screen. In its device options, choose your intended input device. A webcam microphone across the room can sound very different from the headset you're wearing.
In Windows 11, open Start > Settings > System > Sound. Under Input, select that microphone. In its Input settings, choose Start test, speak normally, then choose Stop test and Play where offered.
Adjust Input volume and repeat the short test. Move the microphone closer to your normal speaking position if needed. Aim for a clear voice at your ordinary speaking level, rather than shouting to make a weak recording louder.
In Windows 10, open Settings > System > Sound, select the microphone under Input and open Device properties. Adjust its volume and use the microphone test shown on that page.
If your Windows 10 device offers older microphone controls, open Additional device properties > Levels. Microphone volume and a Microphone Boost control depend on the device; not every USB headset supplies a boost slider.
Record one slide again after changing input volume. Compare the new take with the old one to hear whether the input change helped. It won't rewrite narration already saved inside the presentation.
If Windows can't hear the microphone at all, use the Windows microphone repair steps. A missing or muted input needs fixing before a playback-volume change can help.
3. Check processing when the voice drops after a second
An abrupt drop partway through a sentence is different from a recording that's consistently quiet. In the original discussion, raising PowerPoint playback volume helped only slightly and didn't stop the sudden reduction.
Select your microphone in Settings > System > Sound and look for Audio enhancements. If the input device offers that option, turn it Off, record the same sentence and compare the result.
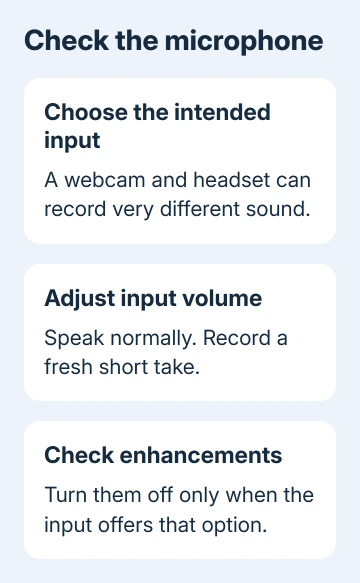
Some drivers expose processing in the older microphone properties instead. Open More sound settings > Recording, select the microphone and choose Properties.
In Windows 10, use Sound > Input > Device properties > Additional device properties.
Look for an Enhancements or Advanced tab with an audio-enhancement option. The names depend on the driver. Write down how it's set now, and restore that setting if the recording doesn't improve.
Close any meeting or voice-chat app that's using the microphone, then make another short PowerPoint recording. That lets you check the recording without another app using the same microphone.
In Recording, open your microphone's Properties > Advanced. If offered, clear Allow applications to take exclusive control of this device, choose Apply, and record a fresh sample.
One owner reported better narration after disabling that permission and recording again. Their colleague heard it as loudly as live speech, but some trainees still had trouble over Zoom. For that problem, use the Zoom checks in section 6.
If the Windows test also fades after you turn off available processing, try another microphone. If that input stays steady, take the problem to the original headset or microphone maker with both recording samples.
4. Use the Mac input controls for a Mac recording
On current macOS, open Apple menu > System Settings > Sound > Input. Select the microphone you're using, speak normally and watch the input-level display. Adjust Input volume when that device provides the control.
On older macOS, use System Preferences > Sound > Input. The Mac's processor, Intel or Apple silicon, doesn't change these input controls. Windows Levels and exclusive-control dialogs aren't part of macOS.
Return to PowerPoint, select the intended microphone in its recording options and make a fresh take of one slide. Replay it before recording the remaining slides. Keep your distance from the microphone consistent during the comparison.
If recording is silent, check System Settings > Privacy & Security > Microphone for PowerPoint permission. If your voice is quiet but audible, PowerPoint already has microphone access. Check permission when it can't record sound at all.
5. Replace weak takes and check the finished movie
Once a short take sounds right, return to each affected slide and record it again. Choose the current slide when using a Clear or Delete recording command so the good narration on other slides stays in place.
The slide-by-slide recording guide covers retakes and timing. Wait until a slide transition finishes before speaking, since narration isn't captured during the transition.
Recording audio separately isn't an automatic solution. The same owner tried an inserted MP3, then couldn't include that media in the exported movie. Check both playback and export before changing how you record the presentation.
If recording still fades, send support a short affected deck, PowerPoint version, microphone model and Windows or macOS version. Explain whether the system microphone test also fades and whether another microphone changes the result.
6. Share computer sound when only Zoom is quiet
Play the video directly on another person's computer. If it sounds clear there but weak during your meeting, keep that working recording and check the sharing setup.
In the Windows or Mac Zoom app, choose Share, select the presentation window or screen, enable Share sound, then start sharing. Play a short passage and ask a listener to compare it with your live voice.
The computer-audio sharing option sends the playing clip into the meeting. Without it, your microphone may only pick up faint sound coming from your speakers.
The Short Version
Check clip volume and microphone input, then record a fresh take. Compare processing and exclusive control if speech fades. If the movie sounds clear when played directly, enable Share sound in Zoom before changing narration again.
Checked November 22, 2026.
 If you have any business, I can build it online