PowerPoint replaces an entrance effect with an exit effect when you choose the second effect from the main animation gallery. Use Animations > Add Animation for the second effect instead. Both effects can stay on one object.
The ribbon catches people moving from PowerPoint 2007 to 2010. Newer Windows versions work this way too. When both effects already appear in the Animation Pane but the object disappears too soon, change their order and timing instead.
In this guide
1. Add the exit through Add Animation
Click the object you want to animate, then open Animations > Animation Pane. The pane lists the effects attached to that slide. Keep it open as you add the second effect and watch whether the first entry stays there.
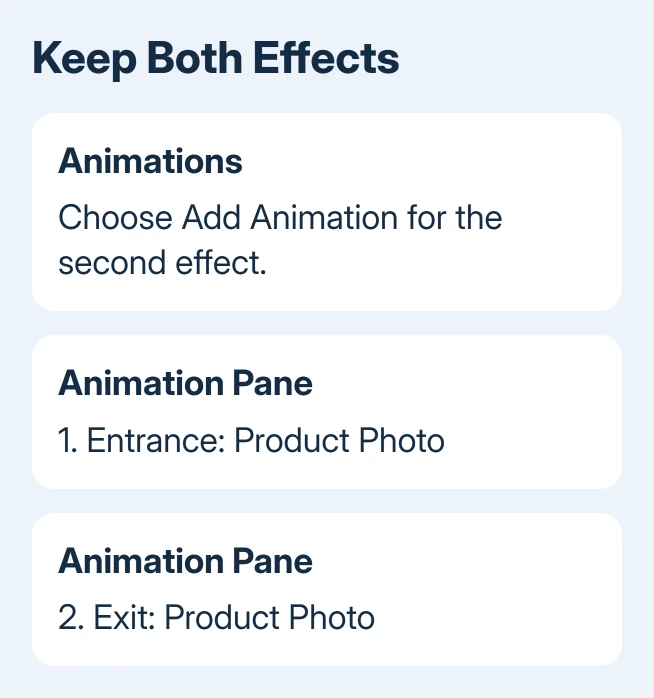
For an object that already has an entrance, choose Animations > Add Animation, then pick an effect in the Exit group. Use More Exit Effects if the effect you want isn't in the first menu.
The pane should now contain two entries for the same object: an entrance followed by an exit. The first must remain after you add the second. If only one entry remains, undo the replacement and use the separate Add Animation button.
For an object with no effects, add its entrance first, then use Add Animation for its exit. Don't make a second copy of the picture just to give it another effect. One object can carry the whole sequence.
Microsoft's multiple-animation instructions explain why this happens: choosing another effect through the ordinary gallery changes the existing effect instead of adding one.
In a PowerPoint 2010 forum thread, the asker confirmed that using the separate button solved the problem. It wasn't a limit on pictures or text boxes, and changing the file format wasn't needed.
2. Keep the entrance ahead of the exit
Look at the order in the Animation Pane. The entrance needs to play before the exit. With other animated objects on the slide, those two entries might not sit together, so check their object names as well as their positions.
Select an effect and use the pane's move controls, or drag that entry into its intended position. Moving the picture on the slide doesn't change when its effects play. Set their order in the pane.
Put the entrance first and exit second. Remove unrelated effects from a duplicate slide if the sequence is hard to follow. Once that pair works, return to the full slide and arrange the other effects around it.
If the entrance and exit have different object names, they belong to different items. Select the intended object on the slide again before adding its missing effect. Overlapping pictures can make that selection harder to see.
Use Home > Select > Selection Pane to name objects clearly. Double-click an object's name and enter a descriptive label, such as Product Photo. Matching names in the two panes makes a crowded slide easier to manage.
3. Give each effect the right start setting
Two entries can exist correctly while the result still looks wrong. An exit set to start with the entrance can remove the object as it appears. An exit set immediately after the entrance can leave almost no time to read it.
Select the exit entry in the Animation Pane. Open its menu and choose Timing, or use the Start, Duration, and Delay controls on the Animations tab where available.
- On Click waits for the next click in the slide-show sequence. Choose this to explain an object before removing it.
- After Previous begins after the preceding effect finishes. Add a delay when the object needs to remain visible for a while.
- With Previous starts alongside the preceding effect. That suits effects meant to overlap, but usually isn't the intended entrance-and-exit sequence.
Previous means the preceding effect in the pane, which could belong to another object. If an unrelated text animation sits between the picture's entrance and exit, the exit's start setting refers to that text effect.
Duration changes how long the animation itself takes. Delay adds waiting time before it begins. Increasing exit duration slows the disappearance. To keep the picture fully visible longer, delay the exit instead.
I'd use On Click for both entries while checking a troublesome slide. It makes the entrance and exit easy to distinguish. Switch to automatic timing afterward if that's how the presentation needs to run.
4. Preview the slide, then check the slide show
Choose Preview on the Animations tab to watch the effects together. Start playback at the current slide and advance through its clicks. The finished sequence should show the object arriving, remaining visible, and leaving.
You won't see the finished sequence just by looking at the slide in the editor. Objects stay available for editing even when an animation makes them appear or disappear during the show. Playback shows whether the sequence works.
If clicks advance to another slide unexpectedly, check that both entries still exist and use the start settings you intended. A presentation that needs automatic playback also needs slide timing set for the show.
An object that isn't selectable or editable is a different problem. Work through what has locked the slide content before trying to attach more effects to it.
When the controls look different
These steps apply to Windows PowerPoint 2010 and newer desktop releases with Add Animation. PowerPoint for Mac uses its animation galleries to add effects to the selected slide object. Don't expect the Windows button layout there.
In current PowerPoint for the web, open Animations > Animation Pane, select the slide object, and choose the pane's Add control. Open the new effect entry to choose its animation and adjust its timing.
If a blank presentation also replaces effects when you use the correct add command, give Microsoft 365 support an example containing that object. Include your PowerPoint version, the object type, and whether a second pane entry appears.
The Short Version
Use Add Animation to attach another effect in Windows PowerPoint. Keep the entrance before the exit, then choose whether the exit waits for a click or follows automatically. Check the result in the slide show.
Checked November 21, 2026.
 If you have any business, I can build it online