An ASUS X99-A Base System Device error with Code 28 means Windows is missing a driver for that entry. Start with the X99-A's chipset package, but check its hardware ID first to tell a motherboard component from an added card.
The generic name doesn't identify one particular chip. If several entries carry it, each can need a different driver. Windows 10's Device Manager gives you the error code and the hardware ID you need to choose the right package.
In this guide
1. Read the code and hardware ID before downloading
Open Device Manager from Start's right-click menu. Expand Other devices and open the Base System Device entry with the warning symbol. On General, read Device status and note its error code.
For Code 28, the driver isn't installed. Microsoft says its Device Manager error reference treats this as a driver-installation problem. A different code needs that code's troubleshooting steps.
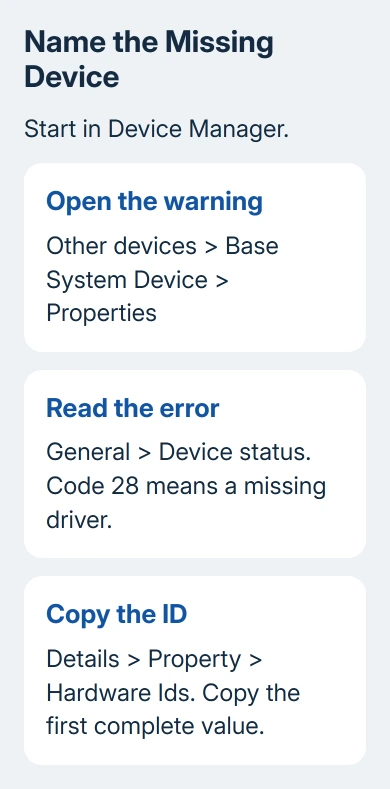
Open Details, then choose Hardware Ids in the Property list. Copy the first value. A PCI entry contains identifiers such as VEN_ for the vendor and DEV_ for the device, followed by details that narrow it down further.
Keep the full ID instead of searching the vendor number alone. Intel makes many components, so that vendor number can't distinguish between chipset information, Management Engine, or something else.
Repeat this for every warning entry and keep a separate note for each. If one disappears after an installation, compare the remaining IDs with the notes instead of assuming the installation failed because another generic name remains.
2. Match the download page to the exact motherboard
Press Windows + R, type msinfo32, and press Enter. In System Information, look at BaseBoard Manufacturer and BaseBoard Product. Confirm the model against the motherboard's documentation if that information is missing or unclear.
Use the X99-A support download page. X99-A, X99-A II, and X99-A/USB 3.1 have different support pages. A similar product name isn't a reason to substitute its driver bundle.
In Windows 10, open Settings > System > About and read System type. Select the matching Windows 10 64-bit or Windows 10 32-bit option on the support page. Choose the package for the Windows version installed on your PC.
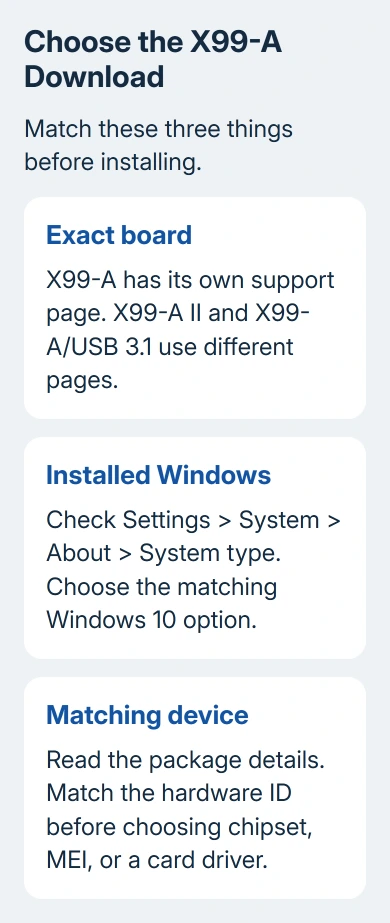
The support page lists chipset software and Management Engine software separately, even when both appear in its chipset category. Descriptions can cover several Windows releases, so read the package's supported-system details.
I'd use the board maker's package before a general driver-updater program. It keeps the model and supported operating system visible while you're working through an older motherboard's software.
3. Install the motherboard's matching chipset package
If the motherboard device's ID matches the package, download the Chipset software for your exact board and Windows version. Extract the ZIP file into a normal folder before running its setup program.
The X99-A download page lists Chipset V10.1.2.8 WHQL and a separately described Intel Chipset Software Installation Utility V10.0.27. These are examples from that board's page, not instructions to install every listed release.
Choose the compatible package offered for your selected OS, run its installer, and follow the prompts. Restart Windows when requested. Then reopen Device Manager and find the recorded hardware ID, rather than just counting warnings.
Chipset information files help Windows identify supported motherboard components. They aren't a universal replacement for graphics, network, storage, and add-in-card drivers. A remaining warning may belong to one of those devices.
If setup reports that the platform isn't supported, stop and recheck the board model, Windows system type, and hardware ID. Don't force a package for a similar board into the machine just to get past the installer.
4. Handle a remaining device with its own package
If the chipset installation clears some warnings but not all, return to the remaining entry's Details > Hardware Ids. Compare that ID with the device or driver information supplied by the manufacturer.
Install the board's Management Engine Interface, often shortened to MEI, only when it matches the remaining component. Its presence on the download page doesn't mean every Base System Device entry needs that particular installer.
An added card reader, capture card, or other PCIe device needs its own maker's driver. Check the card's exact model and Windows 10 support. The motherboard download page can't supply software for every accessory installed in its slots.
When the manufacturer provides extracted driver files instead of a setup program, right-click the device and choose Update driver > Browse my computer for drivers. Select the extracted folder, include subfolders, and continue.
Windows compares those files with the device. If it finds no compatible driver, check that you're pointing at the extracted driver folder rather than the ZIP file. Keep the Device Manager code guide handy if the reported code changes.
5. Rescan and confirm the repair
After the restart, reopen the device's General tab. After a successful repair, the warning symbol disappears and Device status confirms normal operation. The entry may move into its correctly named category.
If Code 28 remains and you have the right package ready, uninstall that device entry, then choose Action > Scan for hardware changes. Windows can ask for the driver's location during reinstallation.
Have the extracted package ready before removing the entry. Removing a device without a matching driver available can leave it with the same generic label when Windows detects it again.
If the warning appeared after a Windows installation, check the board's other missing drivers as separate items. The Windows driver update procedure explains the Device Manager workflow without treating every warning as a chipset fault.
For a persistent failure, send ASUS Support the exact board model, Windows system type, full hardware ID, error code, and installer filename. Ask which package supports that ID. That's more useful than the generic device name.
The Short Version
Read Code 28 and copy Hardware Ids, confirm the exact X99-A model and Windows system type, then install the matching chipset or device package. Restart and check that specific entry. Use MEI or a card driver only when its identity matches.
Checked November 12, 2026.