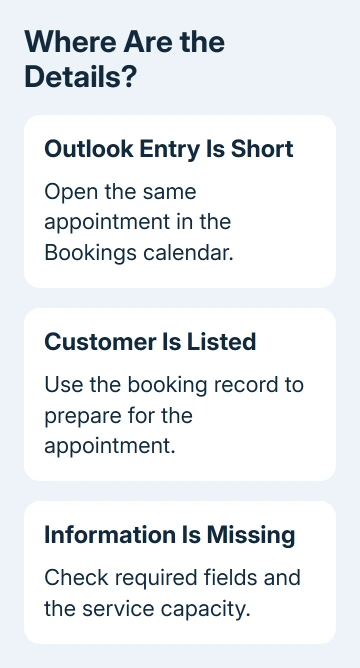
A Bookings appointment can appear in Outlook with the service name but no customer details, especially for a group service. Open that appointment in the Bookings web app to check its customer list first.
Changing Outlook's calendar view won't turn a group booking into a list of customers. Check whether the information exists in Bookings before changing how Outlook displays the event.
Information that was never collected needs a different response from information missing only in Outlook. Rebuilding an Outlook profile won't supply an answer the customer never entered.
In this guide
1. Read the appointment in the Bookings calendar
Sign in to Microsoft 365 with a work account that has access to that business calendar. Open the app launcher, choose Bookings, and select the business calendar responsible for the appointment.
Match the appointment by its service, date, time, and assigned staff member. Open it in the Bookings calendar. For a group booking, choose Edit to check its attendee list. Your staff account needs permission to do this.
The group-attendee instructions put customer management inside Bookings. An Administrator or Team member can update the attendee list; a staff calendar entry in Outlook isn't that management screen.
If the customer appears there, you can read their details in Bookings. Keep that Bookings calendar available for staff who need to prepare for their appointments so they can check more than the short event title in Outlook.
If the customer isn't listed, confirm the calendar and appointment before changing anything. Businesses can have several booking calendars, and appointments with the same service name can occur on different days or with different staff.
I'd check the actual Bookings appointment before changing notifications. A confirmation email that reached someone weeks ago doesn't tell you what information today's staff calendar displays.
2. Check whether the service allows several customers
In the Bookings web app, open Services and choose the service used by the appointment. Inspect Maximum attendees per event. A value greater than one creates a group service, even when only one customer has booked so far.
A group service lets several customers reserve the same staff member and appointment time. That setting is the number of people the service allows, not the number already booked into this appointment.
The current service settings put appointment capacity and attendees in the Calendar tab of the Bookings web app. That's the place to compare the service's capacity with its current customer list.
In the original missing-information discussion, the asker clarified that the problem was the staff calendar item, not the confirmation email. They could find the customer's name in Bookings.
The accepted reply treated their service as a group booking and described the Outlook result as expected. It didn't confirm a setting that inserts all customer names into the Outlook item.
A later person thought they were using a single booking, but their service had a minimum attendee setting of two. That's why you need to check the service settings even when you intended to offer one-customer appointments.
3. Check what the service asks customers to supply
Open the service's Custom fields settings. Review whether the email address, phone number, address, and notes fields are required or optional. The built-in fields can't be removed, but their Required setting can be changed.
Add a custom question when staff need information that isn't already collected, such as an appointment reference. Give the question a clear label and make it required only when the appointment can't be handled without the answer.
Save the service changes, then check a new booking made through that service. A new required field changes what future customers must enter; it doesn't fill in answers missing from existing appointments.
If an existing appointment lacks a needed answer, use the customer's available contact details to request it through your normal business process. Don't mistake an optional blank field for a calendar synchronization failure.
The service's Notes setting is different. Its text appears in the booked staff's event and in the Bookings calendar event. It's useful for fixed instructions about the service, such as preparation staff must complete.
The instructions don't describe that Notes setting as a way to fill in customer names automatically. Avoid putting one person's details into a service-wide instruction that will be reused for other bookings.
4. Separate reminders from the Outlook calendar item
Open the service's Notifications page and review confirmation and reminder settings for staff. These messages can help staff prepare when the calendar's short entry doesn't contain everything they need.
The service supports additional text in confirmations and reminders. Use it for shared instructions about the appointment or where authorized staff should look for its details, rather than assuming it changes the Outlook event's subject.
A reminder email and an Outlook calendar item show information in different places. Check the one staff actually use. Receiving a detailed email doesn't mean the same details will appear when they open an Outlook appointment later.
If a room's entire calendar won't open, use the room-calendar access checks. Viewing an Exchange resource calendar is separate from reading customer information in Bookings.
If staff are also missing the online meeting control, use the Teams meeting options guide. A join link and the booking's customer list serve different purposes.
5. Use the web app for group-service changes
Edit group services in the Bookings web app. Microsoft lists a problem where editing a group booking service from Teams or the mobile app resets its attendees to one. That makes the editing app relevant when a service changes unexpectedly.
For a one-customer service, create a separate service with one attendee if the existing group service won't accept that change.
The older discussion suggests that route, but has no later owner confirmation that it restored customer names in Outlook.
Keep existing appointments intact while checking a new service. Review the new service's staff, duration, availability, and customer fields before making it available for real customers.
Ask the administrator for a specific comparison
If staff still can't get the details they need, give your Microsoft 365 administrator an example appointment, its capacity, and the fields you can see in Bookings and Outlook. Leave unrelated customer information out of the request.
Ask whether the service supports the staff-calendar information you need. If it doesn't, arrange staff access to Bookings or another approved way to get the details. The older accepted answer has no Outlook switch that adds customer names.
The Short Version
Read customer details in Bookings, then check group capacity and required fields. Service notes hold shared instructions. The original discussion has no confirmed fix that adds every customer's name to the Outlook item.
Checked November 17, 2026.
 If you have any business, I can build it online