A Canon EOS sends HDMI video to a display's input or a computer's capture device. Connect to a TV or monitor's HDMI input, or use USB capture hardware for a laptop. Then match the camera's output mode to what that device accepts.
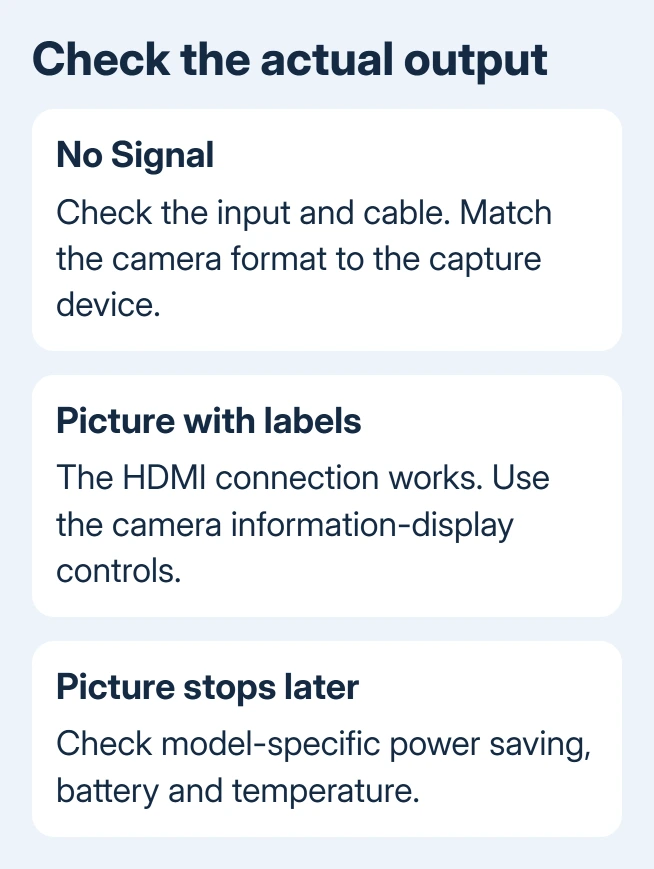
No Signal, a working picture with camera information, and a camera screen that goes dark are different cases. Don't replace the HDMI socket just because the camera's own display turns off.
In this guide
1. Check what the camera is connected to
For a TV or monitor, connect the camera's HDMI output to an HDMI IN port. Select that exact input using the display's source control. Choose HDMI 1 or HDMI 2 to match the cable's socket, even when the sockets look alike.
For a computer, the route is camera HDMI output, capture device HDMI input, then the capture device's USB connection to the computer. A normal laptop HDMI port sends its desktop out to a display; it doesn't accept the camera's video.
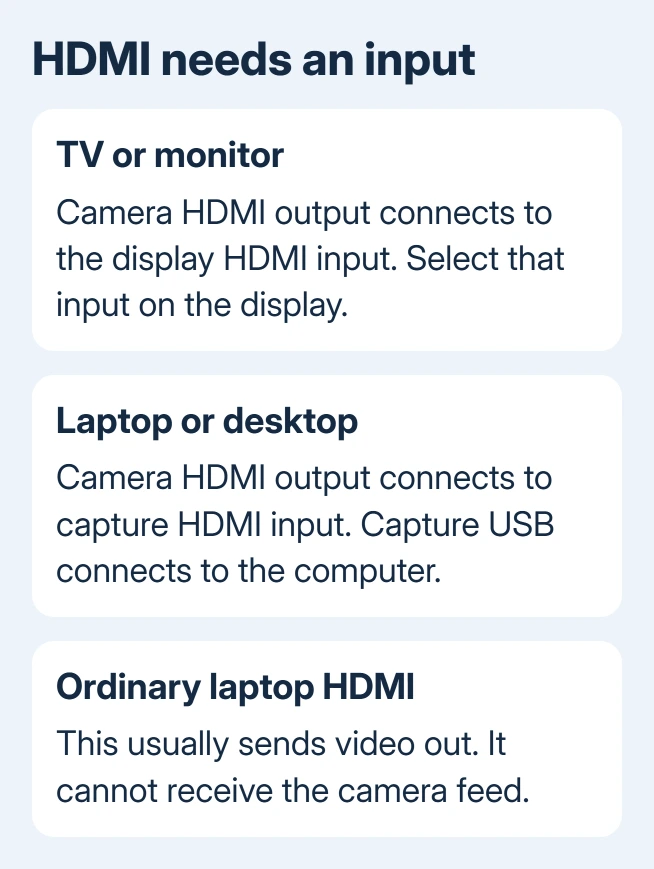
An ordinary USB-C-to-HDMI display adapter also sends video out. It can't do the job of a USB video capture device. Check that the product accepts an HDMI source and presents it to the computer as a camera.
I'd confirm this connection before changing camera menus. A correct camera setting can't turn a laptop's output socket into an input. If you already use capture hardware, test the camera on a display next.
2. Try a direct display and a known working cable
Turn the camera off before reseating HDMI. Check your EOS model's connector: full-size, mini and micro plugs differ. Seat the correct plug gently, then plug the opposite end into a working display.
Turn the display on, select its input, then turn the camera on. Try image playback and, separately, the camera's movie mode. A stored photo appearing on the display confirms that some HDMI output is reaching it.
Seeing a saved photo doesn't mean you can get live video without camera labels. Older models can have different playback and live-output limits. Read your model's movie-output steps; EOS cameras don't all support the same streaming setup.
Try another suitable HDMI cable and another display input if neither playback nor live view appears. Remove extra switches, extenders and converters during this comparison so you're checking the camera and one display.
If direct output works, reconnect the capture device and check its input format, USB connection and app. Cards with a separate display output also need the Elgato passthrough checks.
3. Check the camera's own HDMI mode
On an EOS R50, select movie shooting and open HDMI display in the shooting menu. Use its screen symbols to choose between showing video on both screens and showing it only on the external screen.
With external-display-only output, the camera's own screen goes blank as expected. Look at the receiving display before assuming the camera has stopped. The external screen can initially include shooting information and autofocus points.
Canon's R50 HDMI instructions describe the display choices and information control. Press the camera's INFO button to change the information shown, checking the external feed as you do.
When both screens show the picture, the camera doesn't record movies to its card. Pick the mode for the recording method you need, and confirm the result on the receiving device before starting a session.
Other EOS models use different menus. An EOS R6 Mark II, for example, has HDMI resolution with Auto and 1080p choices. Don't search an older Rebel's menu for an R50-only display option.
4. Match resolution and frame rate to the capture device
Check the supported HDMI inputs for your exact capture-device model. Match the camera's output resolution and frame rate to that list. Your capture hardware won't necessarily accept every recording format the camera offers.
On an EOS R6 Mark II, try HDMI resolution > 1080p if Auto causes display trouble when the output changes. That camera's HDMI resolution instructions recommend fixed 1080p for display or delay issues during resolution changes.
On the R50, HDMI output resolution and frame rate adjust to the movie recording size. Choose a supported movie setting there rather than borrowing the R6 Mark II menu path. Recheck the capture preview after the change.
In OBS or another capture app, add or select the video capture device for the HDMI hardware. Choose the capture device's name. EOS Webcam Utility is a different USB-camera route, so selecting its source doesn't select an HDMI capture card.
If another camera app already has the capture device open, close it and retry the intended app. If Windows doesn't allow camera access, follow the Windows webcam permission checks for the capture input.
5. Check older Wi-Fi restrictions and output timeouts
Some older EOS cameras disable cable connections when their Wi-Fi/NFC setting is enabled. An older EOS support page instructs switching Wi-Fi/NFC to Disable before using an interface or HDMI cable.
Apply that change only to a model whose manual lists the restriction. Modern EOS cameras don't all share the same Wi-Fi behavior. If your model lacks that setting, continue with its own wired-output instructions.
For an R50 that loses HDMI after a long session, the manual gives a specific longer-output setup: choose the combined camera-and-external-screen HDMI display mode, then set Power saving > Auto power off > Disable.
The camera still can't record to its card then. Power saving and output format solve different problems: a picture disappearing after a period of use needs the power check, while immediate No Signal needs the input and format checks.
Use the camera's supported external power option for extended sessions, and watch its temperature and battery warnings. An external feed without camera labels can hide those warnings, so a steady picture doesn't mean unlimited runtime.
Ask for repair after the direct output test
If the EOS still produces no picture on two working HDMI inputs with another correct cable, contact Canon Support for your model. Send your playback and movie-mode results, firmware version, cable connector type and display models.
If direct output works but capture fails, send the capture maker the camera model, output resolution and frame rate, USB connection and preview error. Ask them to confirm that exact signal is supported before buying another camera cable.
For computer-side detection, the Windows external-monitor checks apply when testing the laptop's output to a monitor. They won't make that laptop port accept camera input.
The Short Version
Use a real HDMI input or USB capture hardware. Compare direct playback with live output, then match your EOS model's HDMI mode and capture format. Check model-specific Wi-Fi restrictions and power saving when those symptoms fit.
Checked November 12, 2026.
 If you have any business, I can build it online