Windows can't perform an upgrade that keeps your apps when the computer starts from the installation USB or DVD. Restart into your existing Windows desktop, reconnect the media and run setup.exe from File Explorer instead.
A similar message appears when an upgrade has begun and the PC boots from the USB again. Remove the media and let the internal drive continue. A clean install starts fresh and removes apps and personal data.
In this guide
Identify which Setup message you're seeing
The upgrade-unavailable message appears after you boot from installation media and select an upgrade. The PC is running the installer from the media. It isn't running the Windows installation that holds the apps you want to keep.
The other message says it looks like an upgrade was started and the computer booted from installation media. It offers a choice: continue the upgrade or make a clean installation. Choose whether to finish the upgrade or start fresh.
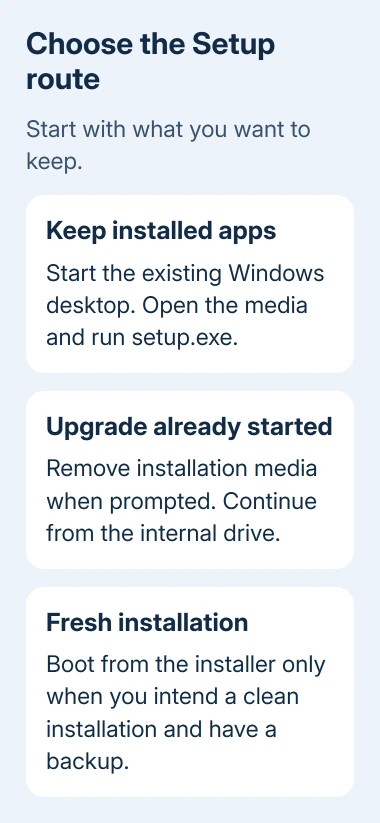
For an upgrade already underway, remove the media and select Yes when prompted to continue. For a fresh attempt, close Setup and start Windows normally before running the installer again.
Don't choose a clean installation just to dismiss the message if you need your installed apps. The route that preserves them depends on starting Setup from the desktop, not on finding a different button in the booted installer.
If the computer isn't finding its internal drive at all, use the boot device checks first. Missing internal storage needs attention before retrying the installer.
1. Start the existing Windows installation
Close the installation window and shut down or restart the computer. Remove the USB drive or DVD so it can't be selected again. Let the machine start normally and sign into the Windows account on its internal storage.
If external media keeps starting, use the manufacturer's one-time boot menu. Select the internal Windows entry, often Windows Boot Manager. The key and labels vary, so use your model's support instructions.
Reaching your familiar desktop confirms the existing Windows installation can start. Open important files and make a backup before continuing. Use a separate drive for the backup, not the installation USB.
Check Settings > System > About and note the Windows edition. The Windows edition you install needs to match your license, such as Home or Pro. Changing editions won't fix a message caused by starting from the USB.
I'd get the desktop working before rebuilding the USB. You can use the same media for an upgrade by opening it from Windows. Recreating it won't change what happened if the PC simply booted from it again.
2. Run setup.exe from File Explorer
Reconnect the installation USB while Windows is running. Open File Explorer > This PC, open the installation drive and double-click setup.exe in its main folder. Approve the User Account Control request using an administrator account.
For a downloaded ISO file, right-click it in File Explorer, choose Mount and open setup.exe on the new virtual drive. Do this inside Windows too. Mounting opens the ISO as a drive in Windows; it doesn't restart the PC into the installer.
Microsoft's own steps describe an in-place upgrade as running Setup within Windows. Continue until Setup shows what will be kept.
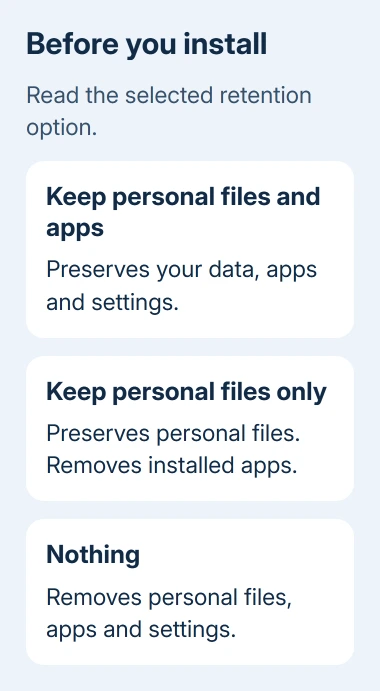
At Ready to install, check the Windows edition and the selected keep option. Choose Change what to keep if needed, then select Keep personal files and apps if the aim is to preserve the existing setup.
Keep personal files only removes apps, and Nothing removes the existing personal content as well. Read the selected option before pressing Install. Even from the desktop, you can choose an option that removes apps or files.
The PC restarts several times during installation. Let it continue from internal storage. If a boot prompt offers to start from the USB again, don't select that route while the upgrade is trying to finish.
3. Stop when the keep-apps option isn't available
If Keep personal files and apps isn't available, cancel before installation. Note the explanation on screen. Starting Setup from the desktop fixes the boot-method problem. Your installer must still support upgrading your Windows version.
Compare your Windows edition and language to the installer's. For Windows 11 version 22H2 and later, automated upgrades need a matching system default UI language (Windows menus). Don't pick another language just because you can read it.
Changing between 32-bit and 64-bit Windows isn't an in-place app-preserving upgrade. If your goal involves that change, you'll need to reinstall your apps and check that your backup works before making the change.
Windows 11 also has hardware requirements. When upgrading from Windows 10, check compatibility through PC Health Check or Windows Update before continuing. This media warning gives no answer about the PC's compatibility.
On Windows 11, a same-version repair may also be available at Settings > System > Recovery > Fix problems using Windows Update > Reinstall now. That option preserves files, apps and settings when offered; it isn't shown on every device.
4. Use recovery when Windows won't start
Keeping your apps during an upgrade requires Windows to start and let you sign in. If it won't boot, use the installer's repair option to open recovery tools. A clean installation isn't a substitute for that repair.
Try Troubleshoot > Advanced options > Startup Repair for a startup failure. If recovery requests a BitLocker key, retrieve the key for that device before continuing. The BitLocker recovery guide explains where to look.
Choose a clean installation only when you intend to start fresh and have saved needed files. Current Windows 11 Setup asks you to confirm deletion of files, apps and settings. Older installers use different screens.
If recovery can't restore startup, ask Microsoft Support or a repair shop for help preserving the drive's data before reinstalling. Give the exact Setup message and say whether the internal Windows installation still reaches its desktop.
The Short Version
To keep apps, start Windows normally and open setup.exe from the media in File Explorer. For an upgrade already underway, remove the USB and continue from internal storage. If Windows can't start, try recovery before a clean install.
Checked November 10, 2026.