A Windows 10 VM on TrueNAS is simplest to install with an AHCI virtual disk and an Intel emulated network adapter. With those choices, Windows can see the installation drive and connect to the network without extra VirtIO drivers.
Create the VM, attach a Windows ISO, then run setup through its display console.
In this guide
Check the TrueNAS version and prepare the installer
These steps follow the TrueNAS 25.10 Virtual Machines interface. Check your NAS release before you start. An older CORE guide or the early 25.04 Instances interface can show different controls, even though both describe Windows VMs.
The NAS needs an Intel processor with VT extensions or an AMD processor with SVM (AMD-V). TrueNAS can't create VMs without that hardware support.
A VM is a separate computer running in software on your NAS. Its Windows disk will be a zvol, a block of storage on a TrueNAS pool. Create a fresh virtual disk for this installation rather than pointing setup at existing data.
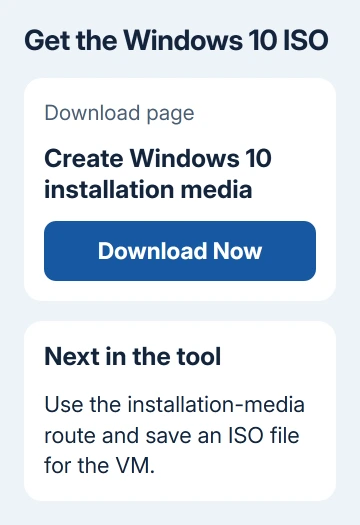
Save a legitimate Windows 10 ISO from the Windows 10 download page. On a Windows computer, the download site can offer the Media Creation Tool; choose its installation-media route and save an ISO file.
Keep the license details for the edition you're installing. Successfully creating a VM doesn't supply a Windows license. When setup asks, choose the edition your license covers.
Windows 10's ordinary support ended on October 14, 2025. Decide how you'll get security updates for this copy of Windows before using it online. Running Windows inside TrueNAS doesn't change the guest's support status.
The Windows installation-media instructions cover creating the ISO. For an existing installation you intend to replace, the Windows 10 reinstall guide explains the separate backup and edition checks.
1. Add the Windows guest and its display
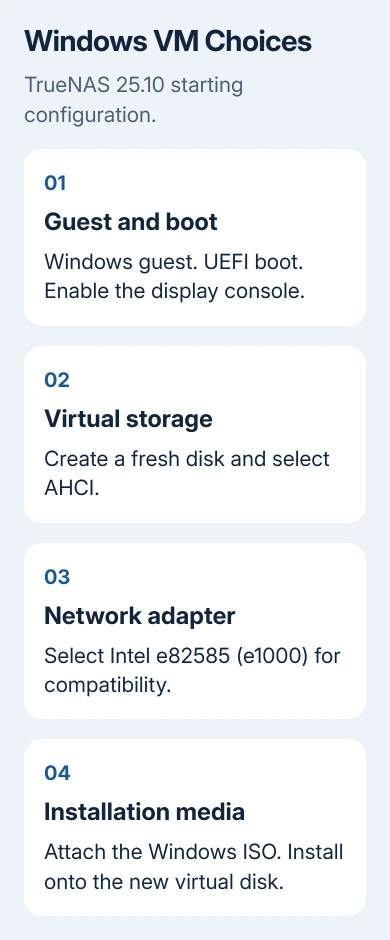
Open Virtual Machines > Add. A system without VMs can show Add Virtual Machines instead. Set Guest Operating System to Windows and give the machine a recognizable name.
Use UEFI for Boot Method unless you specifically need the older boot method. The wizard's virtual TPM and Secure Boot options aren't prerequisites for an ordinary Windows 10 installation; don't copy Windows 11 requirements into this task.
Enable the display option so you can see setup and use its keyboard. The 25.10 wizard calls this Enable Display (VNC) and offers Bind and Password fields. Protect the display with a password and keep access on your trusted network.
I'd leave Start on Boot off during installation. It makes the first setup easier to manage without having an unfinished guest start whenever the NAS restarts. Enable automatic startup later if you need it.
At CPU and Memory, check how much processing power and RAM the NAS can spare for Windows. The Windows choice defaults to two virtual CPUs.
You could start with 4 GiB of RAM for a modest workload. That's a suggested starting point, not a TrueNAS requirement for every VM.
Leave enough memory for TrueNAS and its other services. A VM that uses all the spare RAM can slow the NAS even when Windows seems to run well. Keep the first allocation simple before adding demanding software.
2. Create an AHCI disk and choose the network adapter
At Disks, select Create new disk image. Choose the intended pool or dataset in Zvol Location, set the size, and choose AHCI under Select Disk Type.
TrueNAS recommends AHCI for Windows VMs in its VM creation instructions. It's the simpler choice when you don't already have the Windows VirtIO storage driver ready.
Allow space for Windows, updates, and the applications you actually need. For example, an 80 GiB virtual disk gives a small test installation room to grow, but the appropriate size depends on the work and available pool space.
At Network Interface, choose Intel e82585 (e1000) to start with an adapter Windows can use without an extra driver. Choose the host network interface under Attach NIC. VirtIO networking needs a suitable driver inside the guest.
To reach shares hosted by this same NAS, follow the release's bridge instructions and attach the VM to that bridge. Attaching the VM to the physical network interface doesn't give it the same access to shares on its own NAS.
Make bridge changes only with a way to recover NAS access, such as its local console. Changing the interface that carries the management connection can interrupt the browser session.
3. Attach the Windows ISO and save the VM
At Installation Media, browse to the Windows ISO already on the NAS. To upload it from your computer, use Upload New Image File, choose the storage location and file, then finish the upload before continuing.
The ISO is the installer, while the zvol is the new Windows drive. Check that you've selected each one in the right part of the wizard. Selecting an existing Windows disk image is a migration task, not a clean installation from an ISO.
Leave GPU passthrough out of this first setup unless the work you'll run in Windows needs it. The virtual display is enough to install Windows and check that the guest boots. Review the final settings and click Save.
Expand the new VM, start it with the Running control, and open Display. If the console asks for the display password, use the password you set for the VM's display, not your Windows account password.
4. Install Windows onto the new virtual drive
When the console prompts you to boot from the installer, respond before the prompt expires. Choose the language and keyboard, start installation, and enter the license details or choose to enter them later if setup offers that option.
Choose the edition your license covers. For a new Windows VM, select the Custom installation route and the empty virtual drive created for it. Setup creates its required partitions on that drive.
If no drive appears, stop and check the VM disk's type and attachment. A VirtIO disk needs its matching Windows storage driver loaded during setup. With the AHCI configuration here, first check that you've added the intended virtual disk.
Let setup restart the VM without booting the ISO again. If the installer keeps returning, shut down the guest and detach the ISO or correct the boot order so its installed disk starts.
Finish the account and privacy screens, then check that the desktop loads, networking works, and Windows activation matches the intended edition. Get the applicable Windows updates before adding applications.
Keep the working guest and get help with specific failures
Use Start > Power > Shut down inside Windows for normal shutdowns. TrueNAS distinguishes a clean stop from Power Off, which is closer to removing a physical computer's power.
Keep a separate backup of anything the VM will hold. The Windows repair-install options are for a guest that already runs Windows, rather than a substitute for protecting its files.
If the VM won't start, post in the TrueNAS Community's virtualization category. Include the error, TrueNAS release, CPU, available RAM, and disk and network adapter types.
If setup runs but activation fails, use Windows Activation support with the edition and activation error.
The Short Version
On TrueNAS 25.10, add a Windows VM with UEFI, an AHCI disk, an Intel emulated NIC, and a display console. Attach the Windows 10 ISO, install onto the fresh virtual disk, then boot from that disk and check activation and updates.
Checked November 10, 2026.