A Mac hard-drive partition that won't open needs a repair check before you try changing its partitions. Run Disk Utility's First Aid on the volumes, then their container if present, and finally the physical drive.
A partition that's simply too small needs a different decision, because resizing can require deleting its neighbor.
In this guide
1. Check the disk and preserve readable files
Copy important readable files to a separate drive before repair. If the disk is failing to read and holds your only copy of irreplaceable files, stop using it. Ask a recovery specialist about retrieving them first.
Open Applications > Utilities > Disk Utility. Choose View > Show All Devices. Find the drive itself, then the containers and volumes listed under it. Finder normally shows the volume name, so that name alone doesn't show the full layout.
Select the affected item and check its capacity, format and which physical drive it belongs to. A second external drive can have the same volume name, so use those details to confirm which one you're repairing.
An unreadable volume, a drive missing completely and a healthy volume short of space aren't the same fault. Keep the error message or take a photo for your own records. It will help you choose the right next step.
2. Open Recovery when repairing the startup drive
A separate external disk can usually be checked from Disk Utility while macOS is running. For the Mac's startup disk, or a Mac that doesn't finish starting, start in macOS Recovery, then select its Disk Utility option.
On an Apple silicon Mac, shut down. Keep the power button held as the Mac starts; release it when startup options appear. Select Options, choose Continue, then follow the sign-in prompts. Select Disk Utility from the utilities window.
On an Intel Mac, hold Command+R immediately after turning it on. Release Command+R when the Apple startup logo or another startup screen appears. Enter the requested password, then choose Disk Utility and Continue in Recovery.
The Mac's processor determines which startup method to use, whether the drive is an HDD or SSD. For an external device that isn't listed, use the Mac external-drive checks before attempting a layout change.
Apple's disk-repair procedure uses Recovery for startup-disk repairs. Once Disk Utility opens, choose View > Show All Devices again if you can't see the drive with its containers and volumes listed under it.
3. Run First Aid in the correct order
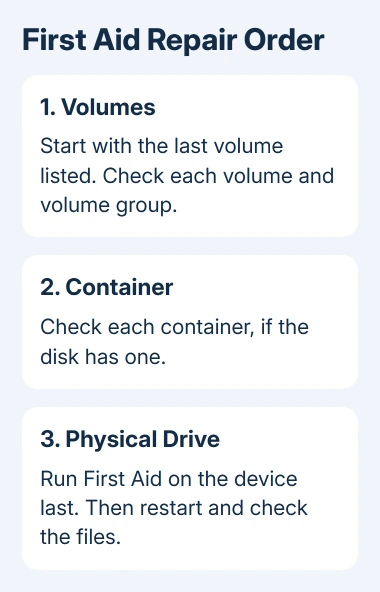
Select the affected drive's final listed volume first. Click First Aid, then Run or Repair Disk, depending on the version. If it asks you to unlock an encrypted volume, use the requested administrator password.
Let First Aid finish its work. Read the result and expand its details when available. Write down the exact error when repair fails. The person helping you can use that detail rather than a general report that the drive is broken.
Continue through the other volumes on that device. Include volume groups shown in the hierarchy, then check each container, and finally select the physical drive itself and run First Aid there.
A disk using another format may not have an APFS container, so work through the items Disk Utility actually lists. If First Aid is dimmed for an item, skip that item and continue with the remaining volumes, containers and device.
When every available check finishes, quit Disk Utility. If you started in Recovery, choose Apple menu > Restart. Open several documents on that volume to see whether the original error returns.
If the error has stopped, you can return to what you were doing. It doesn't add capacity, recover files already deleted or turn one disk format into another. If the complaint is lack of space, continue to the layout decision.
4. Decide whether APFS needs another partition at all
For an APFS disk, a container can hold several volumes that share its available space. That often avoids the need to reserve a fixed slice of the physical disk for each purpose.
Select the APFS volume or container and check its information before making changes. For another APFS area for your files or another macOS installation, consider Add APFS Volume instead of splitting the physical disk.
Apple's partitioning instructions recommend additional APFS volumes for most APFS uses. You can still choose a physical partition, especially when you need another file system.
I'd finish repairing an unhealthy drive before trying to reorganize it. Changing the layout isn't a substitute for First Aid, and creating another volume won't repair unreadable files on the existing one.
If the original complaint involves a macOS installer asking for a firmware partition, use the firmware-partition guide. That installer error needs its own checks rather than an ordinary capacity adjustment.

5. Check the limits before enlarging a partition
In Disk Utility, select a volume on the correct device and click Partition. The pie chart shows the layout and indicates whether the selected volume can be resized or removed. Review it before clicking Apply.
To enlarge a partition, Disk Utility can require deleting the volume that follows it, then extending the first partition into the freed space. It can't enlarge the last volume using that method.
Deleting the neighboring partition erases everything on it. Make a verified copy of that partition's files elsewhere before you consider deleting it, even if the partition you want to enlarge has plenty of free space.
If you choose to proceed, select the neighboring partition in the chart, use the remove control, then review Apply and the confirmation dialog. Stop if the preview changes any partition you didn't intend to remove or resize.
A dimmed remove button means the selected partition can't be deleted through that control. Don't force it with a copied Terminal command. Ask for help with the specific layout, including a list of the volumes and their formats.
6. Stop when the device is missing or repair fails
If Show All Devices doesn't list the external HDD, check its power and cable directly connected to the Mac. Shut down, remove nonessential devices, then check again. Selecting a different volume can't repair the missing drive.
When First Aid reports an unrepairable error, the next option may be to erase the drive and restore your backup, but it destroys the existing contents. For files without a usable backup, ask about data recovery before authorizing an erase.
Send the manufacturer or Apple Support the device model, the full First Aid error and whether the drive appears in Disk Utility. Ask whether the drive needs replacement and whether the recovery they suggest will keep the files you need.
The Short Version
Use Show All Devices, then run First Aid from the volumes through the container to the physical drive. Use Recovery for the startup disk. For space problems, check APFS volume sharing and partition limits before authorizing any deletion.
Checked November 15, 2026.
 If you have any business, I can build it online