Hyper-V is already included in supported Windows 11 editions; enable it through Windows Features and restart the PC. No separate Hyper-V download is needed, and the full feature isn't available on Windows 11 Home.
Check your edition and processor support first. Otherwise, you could work through the steps only to reach a missing Hyper-V entry or a grayed-out setting.
In this guide
Check Windows edition and hardware support
Open Settings > System > About and read Edition under Windows specifications. Windows 11 Pro and Enterprise support Hyper-V. The Home versus Pro comparison explains the edition difference before you pay for an upgrade.
Windows 11 Home can show Virtual Machine Platform without including the full Hyper-V role or its Manager. Skip unofficial scripts that claim to install the unsupported feature on Home.
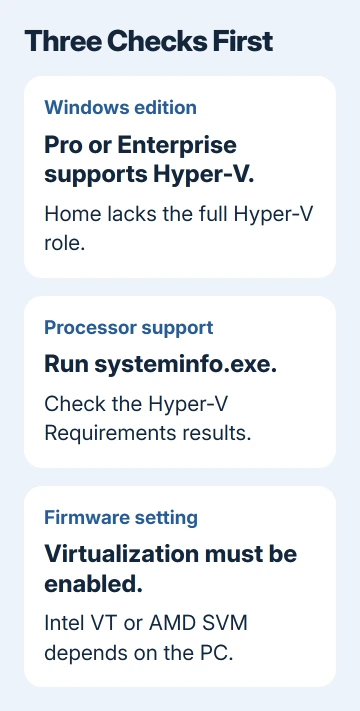
Microsoft's Hyper-V installation instructions list a 64-bit processor with second-level address translation and VM monitor extensions. These let the processor run virtual machines. Memory must be 4 GB or greater.
Four gigabytes is the listed minimum, not a comfortable memory budget for Windows plus a demanding guest system. Your PC needs enough memory for its own work and the operating system you want to run inside Hyper-V.
Open Command Prompt from Start and enter systeminfo.exe. Near the end, find Hyper-V Requirements. A PC that meets the requirements reports Yes for the listed requirements, including virtualization enabled in firmware.
If it reports that a hypervisor has been detected, Windows is already running its virtualization layer, so the individual requirement lines aren't displayed. Hyper-V Manager can still be absent despite that message.
Enable processor virtualization when it is off
If virtualization enabled in firmware says No, you'll need to turn it on before Hyper-V can run. Open Task Manager > Performance > CPU to check the Virtualization status as another view of that setting.
The PC's built-in startup settings are called BIOS or UEFI. Use instructions for the exact laptop or motherboard. Intel models may show Intel Virtualization Technology; on AMD, look for SVM Mode.
On Windows 11, Settings > System > Recovery > Advanced startup > Restart now takes you to the startup options. Choose Troubleshoot > Advanced options > UEFI Firmware Settings when the PC offers it, then restart into firmware.
Keep your BitLocker recovery key accessible before changing firmware. Follow the manufacturer's virtualization instructions, save the change and start Windows again. Leave unrelated boot and storage settings alone.
For an ASUS board, the ASUS virtualization instructions explain the Intel and AMD option names. The firmware setting depends on your board, even if your Windows version takes a different route to reach it.
Run the requirements check again after the change. If a processor requirement still says No, enabling a Windows checkbox won't supply a hardware feature the processor lacks. Check the model's specifications before continuing.
Turn on Hyper-V through Windows Features
Save your work and close running virtual machines first. Windows needs to restart to finish installing the feature, so give it time to complete before returning to work.
- Open Start, search for Control Panel, and open it.
- In Category view, choose Programs > Programs and Features.
- Select Turn Windows features on or off.
- Find Hyper-V, select its checkbox, and choose OK.
- Let Windows apply the change, then restart when prompted.
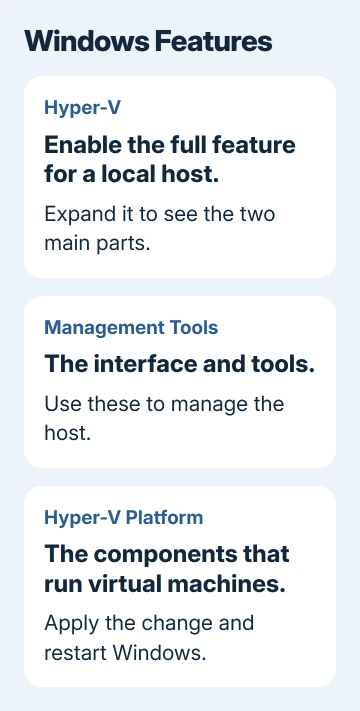
Expand Hyper-V if you need to inspect its parts. Hyper-V Management Tools provides the management interface and related tools. Hyper-V Platform supplies the components that run virtual machines on this computer.
Installing just the tools can help you manage another computer, but it won't let you run virtual machines on this PC. For a normal local installation, keep the full Hyper-V selection.
Record any installation error before closing the dialog. Recheck the edition for a missing feature, or the hardware requirements for a disabled platform option. A different command won't remove those limits.
Use PowerShell as an alternative installation route
PowerShell turns on the same Windows feature. Use it as another installation option on a supported PC, and skip it if Windows Features already worked. Running both methods doesn't add anything.
Search Start for Windows PowerShell, open its right-click menu and select Run as administrator. Accept the permission prompt, then enter:
Enable-WindowsOptionalFeature -Online -FeatureName Microsoft-Hyper-V -AllLet the command complete. Enter Y when prompted to restart, after saving any remaining work. The -All option includes the required parent features so you don't end up with only part of the installation.
For Windows 11, use that optional-feature command. Install-WindowsFeature belongs to the Windows Server procedure on the same documentation page; copying it into a Windows 11 session is the wrong installation route.
If you get an access-denied error, check that you opened PowerShell as administrator. If a command reports an unknown feature, confirm the edition and exact spelling before trying to repair Windows itself.
Open Manager and confirm the local host appears
After the restart, search Start for Hyper-V Manager and open it. Add the local computer as a host if it isn't listed. Select that host before looking for actions that create or manage a virtual machine.
If Manager opens without the local PC listed, choose Connect to Server, select Local computer, then OK. If it can't connect, check that the platform was enabled as well as the management tools and that Windows completed its restart.
Installing Hyper-V doesn't install a guest operating system. The next task is New > Virtual Machine in Manager, using installation media for your chosen guest system and enough available disk space.
I'd confirm Manager can connect before spending time creating the guest. Then you'll know the PC is ready before dealing with the guest operating system's installation media or settings.
If setup keeps failing on supported hardware, give the PC maker the model, Windows edition and firmware virtualization result. For a Windows feature error, include its exact code when opening a Microsoft support request through Get Help.
The Short Version
Confirm the Windows edition and processor requirements, enable firmware virtualization if needed, then select Hyper-V in Windows Features. Restart and open Hyper-V Manager. PowerShell offers an alternative route to the same installation.
Checked November 13, 2026.