A Lenovo laptop that won't charge needs a check of the power connection, from the outlet to the charging port. Connect the specified adapter straight to the laptop first. A phone charger or dock can fit without supplying enough power.
A battery that always stops at the same percentage needs a separate check. If the laptop recognizes power and runs normally, check Lenovo's charging settings first. Conservation mode can stop charging early so the battery won't stay full.
In this guide
1. Bypass the dock with the specified adapter
Save any open documents, then shut the laptop down. Disconnect the charger from the laptop and outlet, then firmly reconnect its removable wall cord. Use an outlet known to work, with the adapter attached straight to the laptop.
Check that outlet with another ordinary device if you're unsure it works. Bypass a power strip or charging dock for this attempt. That removes extra connections between the outlet, charger, and computer.
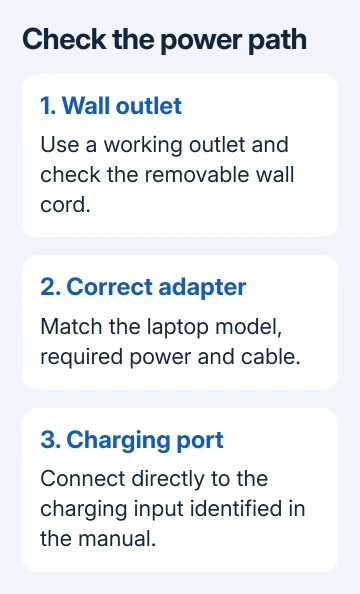
Read the adapter's label and compare it with the charger specified for your exact Lenovo model. Use its supplied adapter when available. A matching plug doesn't mean another charger supplies enough power.
For USB-C, use a port your model's user guide lists as a charging input. Some Lenovo computers have several USB-C ports with different functions; a data connection isn't automatically a charging input.
When Windows shows Slow charger, use the charger-power checks. That warning points toward insufficient incoming power and can appear even though the laptop detects a charger.
Reconnect once and check the result. A charging light or a plugged-in status in Windows means the computer recognizes power from the adapter. If neither appears, continue with the cable and port checks rather than adjusting a charge limit.
2. Inspect the cable and charging connector
Disconnect power and inspect the adapter, cords, plugs, and laptop socket. Check for damage or a connector that no longer seats normally. Stop using the adapter if its casing is scorched, a plug is damaged, or wires are exposed.
Lenovo says to use a suitable certified adapter, check the connector, and push the plugs firmly into place. These physical checks come before software repairs.
For a USB-C adapter with a detachable cable, check that cable's supported power as well as the adapter's wattage. The Windows USB-C guidance explains why either part can limit charging.
Use a compatible, known-working replacement cable or Lenovo-approved adapter for the next comparison. Keep using the same outlet and laptop port. Change only the cable or adapter each time so you can tell which replacement helps.
If the other adapter charges normally, replace the failed adapter or cable with one approved for your model. If both fail at the same socket, the laptop's connector or charging hardware needs checking too.
I'd borrow a confirmed compatible adapter before ordering a battery. A laptop that doesn't recognize its charger could have a power-supply problem, so don't assume the battery has failed.
3. Read the battery result before changing settings
Turn the laptop on if it has enough battery power. Look at the taskbar battery icon and its charging information on Windows 10 and 11. Note the percentage and whether external power is recognized.
Watch whether the percentage rises while the laptop is idle. If it drops during a demanding game but charges after you close it, check the power supply and the laptop's power use. A setting that limits a full charge doesn't explain that.
Close heavy applications and move the laptop to a cool, ventilated surface. Charging can be affected by temperature, and the adapter must supply the running computer as well as recharge its battery.
If the laptop becomes unusually hot, shut it down and let it cool naturally before retrying. Keep its vents clear. Testing it on a soft blanket won't tell you how it charges with clear vents.
If it charges while switched off but struggles during use, report that difference. A repeated stop at one percentage, with normal laptop operation, calls for the charging-settings check next.
4. Check Conservation mode or Smart charge
Open Lenovo Vantage and find its Power or battery settings. Menu names vary with the Lenovo model and Vantage version. Look for Conservation mode, Smart charge, or a battery charge threshold.
On a ThinkPad X9-15 Gen 1, open Vantage's menu and select Power > BATTERY SETTINGS. If Smart charge is enabled and you need a full charge, switch it off, then check charging again.
Some newer Yoga models use Conservation mode, which keeps the battery within 75% to 80%. The Yoga 7/7i user guide describes changing to normal or rapid charging when a full battery is needed.
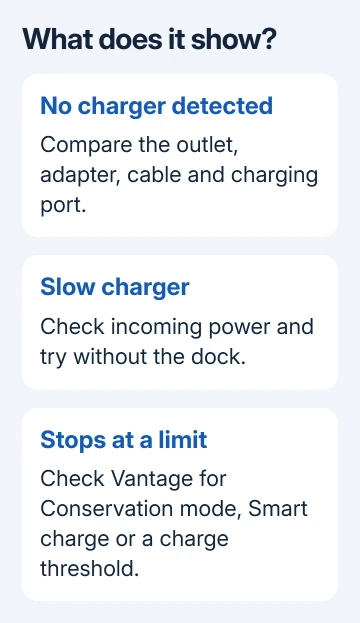
Older Lenovo models can use other limits and menus. Follow the setting shown on your own machine rather than expecting every Vantage version to stop at one percentage. A battery limit you've turned on doesn't mean the adapter is broken.
Leave Conservation mode on if your laptop usually stays plugged in. Turn it off when a longer unplugged session matters, then let the battery charge. If external power isn't recognized at all, this setting isn't the explanation.
5. Restart the charging connection using the model guide
For the ThinkPad X9-15 Gen 1, shut down, disconnect AC power and all connected cables, and wait a few minutes. Then reconnect AC power and turn the computer on. This is the power-connection check in its guide.
Use that model's instructions rather than applying an emergency-reset sequence from another Lenovo. An IdeaPad, ThinkPad, and Yoga don't all share the same battery access or reset controls.
If the laptop won't start at all, use the Lenovo no-power procedure. It explains the difference between the power button, a supported emergency-reset opening, and the separate Novo recovery control.
If your model's guide offers a battery-gauge reset to correct an inaccurate percentage, use it only after the laptop recognizes the adapter. Resetting the percentage reading won't repair a damaged charging socket.
A BIOS update changes the laptop's built-in system software and needs dependable power. Don't start one if the supply disconnects unpredictably. Let support decide how to update it after the physical charging fault has been checked.
6. Ask for the adapter and laptop to be tested together
If charging still fails, contact Lenovo Customer Center using the contact details in your model's user guide. Ask for the charger, charging port, and battery to be checked together before requesting a replacement part.
Give support the adapter wattage, port used, battery percentage, Windows charging message, and result with a compatible replacement adapter. Also say whether charging works with the laptop shut down.
For a loose socket, damaged cable, or failure with two suitable adapters, arrange hardware service. Take the laptop and charger together so the technician can check the complete power connection.
The Short Version
Connect the specified charger directly, inspect the cable and port, then compare a compatible adapter. A fixed battery percentage with recognized power calls for checking Vantage's limit. No detected charger needs supply or hardware checks.
Checked November 12, 2026.