A reusable Word letterhead keeps the business name, logo, and contact details in the header, leaving the letter in the body. Save it as a Word Template (.dotx) so each letter starts as a fresh document.
For a multipage letter, decide whether the full branding belongs on every page or only page one. That choice affects the header setup, so make it before fine-tuning the logo's position.
In this guide
Set the page and separate branding from the letter
Create a blank desktop Word document. Open Layout > Size and choose the paper you'll actually use, such as Letter for US stationery or A4 if that's what your organization uses.
Next, open Layout > Margins. One-inch margins suit an ordinary business letter, but follow your organization's stationery requirements if it has them. There isn't one compulsory letterhead measurement for every business.
Keep the recipient, date, salutation, message, and signature in the body. Put business details you'll reuse in the header or footer. That separation lets you rewrite a letter without rebuilding its branding every time.
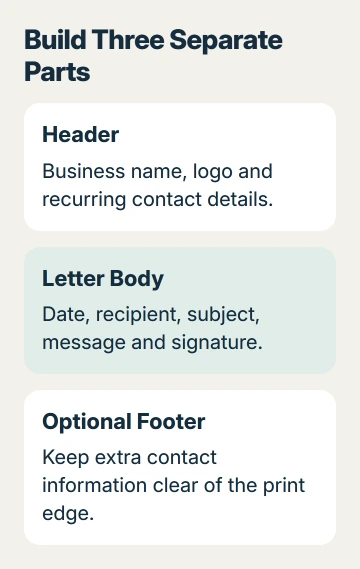
For the first draft, use plain text for the organization name and contact details. Add a logo only after the text fits. It's easier to judge spacing when a large image isn't pushing everything around.
A simple starting set is the business name, a short description if needed, postal address, phone number, email, and website. Keep only details the recipient needs. A full directory of staff and social accounts crowds the actual letter.
Add the branding through the header controls
In Word for Windows, choose Insert > Header > Blank, then replace the placeholder text with the business name. Add the contact details on the next line, using a smaller size if that helps the name stand out.
To add the logo, click where it should sit within the header and choose Insert > Pictures. Choose a local image you're allowed to use and insert it. Resize from a corner to keep its proportions.
On Word for Mac, choose Insert > Header or Footer > Blank. Click the header placeholder, then use Insert > Picture from File for the logo. Enter the business details you want to reuse in that same header area.
Microsoft documents header picture insertion for both desktop editions. The browser version can add header images too, but the desktop app gives you the template-saving workflow used here.
I'd keep the logo in line with the text for a first letterhead. A floating logo can be positioned more freely, but it gives you another layout setting to troubleshoot when the document changes.
Choose Close Header and Footer or press Esc to return to the letter. The header may look faded while you edit the body. Check Print Preview before changing its color just because it looks dim in the editor.
For related layout work, the Word business card setup explains why the selected paper product matters. Letterhead uses a normal page, rather than a sheet of repeated cards.
Give page one its own header when needed
For the full letterhead on every page, leave Different First Page off. The regular header can then repeat as the letter grows. Check page two so a tall header doesn't leave too little room for the message.
For branding only on page one, double-click the header area and enable Different First Page on the Header & Footer tab. This creates a separate first-page header, which you need to fill.
If your branding seems to disappear when you enable it, return to the first-page header and insert the branding there. The regular header and the first-page header are different editing areas.
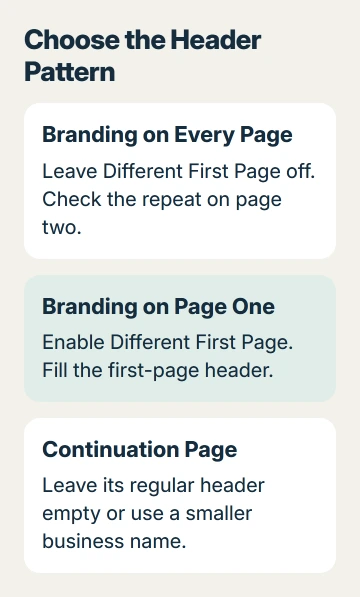
On the second page, leave the regular header blank or add just the business name in a smaller space. This is a design choice. A shorter continuation header often leaves more space for the rest of the letter.
The Different First Page instructions apply to Windows and Mac. Don't insert a section break solely to make the first page different; that particular option already handles it.
Add a temporary second page while checking the template, then remove the extra test content. Confirm the intended logo and contact details appear on each page before saving the reusable file.
Add useful placeholders and check the printed result
Fill the body with placeholders for the date, recipient, address, subject, salutation, message, and signature. Use text you'll recognize and replace, rather than leaving a previous customer's details in the master.
For example, start with Date, then Recipient Name, Recipient Address, Subject, Dear Recipient, Letter Text, and Name and Role. Replace these prompts when you write each letter.
Use paragraph spacing to control gaps between the contact block and the message. Avoid a long stack of empty paragraphs to position the letter halfway down the sheet. That makes later edits harder to keep consistent.
For contact details in the footer, choose Insert > Footer and a simple layout. Leave space within your printer's printable area, especially if the address or website sits near the bottom edge.
Check File > Print on Windows or Mac. Review the paper size, logo proportions, the start of the body, and page two. Print one ordinary-paper sample before using expensive stationery or sending a batch.
If an old template carries an unwanted background mark, use the Word watermark removal steps. Select only that mark so you keep the header content you intend to reuse.
Save the master as a template and start a fresh letter
On Windows, choose File > Save As > Browse and set Save as type to Word Template (*.dotx). Name it clearly, such as Business Letterhead. Keep it in the offered custom-template location if you want it in Word's template list.
Start a letter through File > New > Personal and select the template. Some installations label that area Custom. Word creates a new document based on the template rather than making you edit the master for every letter.
On Mac, choose File > Save as Template, enter a name, and select Microsoft Word template (.dotx) for the format. Start a later letter through File > New from Template and choose your saved design.
Save each completed letter as its own .docx file. When company details change, open the template itself through File > Open, update the business details, then save and close the master.
For shifting logos or clipped printing, give the template owner your sample and paper size. For an app fault, tell Microsoft Support how the document differs between the editor, preview, and printout. Include your installed Word version.
The Short Version
Choose the paper format, add recurring header details, and keep the actual letter in the body. Use Different First Page for first-page-only branding. Save a .dotx master and create a new document for each letter.
Checked November 15, 2026.
 If you have any business, I can build it online