iCloud accepts your registered Apple Account email or phone number, plus the account password. Use iCloud.com for quick access to photos, files or mail. For ongoing syncing, sign in through your device's settings or the iCloud app.
The same account works for both routes. Apple Account is the new name for Apple ID. Your old account still works, even when the sign-in screen uses the newer name.
In this guide
Open iCloud in a browser for quick access
Open icloud.com in your browser and choose Sign In. Enter your account's registered email address or phone number, then enter its password. Complete any verification request that appears.
This route works from a Mac or Windows computer and supported phone browsers, including when you're using Android. You can use the web apps available for your account without setting up syncing on that device.
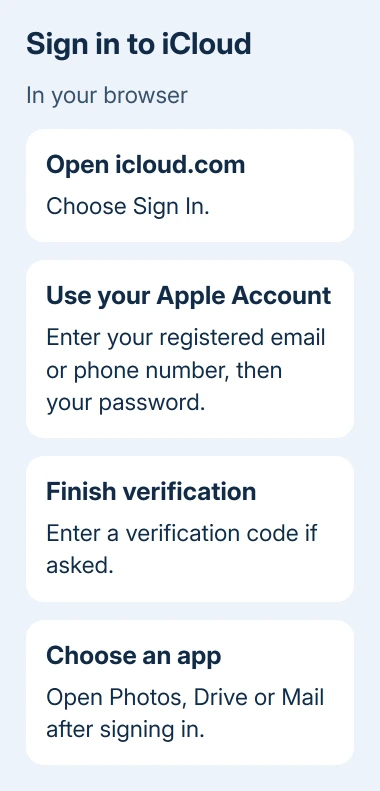
After signing in, choose the app you need, such as Photos, Drive or Mail. A missing mail inbox isn't always a failed login: an account needs iCloud Mail set up to use that mailbox. The iCloud email guide covers that distinction.
I'd use this route on a borrowed computer. Don't save the password or select an option to stay signed in on someone else's browser. Use your account menu to sign out when you're finished.
The website and your device's settings do different jobs. Viewing a file online doesn't turn on iCloud Drive syncing on that computer, and signing into a browser doesn't make that computer your iPhone's backup destination.
Sign in through iPhone or iPad Settings
On an iPhone, open Settings and tap Apple Account at the top. An iPad uses Settings > Apple Account too. Older software may show a prompt to sign in to the device instead of the newer account label.
Choose Sign in Manually and provide your account password and registered email or phone number. Enter the six-digit verification code if requested. Apple's device sign-in instructions also cover using another nearby Apple device.
For that nearby-device method, choose Use Another Apple Device if offered. Bring a signed-in iPhone or iPad close and follow the instructions on both screens. Both devices need Bluetooth turned on and software that supports the feature.
If that choice is missing, use manual sign-in. Update both devices if you specifically want to use the nearby-device method. Creating a second account isn't necessary to work around a missing button.
When Settings already displays a name, tap it and check the account details. The device is already signed in. Check which account it is before changing anything, especially on a phone that belongs to a family member.
After signing in, open Settings > your name > iCloud. Review the apps and features that should use iCloud. Signing in doesn't turn on every syncing switch. Check the apps you want to use before expecting their content to appear.
Connect a Mac or Windows PC
On a current Mac, choose Apple menu > System Settings and select the sidebar's Sign in control. Follow the account and verification prompts. On older macOS versions, the equivalent controls are in System Preferences.
If your name is already visible, open it and check the account rather than looking for another login screen. Select iCloud to review the services enabled on that Mac. Neither an Intel processor nor Apple silicon changes these account steps.
On Windows, install iCloud for Windows from the Microsoft Store, open it and log into the account holding your iCloud content. Complete verification when asked, then select the features you want to use on the PC.
Use the app when you want iCloud features available within Windows. Use the browser when you only need to retrieve something once. Signing into Windows itself with a Microsoft account doesn't sign you into Apple's services.
Once the app is set up, check that the account displayed is the one holding your files and photos. An empty library under a different account can look like lost content even though the original account still has it.
Complete verification or recover the account
A verification code normally reaches one of your trusted devices or a trusted phone number. If it doesn't arrive, use the sign-in screen's code options. Two-factor authentication may require that code as well as your password to sign in.
Check that the browser's address is iCloud.com before entering your account details or code. Keep the code private, and approve only the sign-in you started, even if another login request appears on your device.
If you've forgotten the password, use Forgot password? in the sign-in flow. A trusted device that's still signed in can offer a password-change route without first signing out.
If you can't remember the account address, check the name and account details on another signed-in Apple device. Guessing new addresses or creating another account won't reconnect the photos stored under the original one.
For a repeating prompt after the password is accepted, use the Apple Account sign-in loop checks. Note whether it returns immediately or only after restarting.
Allow web data access when the login succeeds
An iCloud Data Web Access is Off alert means the login worked, but browser data access is disabled. On iOS or iPadOS 26.4 or later, open Settings > your name > iCloud > iCloud.com and enable Allow Data Access.
On macOS 26.4 or later, open System Settings > your name > iCloud > Data Access on iCloud.com and enable Allow Data Access. Earlier supported versions show Access iCloud Data on the Web directly in iCloud settings.
With Advanced Data Protection, web access turns off automatically. Enable it again, sign into iCloud.com and approve temporary data access on your trusted device. Keep the protection itself enabled while using this route.
If access still fails, give Apple Support the exact alert, device version and whether device Settings or only the website is affected. Choose the Apple Account or iCloud support subject so the adviser can address the failing part.
The Short Version
Use iCloud.com for browser access, Settings for an iPhone or iPad, System Settings for a Mac, or iCloud for Windows on a PC. Finish verification, check the account, and enable the particular services you need.
Checked November 10, 2026.