Slow Wi-Fi on an M1 MacBook Pro can come from weak reception, dock interference or traffic-filtering software. Start beside the router with USB accessories disconnected and your VPN paused.
If that helps, reconnect the equipment or software separately to see which affects the speed. Otherwise compare another device before changing the Mac's settings.
A Mac that's slow on every network needs different attention from a home network that's slow on every device. Use the same download or speed test for both comparisons so you can judge the difference.
In this guide
1. Compare the Mac beside the router
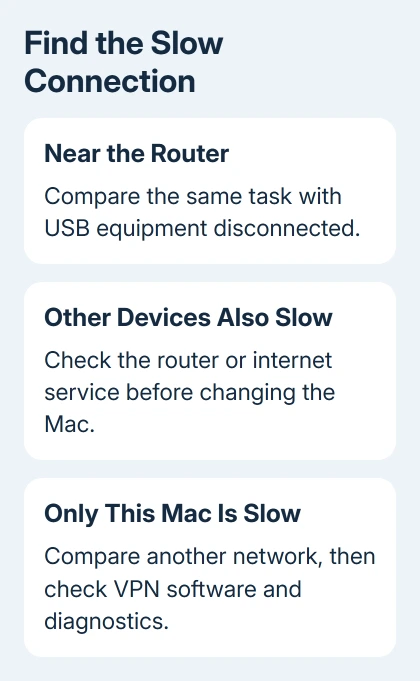
Place the Mac close to your router, with no wall between them. Pause large downloads and cloud uploads, then try the same site or download again. Compare another device on that Wi-Fi in the same location, one device at a time.
If both are slow, check the home connection first. If the Mac improves dramatically near the router, distance or interference is part of the problem. A fast phone beside a slow Mac calls for the Mac-specific checks next.
An internet speed test also depends on your provider's connection and the test server. It doesn't measure only the Mac-to-router wireless connection. The Wi-Fi speed checking guide explains that distinction when numbers disagree.
Try another network, perhaps a phone hotspot with a suitable data plan. Its maximum speed doesn't have to match your home service. Check whether browsing and downloads become responsive away from the home router.
If another network works normally, don't erase or reset the Mac. Note the difference and keep checking the home connection. If every network is slow only on this Mac, pay particular attention to VPN software, macOS updates and diagnostics.
2. Disconnect the dock and nearby USB equipment
Unplug the USB-C hub, external drives and unnecessary adapters. Test using the Mac's own display and keyboard. Keep external equipment and cables away from the Mac and router during the comparison.
Apple says that equipment using USB 3 or Thunderbolt 3 can cause wireless interference. This makes unplugging the dock a useful check before altering the router.
If speed returns, reconnect each accessory separately. Watch for the cable or device that causes another slowdown. Move that equipment farther away or try a better-shielded cable before replacing wireless hardware.
Try a 5 GHz connection if your router offers one. Interference is less troublesome there than on crowded 2.4 GHz, though walls and distance still affect reception. Compare both bands without moving the Mac.
The 13-inch M1 MacBook Pro supports Wi-Fi 6. That label doesn't mean it can use the 6 GHz band offered by Wi-Fi 6E equipment. Buying a 6 GHz router alone won't make that model connect on the new band.
3. Pause the VPN and network filters
Pause the VPN through its app and retry the download. Security products and content filters can also affect network access. Check their controls too; disconnecting a VPN doesn't necessarily stop a separate filter.
If one paused product restores speed, update it or send its developer your macOS release and the speed comparison. Reconnect needed protection after testing. Leave work-required security changes to your administrator.
A managed Mac may prevent changes to these tools. Give the administrator the before-and-after result and the name of the affected network. They can use that comparison to check the problem, rather than starting with a general Wi-Fi reset.
For an M1 Mac, I'd check the dock and VPN before trying Terminal commands. Both comparisons are easy to reverse, and neither changes system network files. If neither helps, try restarting and checking the saved Wi-Fi connection.
4. Restart, then check macOS and the connection
Save your work and choose Apple menu > Restart. Rejoin Wi-Fi after the desktop returns. Restarting also renews the network address, which can help with a bad address assignment rather than a radio-speed problem.
For Ventura 13 or newer, use System Settings > General > Software Update. Monterey 12 and Big Sur 11 use System Preferences > Software Update. Back up and use a working connection to install a compatible update.
If you know the network password, try forgetting the network and joining it again. On current macOS, open System Settings > Wi-Fi > Advanced. Use the menu beside the saved network, choose Remove From List, then confirm Forget.
On older releases, use System Preferences > Network > Wi-Fi > Advanced, select the saved network, and remove it with the minus control. Reconnect and enter the password. Forgetting can also remove it from devices using iCloud Keychain.
A speed problem and repeated disconnections aren't identical. If the Wi-Fi icon actually drops the network during use, the MacBook Pro Wi-Fi dropping guide follows that branch in more detail.
5. Read the Mac's wireless recommendations
Open the Wi-Fi menu from the menu bar, or through Control Center. Open Wi-Fi Recommendations if that item appears. It explains a problem the Mac has detected. Follow that recommendation rather than changing unrelated settings.
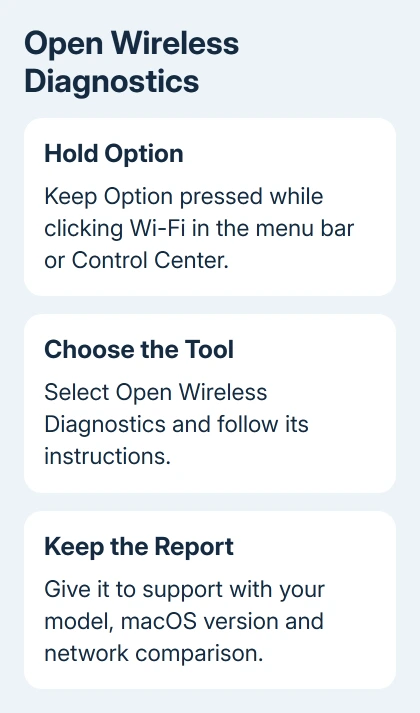
For a deeper check, hold Option while clicking Wi-Fi, then choose Open Wireless Diagnostics. Follow the onscreen instructions. Keep its report for the network administrator or support technician if the slowdown continues.
Recommendations aren't available for personal hotspots and some enterprise networks. The connection could still have a problem even without that menu item. You can still compare performance on another network.
6. Have the router settings checked before replacing hardware
If your home network is slow, reboot the router and check its firmware (router software) version with its maker's instructions. On a shared or managed network, ask the administrator to do this instead of changing the equipment yourself.
The recommended router settings turn on supported radio bands, use automatic channel selection, and enable WMM, the feature that prioritizes wireless traffic. For channel width, use 20 MHz on 2.4 GHz and Auto or all widths on 5 GHz.
Normally, use one unique network name across bands. Comparing an existing separate 5 GHz network doesn't mean permanently splitting the names is required. Note the original settings so you can undo a change that worsens the connection.
If the Mac stays slow across networks with accessories removed and filters checked, contact Apple Support. Ask for a wireless assessment and provide the model, macOS version, comparison results and Wireless Diagnostics report.
The Short Version
Compare beside the router, unplug USB equipment and check traffic-filtering software. Try another network to decide whether the Mac or home connection needs attention. Use diagnostics before paying for hardware.
Checked November 12, 2026.