A Microsoft Word resume template gives you a layout to fill with your experience. Open File > New and search for Resume, then save an editable copy. Choose a simple design that fits your information instead of a cramped decorative layout.
Keep the employer's file requirements in mind from the start. Save the Word document for later edits, and make a PDF copy when the application accepts it. Open the exported file to check that the layout still looks right.
In this guide
Choose a resume template for your version of Word
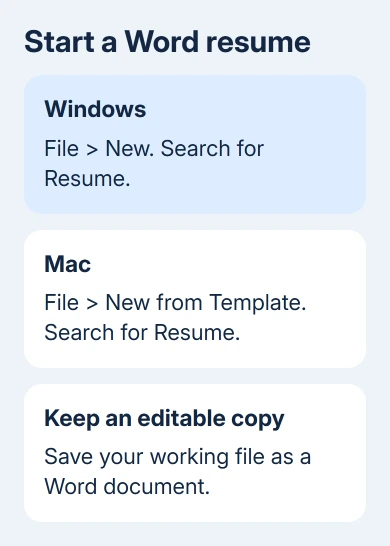
In Word for Windows, open File > New, enter Resume in the template search box, and select a result. Open its preview, then create the document. Online template searches need an internet connection.
On a Mac, choose File > New from Template instead. Search for Resume, then double-click the template you want. Microsoft explains these routes in its resume template instructions.
For Word for the web, use File > New > Browse Templates and Explore all templates where offered. Open a resume template in the signed-in editor. The browser version saves the working document online.
If a template search doesn't load, begin with Blank document in desktop Word and follow the formatting choices in the next sections. Missing online results don't prevent you from building a resume with ordinary paragraphs and headings.
I'd choose a single-column layout for a first draft. It's easier to extend when a job description takes another line, and you can see whether the order still makes sense without moving several separate text boxes.
Resume Assistant isn't the template search. That older feature was removed, so an instruction telling you to open its pane won't restore it. Use New and the available templates instead.
Save a working document and replace the sample text
Give the document a useful name such as LastName_FirstName_Resume.docx. In desktop Word, use File > Save As, or Save a Copy when that's the command your version offers. Keep a separate copy before major design changes.
Replace the sample name, contact details, summary, job history, education, and skills with your own information. Read the small headings and footer too. It's easy to miss sample text there after you've replaced the larger text.
Select only the placeholder words when replacing a section. If you select the paragraph mark or the whole surrounding table, you can also replace the structure that keeps the template aligned.
Use one job entry as the pattern for the others. Keep employer names, job titles, dates, and bullets in the same order each time. Consistent formatting helps a reader find the next date or role without searching around the page.
Write the content before trying to make it fit one page. Then remove repeated information and adjust the layout. A tiny font makes the document harder to read and can hide a content problem rather than solve it.
If the starting document came from an external resume builder and changes shape in Word, use the VisualCV formatting repair for that export. A native Word template is a different starting point.
Set page size, margins, and readable type
In desktop Word, open Layout > Size and choose your paper size. For a US application, Letter is a practical choice unless the employer asks for something else. Check Layout > Margins before adjusting individual paragraphs.
For a blank document, Normal margins are a sensible starting point. A template may use its own margins, so inspect the preview before replacing them. A margin change affects the whole page, including how many lines fit.
Choose an ordinary readable font and use it consistently. Try 11 or 12 points for body text as a starting point. That's a layout suggestion, not a requirement for the job application. Make headings visibly larger or bold.
Highlight the passage that needs changing, then use the Home tab's font name and size controls. Avoid changing the entire document when you only mean to repair one job entry or a small heading.
Use left alignment for the main body unless the chosen template needs something else. Don't line up dates by typing long runs of spaces. A template's table or tab positions can hold alignment more reliably as wording changes.
If a change pushes a heading onto the next page, look over the whole page before shrinking the text. A long bullet, a blank paragraph, or the wrong paper size can be the actual reason for the extra page.
Use paragraph spacing instead of extra blank lines
Select the paragraphs you want to adjust. On Windows or Mac, open Home > Line and Paragraph Spacing. Choose a spacing value, or open Line Spacing Options for the paragraph's Before and After spacing.
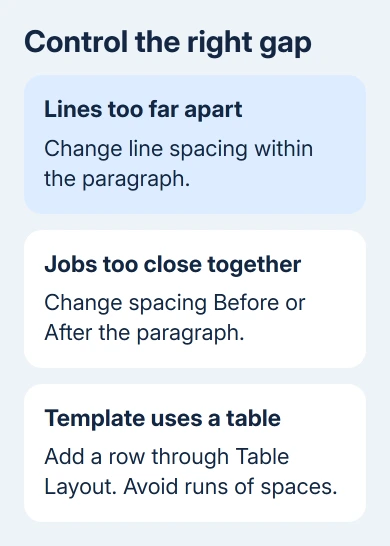
Line spacing controls the gap within a paragraph. Before and After control the gap between paragraphs. Keeping those separate lets you give headings space without spreading every line of a job description apart.
For a blank resume, start with single line spacing and a modest gap after each entry, then judge the page in Print Layout. Use the same values for matching entries rather than repeatedly pressing Enter to create gaps.
In Word for the web, select the text and use Home > Line Spacing. The available controls can differ from desktop Word, so use the desktop app if you need a paragraph setting that the browser editor doesn't offer.
For bullet descriptions, keep the same bullet style and indent throughout the experience section. Change one complete set of bullets together. Mixed indents can make jobs appear to belong to the wrong heading.
If the template uses a table, add space through its structure. Select the relevant table row and use Table Layout and its row-insertion controls. Don't try to create another column by pressing the spacebar repeatedly.
If adding entries keeps breaking the template's layout, choose a simpler one while you're still drafting. That's usually easier than rearranging a complicated design after every new line of experience.
Export the requested file and inspect every page
Save the editable Word copy first. Follow the application form's requirement for DOCX or PDF. A PDF keeps the page layout fixed, but send the Word file if that's what the employer asks for.
On Windows, use File > Save As or Save a Copy, set the file type to PDF, then save. On a Mac, use File > Save As or Save a Copy, then choose PDF under File Format.
In Word for the web, choose File > Export > Download as PDF. Open the downloaded PDF too, rather than judging the layout only in the editor. Check the filename so you know which version you're about to submit.
Read the first and last lines on every page. Check for a heading left on its own, clipped contact details, a blank final page, and a bullet that moved away from its job title. Open each link to check that it works.
Use Word's spelling and grammar tools before submitting. If those tools aren't responding, the Word spell-check fixes cover language and proofing settings without rebuilding your resume.
If the export still shifts or loses content, keep the DOCX and the faulty export. Use Help in Word to report the problem with your Word version and export method. Remove personal details from any copy you share publicly.
The Short Version
Choose a simple template in Word, replace every sample field, and save a DOCX copy. Set the paper size before fine spacing. Export the format the employer requests, then open that final file and check each page.
Checked November 13, 2026.