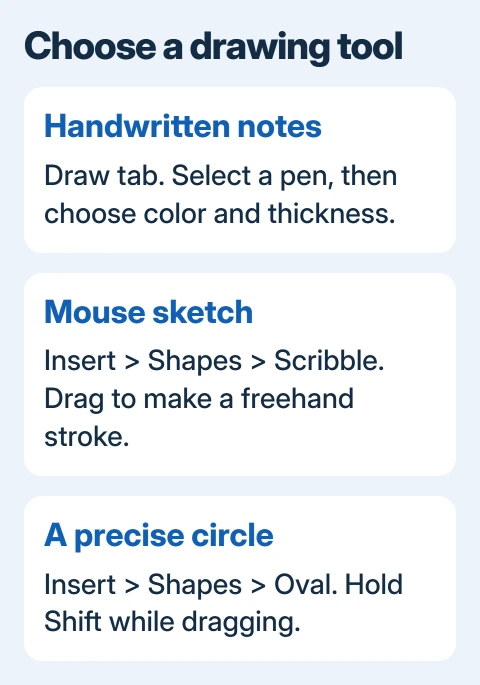
Word lets you draw directly on a document from the Draw tab: select a pen, choose its color and thickness, then draw on the page. Without a pen or touchscreen, Insert > Shapes > Scribble gives you a mouse-friendly way to sketch.
The right tool depends on whether you want handwriting, a loose sketch or a tidy shape. Use ink for handwritten notes, Scribble for a freehand mouse drawing and the shape gallery for circles or other regular objects.
In this guide
Choose ink or a shape before drawing
Open an editable document and decide what you're adding. A handwritten note belongs with the ink tools. A diagram built from boxes and circles is usually easier with shapes because each object can be resized separately.
Save a copy if you're marking up a document that needs a clean original. Drawing adds objects to the file; it doesn't create a separate review copy automatically.
Microsoft explains pens, selection and erasing in its Office inking instructions. Available tools vary with the Word edition and device, so follow the desktop Windows or Mac steps for your device.
I'd use a normal shape for anything that needs to look precise. Drawing a circle by hand and correcting it repeatedly takes longer than inserting an oval and keeping its proportions.
Draw with a pen or touch in Word for Windows
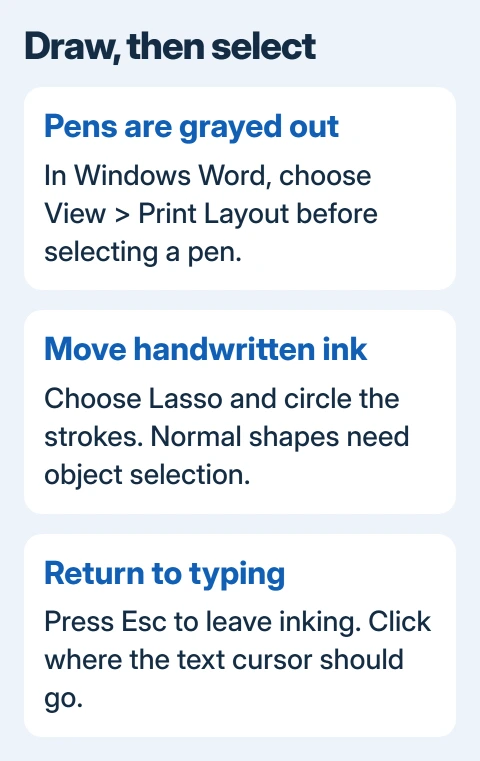
Open View > Print Layout first. Word needs Print Layout for inking; a grayed-out pen can be a view problem rather than a stylus fault. Return to Draw after changing the view.
Select a pen in the pen gallery, then open its menu to choose thickness and color. Make a short mark in a clear part of the page so you can check the selected tool before annotating text.
Draw with the stylus, or enable Draw with Touch when using your finger and that control is available. If dragging selects text or scrolls the page, check that drawing mode is on instead of selection mode.
To change a mark, choose Eraser on the Draw tab and pass it over the ink. Available eraser choices differ, so watch whether it removes a whole stroke or only the portion you touch.
Press Esc when you've finished drawing and want to select or type again. Leaving a pen active can make the next click add another mark instead of moving the text cursor where you intended.
When you need to move ink, use the Lasso selection tool and circle the strokes. Lasso targets ink; it isn't the right tool for selecting a normal inserted picture or a shape from the shape gallery.
Show the Draw tab when it is missing
In Windows desktop Word, choose File > Options > Customize Ribbon. Find Draw among the main tabs, check its box and choose OK. The new tab should appear in the ribbon when you return to the document.
A touch-enabled device can show Draw automatically. A missing tab on another computer doesn't mean the document itself prevents drawings; the ribbon may simply need that tab enabled.
On Mac, open Word > Preferences > Ribbon & Toolbar and check the main ribbon tabs for Draw. Some versions label app preferences as Settings. Save the ribbon change, then look for Draw in the document window.
If the document won't accept any edits, fix its editing state first. The Word editing-unlock guide covers protected and read-only cases. Adding a ribbon tab doesn't grant permission to change a protected file.
Sketch with a mouse using Scribble
In desktop Word, choose Insert > Shapes. Under Lines, choose Scribble. Click and hold while moving the pointer to draw the stroke, then release when you've finished that stroke.
The result is a shape object, so selecting it brings up Shape Format or the equivalent formatting tab in your edition. Use its outline controls to change the stroke's color or weight.
For a combination of straight and curved sections, choose Freeform instead. Click to place straight segments and drag to make curves. Double-click to finish an open shape, or click near the starting point to close it.
If you want a circle, choose Insert > Shapes > Oval, then hold Shift while dragging. For a circle around existing text, use Shape Fill > No Fill so the object doesn't cover the words.
Choose Layout Options or Wrap Text when the shape needs to sit over text, then select In Front of Text if that arrangement suits the annotation. Review the surrounding paragraphs after placing it because objects can change the page layout.
For a labeled diagram, add a Word text box beside the drawing. Keep labels as editable text rather than writing every word with the mouse.
Use the Mac, iPad or Android drawing controls
In Word for Microsoft 365 or Office 2019 for Mac and later, open Draw, choose a pen and set its thickness and color. Draw the annotation, then press Esc to leave inking and select objects again.
Mac Word can also offer trackpad drawing through its Draw tools. Use it if it's available in your edition; otherwise, try desktop Word's Insert > Shapes > Scribble for a sketch with your mouse.
On iPad or iPhone, open the editing ribbon, choose Draw and select a pen. Tap the pen again for its available color and thickness choices. Use a compatible iPad and Apple Pencil, or the touch-drawing control for your finger.
On Android, open the ribbon's Draw tools, choose a pen and enable touch drawing when needed. The mobile tools include selection, erasing and ink thickness controls, although their arrangement differs from the desktop ribbon.
When browser Word lacks a needed tool, open that file with the desktop Word app. You won't find all the desktop ink menus in the browser version.
Check the saved drawing
Save the document, reopen it and check that the drawing appears beside the right text. Check another page if the drawing shifted your page breaks. Moving text after placing a drawing can change how the annotation relates to its target.
If pens stay unavailable in an editable Print Layout document, update Word. Ask support about ink in your edition and include the platform, version and whether Shapes works. This helps tell a missing tool from a pen or touch problem.
The Short Version
Use Draw and a pen for ink, or Insert > Shapes > Scribble for a mouse sketch. Enable Draw in ribbon settings if needed, use Print Layout for Windows ink and press Esc to return to selection when finished.
Checked November 13, 2026.