
Yes, you can print on notebook paper if the loose sheet meets your printer's paper rules. The printed lines aren't the main obstacle; holes, torn edges, unsuitable thickness or a page still attached to its notebook can make it unsuitable.
Check your printer's manual before loading it. If the paper doesn't qualify, printing ruled lines on supported plain paper gives you a usable alternative without trying to feed a torn notebook page.
1. Check the sheet against the printer's paper rules
Find your printer's model number, usually on its front or top. Its manual should list the paper sizes, weights and types it can and can't feed. Those limits matter more than whether the package calls it notebook paper.
Canon lists paper with any holes, uneven cut edges, staples or glue binding as unsupported on the G4070 series. Check for those restrictions in your model's manual too.
That rules out many loose-leaf and spiral-notebook pages for the G4070 series. Removing a page from its binding leaves the punched holes in place, and a ragged tear still isn't a suitable edge.
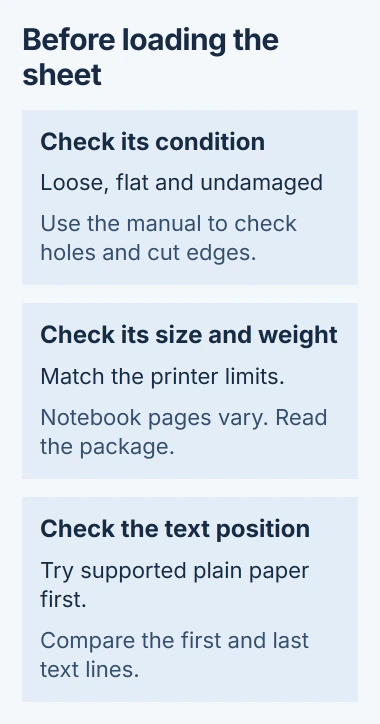
The same manual rules out damp, curled, folded or wrinkled paper. Check the whole sheet, especially the edge that enters the printer first. Even if the middle looks flat, a curled corner can catch as the printer pulls it in.
Other printers have their own limits, so use this as an example of what to check. A sheet fitting in the tray doesn't mean the manufacturer supports that paper.
If the page is valuable handwritten work, print on a separate supported sheet instead. I'd avoid making the only copy of your notes the first test of an unfamiliar paper type.
2. Match the paper size and weight
Read the dimensions on the paper package, or measure the loose sheet. Notebook pages aren't automatically Letter size, even when the notebook itself looks close to an ordinary pack of printer paper.
Check the weight too, usually labeled gsm or g/m2, meaning grams per square meter. For example, the G4070 series supports ordinary plain paper from 64 to 105 g/m2, but that range isn't a rule for every printer.
Compare the weight on the paper package with the range in your manual. A sheet can fit in the printer and feel fine in your hand while still being too light for it to feed properly.
If the actual size is listed in the printer's supported sizes, choose that size in both the document and print settings. If it isn't, use a custom size only when the printer supports those dimensions.
Don't select A4 simply because it's the closest familiar option. A size mismatch can move text off the sheet or cause a paper-size warning, even when the paper itself feeds normally.
If your printer can't use that custom size, choose a supported sheet and resize the document to fit. A word processor can let you enter a page size that your printer can't use.
3. Set up the document before loading the paper
In desktop Word, use the Layout tab to choose the matching paper size and orientation. Then open Layout > Margins. The custom margin controls let you keep text away from the edges.
Leave space for the notebook's printed margin and any area you want to keep blank. Check where the text sits in the preview; moving a paragraph now is easier than correcting it after printing.
To place typed words on the existing horizontal lines, adjust paragraph line spacing too. Font size and line spacing are different: making the font smaller doesn't automatically match the gaps between the printed lines.
Use Home > Paragraph to open the line-spacing options. Adjust the spacing and starting position, then test the layout. There isn't one setting that matches every brand of wide-ruled or college-ruled paper.
Long paragraphs can wrap to a new line sooner than you expect because of margins and font width. Check the entire preview, especially the last lines on the page, rather than judging alignment from the first sentence.
For a document with several pages, select only the page you want to test in the print dialog. Sending the whole document can use the next sheets in the tray before you've checked the first result.
4. Test on supported plain paper first
Print one page on ordinary supported paper, with the same document size and print settings you intend to use. Hold that test page against the ruled sheet to compare the text position without risking the notebook page.
Check both the first and last text lines. If alignment drifts farther down the page, adjust line spacing; if all lines are shifted by roughly the same amount, adjust the starting position or margin.
This test gets the layout close, but the notebook sheet can still shift slightly as it feeds. That can leave text between the printed lines instead of on them, even when the plain-paper test looked right.
For exact alignment, create a fresh document with both lines and text, then print them together. That removes the need to match your text to lines already on the sheet.
When the layout looks right and the notebook paper meets the manual's requirements, load a test sheet using the supported tray and guide positions. Follow that printer's loading illustration for which side faces up or down.
Move the guides to the sheet without bending it. Choose the plain-paper setting if that's how the manual treats this paper. The computer printing guide covers choosing the printer and checking the preview.
5. Stop if the sheet won't feed cleanly
Watch the first sheet as it feeds. If it goes in crooked, wrinkles or stops moving, stop the job and follow the printer's jam-removal instructions. Sending the job again won't fix paper the printer can't feed.
Use the paper jam checks if paper is stuck, and remove it through the access point your manual specifies. Don't pull a trapped sheet against the feed direction simply because an edge is visible.
If supported plain paper prints normally afterward but the notebook sheet fails again, switch paper. That points to a problem with the sheet or how it fits, rather than your document's layout.
If ordinary supported paper also jams, check how it's loaded and the path it takes through the printer. Contact the manufacturer if jams continue; changing Word margins won't fix a problem with the printer's paper feed.
Print ruled paper instead when the notebook sheet is unsuitable
Some printers can create ruled pages themselves. On the Epson XP-7100, load supported Letter or A4 plain paper and choose Various prints > Ruled Paper from the home screen.
Choose a ruled layout, select the paper settings, and continue to To Check Printing. Choose Copies, enter the quantity, then print. This model also offers layouts such as graph and music paper.
For another printer, check whether its menu has a similar stationery option. If it doesn't, print a ruled document from your computer on supported paper. Neither method requires feeding a bound, torn or punched notebook sheet.
The Short Version
Print on notebook paper only if its size, weight, edges and condition meet your printer's manual. Match the document settings and test the layout first. For unsupported sheets, make ruled pages on compatible plain paper instead.
Checked November 4, 2026.

Isaac Smith is the founder and editor of PC Glance, a website that covers computers, laptops, and technology. He is a tech enthusiast and a computer geek who loves to share his insights and help his readers make smart choices when buying tech gadgets or laptops. He is always curious and updated about the latest tech trends.