Screenity can record a Chrome tab, an app window, or your whole screen as a video file. The extension works without an account, so you can use it for a quick demonstration and save the recording on your computer.
Choose the capture area and audio source before recording. A video can show the right screen and still be silent if the microphone or computer audio wasn't included.
In this guide
Install the extension from its official listing
Use Chrome on a computer. Open Screenity's extension page and follow its Chrome installation link. Check that the listing is Screenity before choosing Add to Chrome, then review the requested permissions and confirm Add extension.
Chrome on a phone can't run this desktop extension. Add to Desktop saves the extension for installation on a computer; it doesn't add a screen-recording toolbar to Android Chrome or the iPhone browser.
Select Extensions to the right of Chrome's address field. Pin Screenity there to keep its icon visible. Clicking Screenity's icon opens the recorder; installing the extension doesn't start a recording.
Google's extension installation instructions explain that work or school management can block an extension. Ask your administrator to approve the recorder when a managed computer refuses installation.
If Chrome already disabled another recorder, check why unsupported extensions stop working before trying to restore it. Use a currently supported recorder rather than downloading a copy from an unrelated site.
Pick the screen area before starting
Select the Screenity icon. Under Record, choose Screen, Tab area, or Camera. Screen captures the screen, window, or tab selected in Chrome's sharing prompt. Tab area is for a selected portion of a browser tab.
Use Camera for a camera-only recording. The other capture modes can include your camera too, but they don't require it. For a short software demonstration, leaving the camera off keeps the recording focused on the controls.
I'd record one tab when everything you need stays in that tab. Choose a window or the whole screen when the demonstration must switch between apps, and close unrelated windows before sharing that larger area.
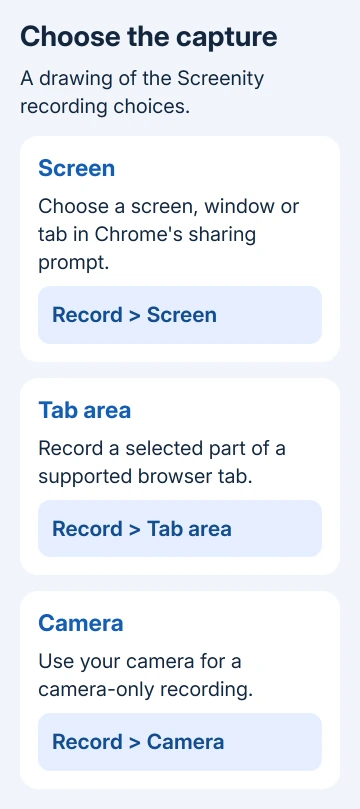
Select the camera and microphone from their dropdowns if you need them. Allow their permission prompts. Switch them off when you don't want them captured, rather than covering the camera and hoping the audio is also off.
Select Start recording. When Chrome asks what to share, choose the intended screen, window, or tab and confirm. Read the selected item's name before continuing, especially when several similar browser windows are open.
Include the sound you actually need
Your microphone records your voice. Computer or tab audio records the sound from the content you're demonstrating. Choosing a microphone doesn't also turn on computer audio.
For narration, choose the correct microphone in Screenity's dropdown. If Allow microphone access appears instead, grant the permission. Check that the microphone isn't marked Off or set to No microphone.
If Push to talk is on, your voice is recorded only while you hold its shortcut. The default is Alt+Shift+U on Windows or Linux and Option+Shift+U on Mac. Keep the recording page selected for this to work.
For computer sound, open the popup's three-dot menu and check Include system audio. Chrome's sharing prompt must also offer the audio source and have it enabled. Both choices matter.
On Windows and ChromeOS, check Share system audio when Chrome offers it. If it isn't available, update Chrome or try capturing a tab. On Mac with Chrome 141 or newer, the same system-audio option applies.
On an older Mac Chrome version, use Chrome Tab and enable Also share tab audio for the tab's sound. Don't expect an entire-screen capture on that older version to include every app's audio.
Record a brief trial and check its sound before making the full demonstration. Speak and play the sound you need during the trial. Audio that wasn't captured can't be recovered by changing an export setting later.
Finish the recording and download a usable file
When finished, select the toolbar's circle containing a square, labeled Finish recording. If the toolbar is hidden, select the Screenity icon in Chrome's toolbar instead. Wait for the player to open.
Under Export, choose Download as .mp4, Download as .webm, or Download as .gif. MP4 is marked as recommended. Pick the save location if Chrome asks where the file should go.
MP4 and GIF can show Preparing… while processing. Wait until that's finished, then select the download. Check that the file has downloaded; the preparation message doesn't mean it's saved yet.
GIF export is limited to recordings up to 30 seconds. For a longer recording, trim it with Edit video first or choose a video format. A GIF also isn't the format to choose for a demonstration that needs sound.
If the recording is too long to process, MP4 and GIF can show Unavailable for long recordings while WebM remains available. Download WebM instead. If the processed video has a problem, you can also try the advanced raw-video download.
Open the downloaded file and check the beginning, the important action, and the ending. When you record without an account, that download is your copy to keep. Save it before closing the player.
Fix a disabled capture area or a blank result
When a page can't use tab recording, Tab area can be grayed out and Screenity falls back to Screen. Try that capture mode and select the intended source in Chrome's sharing prompt.
A message that custom-area recording is disabled can also mean Chrome needs updating. That feature needs Chrome 110 or newer. Update through Chrome menu > Help > About Google Chrome, then reopen the recorder.
On a Mac, screen capture can require operating-system permission for Chrome. If capture won't start, use the Mac screen-sharing permission checks and restart Chrome when macOS requests it.
If a short trial fails, report the Chrome version, operating system, capture mode, and error through Screenity's Help Center. For missing audio, say whether narration, tab sound, or system sound is absent.
The Short Version
Install Screenity, choose the capture area, and set narration and computer audio separately. Record a short trial, then finish the full recording and download it from Export. Check that saved file before sharing it.
Checked November 10, 2026.