Moving photos between iCloud accounts takes a download from the first and an upload to the second. Keep the local files until you've checked the new library. Using a browser keeps your phone signed into its current account.
This copies photo and video files. It doesn't merge Apple Accounts or automatically rebuild the source library's albums and organization. For a large collection, work in batches so you can confirm what reached the new account.
In this guide
Prepare both accounts and a local holding folder
Make sure you can sign into both accounts and complete any verification requests. The source account owns the current pictures. The destination account needs iCloud Photos available and enough storage for what you're copying.
Make a folder on your computer for the downloaded originals. Choose a location with enough disk space, and keep separate batches in named subfolders. Clear batch names help you resume after an interruption.
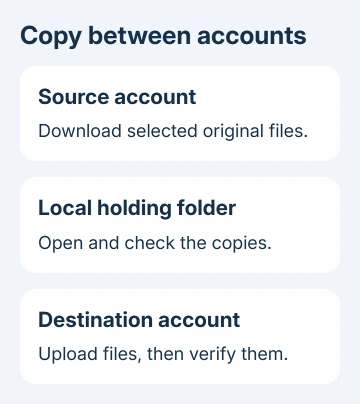
Look through the destination account's existing library first. Uploading adds items rather than replacing that collection. A test batch shows the result before you spend hours on the entire transfer.
If the other account belongs to someone else, get their permission and let them sign in themselves. Don't share passwords or verification codes to get around account access. The account owner can handle their stage of the transfer.
The iCloud photo viewing guide helps confirm which online library is open. Check recent pictures and older ones so a familiar thumbnail doesn't distract you from a wrong-account sign-in.
Download originals from the source account
Visit icloud.com/photos from your computer, using the source account's sign-in. Select the photos or videos to copy. Hold Command on Mac or Ctrl on Windows when selecting several separate items.
Apple says in its download instructions that a selection can contain up to 1,000 items at a time. Treat that as the selection limit, rather than a target every batch must reach.
Open More > More Download Options and choose Unmodified Originals when you want the captured or imported files. Use the download control and save the result to the holding folder.
Most Compatible creates JPEG pictures or MP4/H.264 videos. That option can help when another app can't read the original format, but it isn't the same choice as preserving the unmodified source files.
For edited pictures, decide whether you also need a copy showing the finished appearance. An unmodified original preserves the starting file. It doesn't preserve every edit as an editable history in the new account.
Wait for each browser download to finish. For a ZIP download, extract the archive into your batch folder before selecting its contents for upload. The ZIP holds the files; Photos needs the pictures and videos inside it.
Check the downloaded batch before changing accounts
Open a few files directly from the local folder, including a video and an older picture. Confirm they display or play. A browser download list showing a filename isn't enough if the download was interrupted.
Compare the files with the selected items in the source library. Some media items have more than one file, so the number of downloaded files won't always match the number of thumbnails you selected.
Keep the two browser sign-ins separate. Sign out of the source web session before signing into the destination, or use a different browser profile for each account and label them clearly.
Signing out on the website changes the browser sign-in without changing the account on your computer or phone. Leave the main Apple Account on your everyday devices alone while you copy through the web.
I'd start with a small mix of ordinary pictures and videos. It shows whether your chosen formats upload and appear correctly before you repeat the process across a much larger library.
Upload the files into the destination library
Open icloud.com/photos with the destination account. Check the destination account's identity again. Select Library, or open the album that should receive the items, then use the upload control to choose local files.
Select the extracted photos or videos from the holding folder and click Upload. Leave the browser open while that batch uploads. Watch for a rejected file or a storage warning instead of assuming every selected file succeeded.
The current iCloud upload instructions allow photos and videos in multiple formats. Older versions of that page described JPEG-only personal-library uploads, so check the current upload dialog if a format is refused.
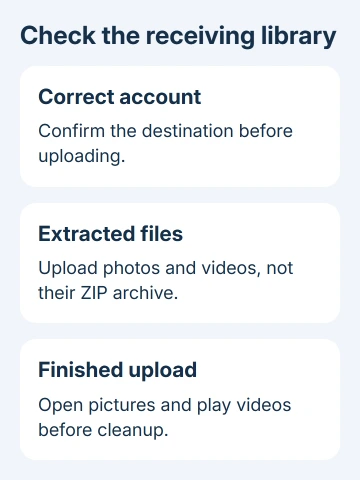
Once uploading finishes, open the new pictures and play the videos in the destination library. If the destination also syncs to a phone or Mac, give that device time to receive the new items before checking it there.
For an item the browser refuses, preserve its original and read the exact message. Try importing the saved file into Photos on a Mac already using the destination account, then let that Mac's iCloud Photos upload it.
In that Mac's Photos app, use File > Import, choose the saved media, then click Review for Import. Import the intended items. Confirm that Photos is syncing with the destination account before relying on this alternative.
Rebuild the organization that matters to you
Downloading photos and videos doesn't copy the whole Photos library and its organization. Plan to recreate albums in the destination when you need the same grouping. Copying files won't bring every part of that organization across.
Transfer each album as a named batch, then check the destination album. One picture can appear in multiple albums. Watch repeated selections so the batch process doesn't create unwanted duplicates.
On a Mac, the album and folder controls help rebuild those groups. Keep the local batch names clear enough to match each uploaded group with its intended album.
Shared Photo Library has different rules from a personal library. The web instructions direct Shared Library uploads to Photos on a supported device, including iOS 16.1, iPadOS 16, or macOS 13 and later.
Sharing a library and giving someone their own copy serve different needs. Decide whether you need another person to view the same library or own a separate copy before duplicating the collection.
Keep the source until the destination is checked
Keep the source library and a separate local copy until you've checked that every planned batch arrived. Check a sample of original dates, picture quality, and videos in the destination rather than judging only the thumbnail grid.
If downloads or uploads repeatedly fail for particular items, contact Apple Support about the affected iCloud Photos transfer stage. Give them the account involved, format, error message, and whether the local file opens.
If the destination shows a storage warning, make room or increase its storage before uploading more. Space available in the source account doesn't belong to the destination. Each account's storage plan remains its own.
The Short Version
Download source-account originals, check the local files, then upload them while signed into the destination account. Work in batches and recreate needed albums. Keep the source and local copies until you've verified the new library.
Checked November 16, 2026.