Unused styles can linger in Word 2010's In use list. Try opening Manage Styles at the bottom of the Styles pane, then clicking OK without changing anything. An owner reported that this refreshed the list and removed the extras.
Extra entries in the list need a different fix from text using the wrong style. Changing which styles the pane displays should help you inspect the document, without making every paragraph look different.
In this guide
1. Refresh the list through Manage Styles
In Windows Word, open your affected file. Find Styles on Home and open the pane using the small corner button in that group. The shortcut Ctrl + Alt + Shift + S also opens it.
Choose Options at the bottom. Set Select styles to show to In use, then choose OK. Check which unwanted names remain in the pane.
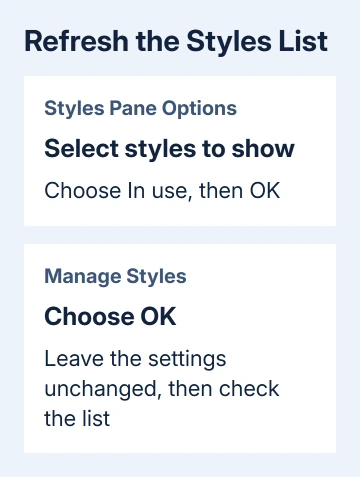
Click Manage Styles beneath the style list, then choose OK without changing its settings. Check whether the list now contains only the styles you expect.
One owner in the Word 2010 discussion confirmed this refresh worked. Another reported success through an unused style's menu, but a later reply said that route made no difference.
That menu route involved Select All: Not currently used, which can be disabled. If it's unavailable, continue with the usage check. Don't change a style's formatting just to shorten the list.
2. Check whether the entry actually selects text
A list entry alone doesn't tell you where formatting has been applied. Open the suspect style's menu and inspect the Select All command. If it shows a selection count and is available, Word can highlight the text using that style.
Choose it and look at the highlighted text. A style you didn't apply by hand can still be present in pasted material or a small part of a paragraph. Check what gets selected before deciding that the list is wrong.
A disabled Select All entry can say Not currently used or No Data. Check your version's wording. It isn't a command to delete the style. Settings for tracking formatting can also affect whether selection is available.
Click in a familiar paragraph and inspect its highlighted style. When selecting one style applies a different one, use the wrong-style selection fix rather than assuming every Styles pane fault is the same bug.
Keep an eye on your document's appearance while checking. You're checking which formatting it uses, rather than changing a required template to match the list you expected.
3. Change the pane's filter without changing the styles
Reopen Options in the Styles pane and read Select styles to show. The choices control the list you see; they don't replace the formatting already applied to your paragraphs.
All styles is useful when you're looking for a built-in style that isn't visible. In use is the filter involved in this fault. In current document is another comparison available in the historical Word discussion.
Try In current document, choose OK, and compare the names. If it gives you the list you need, leave it there. If unexpected styles remain, use the selection check to see which ones the text uses rather than relying on the filter.
In the original replies, the asker said changing to In current document didn't remove the extra entries. The same files showed the expected shorter list in Word 2007 but extra entries in Word 2010 on more than one computer.
Changing the filter again won't help if it didn't remove the extra entries the first time. Use it to choose a workable view, then continue with the refresh or document comparison if the unwanted entries persist.
The sorting choice is separate. Alphabetical order can make two lists easier to compare, but it doesn't decide which styles appear in the list. Change the filter and the sorting for different reasons.
4. Separate the Styles pane from the ribbon gallery
The Styles gallery contains the previews displayed on Home. It isn't the same list as the Styles pane. A style can be available in the pane without appearing among those ribbon previews.
Microsoft's gallery instructions describe adding and removing those shortcuts. Removing a style from the gallery doesn't remove that style from the document or strip its formatting from existing text.
For a missing heading shortcut, open the Styles pane, choose Options, and select All styles. Find the desired style, open its menu, and use Add to Style Gallery when that command is available.
To hide an unwanted ribbon preview, right-click it in the gallery and choose Remove from Style Gallery. Use that option when the ribbon is cluttered but your document's formatting is correct.
Don't choose Update [Style Name] to Match Selection for a list-display problem. That command changes the style definition to match selected text. It can alter other text that uses the same style, which isn't what this repair needs.
The accepted replies in the historical thread used that update command while trying to expose Heading 2 and Heading 3. They got their heading shortcuts back, but that doesn't mean the command removes unused entries from an In use list.
5. Compare a new document before changing a template
Create a blank document through File > New. Type a short paragraph and a heading, apply their styles, and inspect the Styles pane with the same filter. Leave your original document open for comparison.
If the blank file behaves normally, save the affected document under a separate name before trying larger changes. If the files behave differently, you can show the difference to whoever manages your template or provides support.
The original asker later connected the extra entries with choosing a style set. They couldn't find a consistent workaround, even across fresh documents. Include that detail if the list changes after you choose a set.
If both files show extra entries, record your Word version and filter. Neither deleting Normal.dotm nor reinstalling Office was reported to fix the extra entries in that thread.
For unwanted formatting in actual text, use the clear-formatting choices only on the intended selection. Clearing text formatting and filtering the pane solve different problems.
I'd leave a harmless extra list entry alone before deleting a style from a shared template. You can still use a correctly formatted document while the Styles pane shows extra entries.
For a company or school template, send its owner a copy without private text, the selected filter, and a screenshot of the suspect style's menu. Ask them to check style usage and the template in your exact Word version.
The Short Version
Set the pane to In use, open Manage Styles, and click OK without changing settings. Inspect actual selections if extra names remain. Gallery cleanup and style-definition changes are separate tasks.
Checked November 17, 2026.