A whole line vanishing while the next one grows can be a Word page-layout display fault. For the Windows problem reported in 2021, turning off Widow/Orphan control brought the missing text back.
Try that on the affected paragraph first, before you retype your work.
In this guide
1. Turn off Widow/Orphan control for the affected text
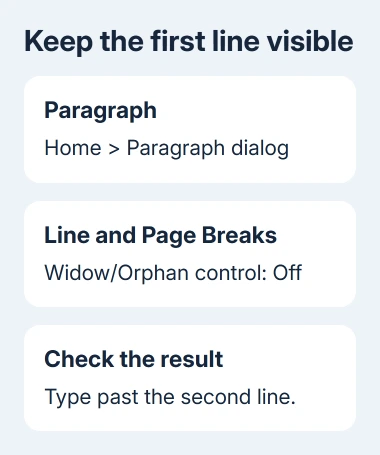
Click inside the paragraph whose first line disappears. On Home, click the Paragraph group's dialog launcher. Select Line and Page Breaks, clear Widow/Orphan control, then click OK.
Continue typing until you pass the point that previously made the line vanish. If it works, the first line stays visible as you type. Check the next page too, especially if the fault repeats at every page boundary.
One owner resumed their thesis after clearing this option, as they confirmed in Microsoft's forum. Another owner reported that it helped too, but they had to change the setting again in each new document.
This advice fits a particular symptom: a complete line disappears when more text is typed, then returns when a few characters are deleted. It isn't the same problem as new letters replacing existing letters among words already on the page.
I'd change one affected paragraph first. That lets you try the fix without changing page breaks throughout a long document. If the line stays visible, decide whether the same change belongs in the rest of that file.
To apply it throughout the document, press Ctrl+A in the main document text, reopen the same dialog, and clear the option. Review headings and page endings afterward because their positions can change.
2. Keep the workaround in the style you actually use
A paragraph setting can solve the current page while leaving the next blank document unchanged. New paragraphs often take their settings from a style, such as Normal, so change that style only after the first test works.
Click in ordinary body text and press Ctrl+Shift+S to open Apply Styles. Check the style name. If it is Normal, select Modify, then Format > Paragraph > Line and Page Breaks.
Clear Widow/Orphan control and confirm the paragraph dialog. Back in Modify Style, choose Only in this document if the change should stay with this file, then confirm.
For future documents using that template, choose New documents based on this template instead. Save the template if Word asks when you close it. Create a blank document afterward and inspect the option before relying on it.
Changing Normal won't necessarily affect paragraphs that use another style or have formatting applied directly. For a section that still fails, check its paragraph style instead of repeating the change elsewhere.
A university or workplace template may use a custom body style. Modify that style in a copy of the template when its owner permits changes. Don't replace the institution's entire template to correct one display problem.
3. Check whether the words are hidden or really missing
Save the file under another name before making wider changes. Open File > Print and examine the affected page in preview. Compare the first line with the editing view, including its first and last words.
If the line appears in preview, Word still has the text. Return to the document and keep working on the display and paragraph settings. Retyping them could leave duplicate text when the display refreshes.
If the words are missing in both places, press Ctrl+F and search for a distinctive phrase from the line. A match elsewhere can show that the paragraph moved rather than vanished. Check the page before changing its content.
If the phrase can't be found, check for missing content. Search an earlier saved version for that passage, or compare the file's version history. The unsaved Word document recovery guide covers recovery when work really hasn't been saved.
Don't mistake text moving onto the following page for text disappearing. Pagination options can move a paragraph or keep lines together, so look at the neighboring page before treating it as lost content.
For a different display symptom, where indents seem to disappear but the formatting remains, use the Word 2016 indent display checks. That report has its own refresh workaround.
4. Update Word before changing more document settings
The confirmed reports date from early 2021. They explain why the workaround is useful, but they don't mean every current Word build has the same fault. Check the installed version if the symptom keeps returning.
In Word for Windows, open File > Account. Under Product Information, use Update Options > Update Now when that control is available. Save first, and reopen the document after the Office updater finishes.
On a managed work computer, update controls may be handled by your organization. Send IT the About Word version and build, together with the steps that reproduce the disappearing line.
After updating, try a short paragraph in a new blank file and then in a duplicate of the faulty file. Note whether it happens only with one template or in every blank document. That detail helps support choose the next check.
Widow/Orphan control normally prevents a lone paragraph line at a page boundary. Turning it off changes that page-layout preference. Once the display works properly after an update, restore that setting and recheck the troublesome passage.
When the line still disappears
Use Help > Contact Support in Word. For a managed subscription, your workplace IT team can submit the case. Include your Word build, whether a blank document is affected, and whether the line appears in Print preview.
Remove private text from a short document copy and provide that sample. Explain that clearing Widow/Orphan control did or didn't change the result. Support can use the sample to reproduce the disappearing line.
The Short Version
Clear Widow/Orphan control on the affected paragraph first. If that fixes the disappearing line, save the change in the correct style. Compare Print preview before retyping anything, and update Word if the fault returns.
Checked November 17, 2026.