XNALara may not open on Windows 10 without its older runtime components. For XPS 11.8.9, View Mode Edition, enable .NET Framework 3.5 and install XNA Framework Redistributable 3.0. A newer version doesn't replace those requirements.
These steps cover the standalone XNALara/XPS program. An XPS import add-on failing inside Blender needs the add-on's own Blender version and installation checks instead.
In this guide
1. Check the program and extract its complete folder
Find the download you used and check its release name. The project download page offers XPS 11.8.9, View Mode Edition and includes installation directions for Windows 10. Use those directions for that release.
Extract the ZIP into a normal folder before launching it. In Windows 10, right-click the ZIP, choose Extract All, choose a writable destination folder, then select Extract. Open the extracted folder afterward.
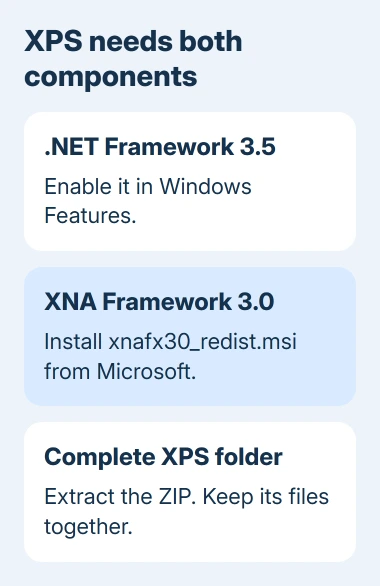
Run the program's executable from that folder, keeping its supplied files and subfolders together. Copying only the EXE to the desktop can leave the program without files it expects beside it.
Note what happens: nothing visible, an error naming a component, or a window that disappears. Write down any error exactly as displayed. A missing .NET component and an error loading one particular model aren't the same failure.
Avoid the fake release called XNALara 12 VMD for XPS. Use the release links from the established project page rather than a download site offering a supposed repair package.
2. Enable .NET Framework 3.5 in Windows Features
Open Start, type Windows Features, and select Turn Windows features on or off. Check .NET Framework 3.5 (includes .NET 2.0 and 3.0), then select OK.
Allow Windows to download the needed files if asked. Keep the PC connected to the internet and restart if prompted. Microsoft says to enable the older framework through this Windows feature.
Leave the extra Windows Communication Foundation options alone unless another application or your administrator requires them. The main .NET Framework 3.5 box is the part XPS needs for this startup check.
Having .NET Framework 4 on Windows 10 doesn't mean you already have 3.5. Older applications built for .NET 2.0 through 3.5 can still need the separate 3.5 feature. Installing the newest modern .NET package isn't this step.
Try XPS again after Windows finishes. If it now opens, load one of its supplied test models before restoring your other content. If it still won't launch, continue with the separate XNA runtime.
For an installation error such as 0x800f081f, write down the code. Use the installation page's troubleshooting link or ask IT to check where Windows gets its installation files. Reinstalling XPS won't finish a failed Windows feature setup.
3. Install the XNA 3.0 runtime the release requests
Open the official Microsoft XNA Framework Redistributable 3.0 download page. Check that its version is 3.0 and its installer filename is xnafx30_redist.msi before downloading it.
Install that runtime alongside .NET 3.5 as specified in the XPS Windows 10 setup procedure. XNA supplies program components used by the older posing application; it isn't a model pack or Blender plug-in.
Run the downloaded installer and finish its prompts. If it reports an existing installation, read the available maintenance options and note that result before trying XPS again. Keep the MSI filename in your troubleshooting notes.
Don't choose XNA 4.0 just because its number is higher. The requirement attached to this XPS release is 3.0. An error naming Microsoft.Xna.Framework should be checked against that exact version requirement.
The download page's supported-system list is old. The Windows 10 setup steps come from the XPS host page. They don't mean Microsoft currently supports XNA 3.0 on Windows 10.
I'd finish both named components before trying compatibility settings. Otherwise, changing launch options can hide the fact that the program still lacks something its own instructions require.
4. Keep program startup separate from model loading
Launch XPS from its extracted folder without adding a downloaded model. If its main window stays open, the program can start, so check model loading next. Test one supplied mesh before opening a large scene or adding a third-party model.
If only one model fails, keep its folder and error details for the model's creator. Check the model package's extraction instructions. Installing more runtimes at random won't identify a missing texture or incompatible model file.
If the program still closes before its window appears, use Event Viewer > Windows Logs > Application and look for the error at the matching time. Copy the application name, exception text and any named runtime component.
The report lets project support check the error behind that silent double-click. An entry naming a component can guide the next check, while a general application-crash entry needs the complete report and release details.
For a separate modern app that won't launch, the Bambu Studio error guide shows why the named missing component matters. Its Visual C++ and browser-component fixes aren't replacements for XPS's XNA requirement.
5. Check permissions only after the dependencies are present
The XPS installation directions also suggest trying administrator access on Windows 10. First try a fully extracted copy in a folder owned by your Windows account. A failure in a protected location can be a permissions problem.
For a trusted copy, right-click its executable and choose Run as administrator for one comparison. Accept the request only after checking that the named executable is your XPS copy. Don't disable User Account Control for this test.
If that launch works, tell project support that it only opens as administrator and where you stored its folder. Avoid making administrator access the permanent answer without understanding why the app needed it.
If a separate external drive holding your models disappears too, follow the USB detection checks for that device. A drive that Windows can't read is a separate obstacle from a program that won't start.
What to send when XPS still closes
Use the project discussion linked from the XPS host page. Include the release, Windows 10 version, exact error, .NET feature result and XNA installer version. Explain whether the empty program launches or only a model fails.
Keep your original models and poses backed up while testing a fresh extracted copy. Don't remove that content simply to repeat the same startup attempt.
The Short Version
Extract the whole XPS folder, enable .NET Framework 3.5 and install XNA Framework Redistributable 3.0. Compare an empty launch with model loading, then report the exact component or crash error if the program still closes.
Checked November 13, 2026.