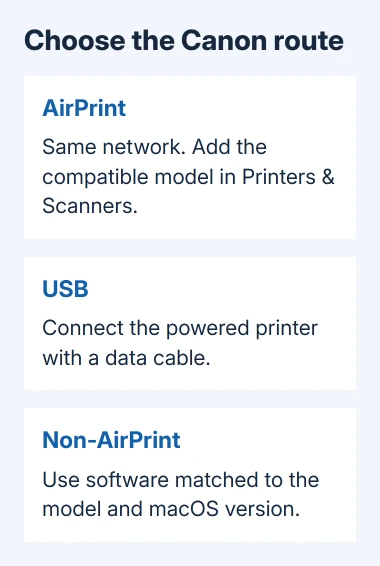
Add a Canon printer through System Settings > Printers & Scanners > Add Printer, Scanner, or Fax. For AirPrint, connect both devices to one shared network, then select and add the compatible printer. A separate driver isn't needed.
USB and older non-AirPrint models take different routes. Use a connection your model supports, then check which software the Mac selects. Joining the printer to Wi-Fi and adding it to the Mac are separate parts of setup.
In this guide
Get the printer ready before opening the Mac's settings
Turn the printer on, load paper, and finish its initial ink or toner setup. Check its display or lights for a setup error before trying to find it on the Mac. Adding a printer won't clear an unfinished cartridge installation.
For wireless printing, connect the printer to the same home or office network as the Mac. Use the full Canon model number from the printer, since touchscreen controls and button-only setup sequences differ between models.
For a printer still waiting to join your router, the Canon Wi-Fi setup guide explains that stage. Complete it before expecting the Mac's printer list to discover the device on your network.
Wireless Direct differs from a connection through the router. Check which you're using; a network name containing Canon isn't enough to choose it. The Mac needs to reach the printer through the connection you've chosen.
For USB, connect the printer with a suitable data cable and any required Mac adapter. Keep the printer powered on. Connecting by USB doesn't set up Wi-Fi. These are separate ways to connect the printer.
Add the Canon using AirPrint
In macOS 13 (Ventura) or later, open Apple menu > System Settings > Printers & Scanners. Scroll the sidebar if necessary, then click Add Printer, Scanner, or Fax to open the available-printer window.
For Monterey 12 or an older macOS release, use Apple menu > System Preferences > Printers & Scanners, then the plus button beneath the printer list. The older settings window looks different, but you're still adding a printer to the Mac.
Select the Canon model in the list. Give the list a moment to fill, and make sure you're selecting your printer rather than a nearby one. Compare the displayed model with the model printed on your device.
Check the Use choice. For a compatible model, use AirPrint, then click Add. The printer should appear in Printers & Scanners afterward, ready to be selected in an application's print dialog.
Apple's printer setup instructions recommend AirPrint for compatible printers. It lets you print without downloading a separate driver. Compatibility depends on the printer model.
I'd try AirPrint first when the printer offers it. It avoids choosing an old driver package just because a search result mentions Canon. You can decide separately whether you need any of the model's extra software.
Add a USB printer or choose its matching software
After connecting a USB printer, check Printers & Scanners. If the Canon is already listed, open a document and try printing. If it isn't listed, open the Add window and select the connected printer there.
A non-AirPrint model may need software for that printer and macOS version. Use Canon's model-selection setup page to enter the full model in the product-name field. Choose Go, then follow the matching setup instructions.
Check which operating system a download supports before installing it. Intel-only software or a package for another macOS release might not suit an Apple silicon Mac. Read the compatibility details for your model's current software.
Return to the Add window after completing any required installation. If the right software isn't selected automatically, open Use > Select Software, choose the exact supported printer entry and continue with Add.
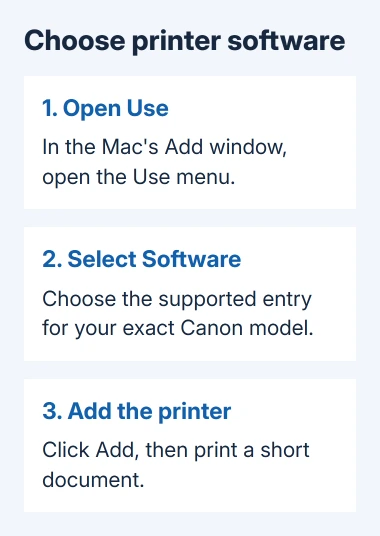
Don't choose a random generic driver just because the software choice is empty. Ask Canon which supported package or connection applies to an unlisted printer. Some older printers lack software compatible with newer macOS releases.
Add by IP address when the network printer isn't listed
First confirm that the printer has joined the network and read its current IP address from its network settings or configuration report. The menu or button sequence for that report depends on the Canon model.
In the Mac's Add window, select the IP tab. Enter the address and choose a supported Protocol (how the Mac communicates with the printer). AirPrint is an option for compatible models; other protocols require the correct printer details.
Check Name and Use before adding it. If a workplace printer needs a queue name, ask its administrator for that value. Don't invent a queue or choose a protocol simply because it's the first item in the menu.
Click Add, then print a short document. If the page prints, the address connection works even though the printer didn't appear automatically in the list. Leave the Mac's other printer entries in place.
If the printer still can't be reached, compare its network name with the one the Mac uses. On a managed office network, ask IT whether the computer is allowed to reach that printer and which address and protocol to use.
Print a page and check the queue
Open a short document and choose File > Print. Select the newly added Canon in Printer, check the paper size, and print one page. This confirms the selected printer can receive and complete a job from the Mac.
If the job waits in the queue, check whether the printer is paused, offline or displaying an error. Fix the paper, ink, toner or connection problem before adding another copy of the same printer.
For a Canon that was working before a system update, use the Mac printing repair checks instead of starting a fresh installation. Those cover paused jobs and permissions after an update.
Printing and scanning are separate features. If printing works but scanning doesn't appear, ask Canon which scan method or utility supports your model and macOS version. Replacing a working print entry may not add the missing scan feature.
Send Canon Support the full model, macOS version, connection type and exact error. Ask whether your model should use AirPrint or a supported driver. Include the office network administrator before changing a workplace printer.
The Short Version
Connect the Canon through the network or USB, then add it in Printers & Scanners. Choose AirPrint if supported, otherwise use matching software. Try its known IP address when discovery fails, then print a page to check setup.
Checked November 15, 2026.
 If you have any business, I can build it online