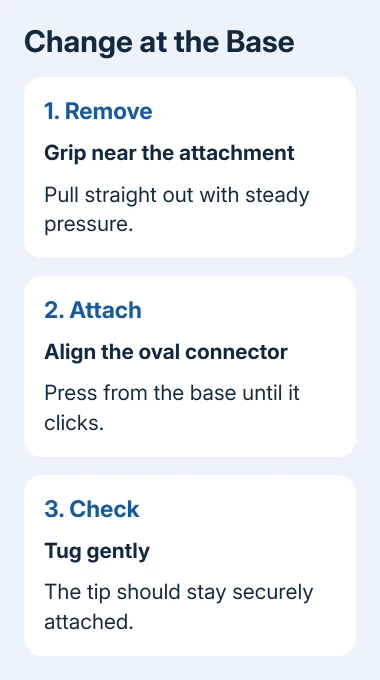
AirPods Pro tips pull straight off when gripped near the base, where the tip attaches to the earbud. Align the replacement with the oval connector and press from its base until it clicks, then give it a gentle tug to check that it's secure.
Different tip sizes can help when an earbud feels loose or uncomfortable. Choose tips made for your AirPods Pro generation, then check comfort and the acoustic seal (how well the tip seals your ear). Each ear can need a different size.
In this guide
Check the generation and tip size first
AirPods Pro 1 come with S, M, and L tips. AirPods Pro 2 add XS. AirPods Pro 3 include XXS, XS, S, M, and L. Medium tips come fitted, but that doesn't make medium the right size for every ear.
Gently unroll the soft edge to read the size marking near the base. Keep the spare sizes organized as you try them, especially if your left and right ears need different sizes.
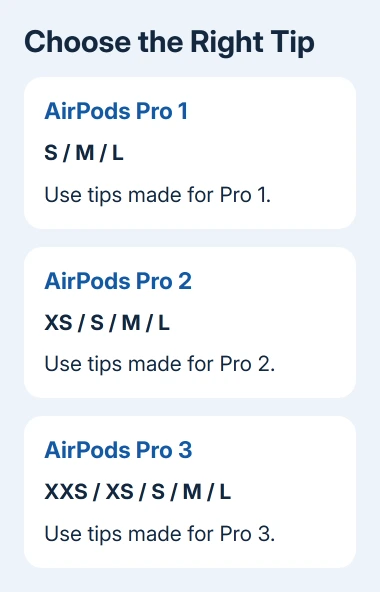
Apple's current ear-tip attachment instructions say tips aren't interchangeable between models.
Check the generation listed on replacement packaging rather than assuming every oval connector takes the same tip.
If you aren't sure which generation you have, use the AirPods serial-number and model checks before ordering. Ordinary AirPods without removable silicone tips don't use this replacement procedure.
Grip the base and pull straight out
Hold the AirPod firmly in one hand. With the other, grip the ear tip close to where it joins the AirPod. Pull straight outward with steady pressure, keeping your grip on the base rather than stretching the thin outer edge.
If your fingers slip, use a clean, lint-free cloth to get a better grip. You can also roll the soft edge inside out so your fingertips can hold the base more securely.
Don't insert a tool into the connector to lever it loose. The tip releases with a steady, straight pull. Prying underneath puts pressure on the small connector.
Check the tip you've removed before fitting another. If it's torn or its attachment is damaged, replace it instead of putting it back on.
If the attachment on the earbud itself appears damaged, have it checked before pressing another tip onto it.
Click the replacement onto the oval connector
Line up the replacement's opening with the oval connector on the AirPod. Push the tip on from its base until you feel and hear it click into place. Then tug gently to check the attachment.
The soft skirt can move even when the base is attached, so check that the base is secure. If the tip comes straight back off during the gentle check, align it again and repeat the attachment before wearing it.
If you're reusing a tip that needs washing, follow the AirPods cleaning instructions and let it dry fully first. Cleaning the detached tip is a separate job from cleaning the earbud's speaker meshes.
Choose comfort before running a seal test
Wear the AirPods during normal activity for 10 to 15 minutes and pay attention to how they feel. A tip that's too small can feel loose or fall out as your head moves. A tip that's too large can feel compressed or uncomfortable.
Try a different size for the ear that needs it. The left ear can use small while the right uses medium; matching labels isn't the goal. Each side needs its own comfortable, secure fit.
I'd change one side at a time. It's easier to remember which size improved the fit when you aren't swapping both sides through several sizes together.
Seat each AirPod comfortably before judging it. A poorly positioned earbud can give a bad seal even when the tip size is suitable. Adjust its position first, then decide whether you need the next smaller or larger size.
Run the test for your AirPods Pro model
Put both AirPods Pro in your ears and connect them to your iPhone or iPad. Open Settings > Bluetooth, then tap the information button beside their name.
On AirPods Pro 1 or Pro 2, select Ear Tip Fit Test. On AirPods Pro 3 with iOS or iPadOS 26 or later, select Acoustic Seal Test. Tap Continue, then the play control, and follow the result for each ear.
The model-specific fit guidance explains these different test names. The test measures the acoustic seal, which affects sound and noise cancellation.
It doesn't replace the comfort check you just made.
If it asks for an adjustment, reposition the AirPod and run the test again. If the same ear still needs a change, try another tip size on that side and retest. Keep the better-fitting side as it is.
Check Pro 3 heart-rate contact separately
AirPods Pro 3 also need skin contact for heart-rate readings. The best tip size for that contact may differ from the size that gives the best acoustic seal, so passing the sound test doesn't mean the sensor has good contact too.
Insert the tip, rotate the stem toward your face at about 45 degrees, and press gently so the sensor rests against your ear. A mirror can help check the position without repeatedly removing the earbud.
If readings seem inconsistent, check that the sensors are clean and dry, then try another tip size. Keep the fit snug without making it tight. Don't keep wearing a tip that causes discomfort just to get a different test result.
When a new tip still won't attach or fit
Check the replacement's generation and size again. If a matching tip won't click onto the connector, ask Apple Support or a nearby Apple Store to check the connector and confirm which replacement set fits your model.
For a fit problem, explain which ear slips or hurts, the sizes tried, and the result from that ear's seal test. That gives the adviser a specific fit problem to address instead of sending the same size again.
If the connector is damaged, have the earbud checked. A softer tip won't fix that.
The Short Version
Hold the old tip's base and pull outward. Align a model-matched replacement with the oval connector, press until it clicks, and gently check the attachment. Choose a comfortable size for each ear, then run that model's seal test.
Checked November 11, 2026.