A Chromebook can have no Caps Lock or Delete key by design; use its shortcuts instead. For a bare gap where a letter used to be, inspect the detached keycap and the small plastic supports underneath.
An intact detached keycap can sometimes be reseated using the manufacturer's instructions. Broken clips, a missing hinge, or damage under the cap needs the correct replacement part or keyboard repair, not a ChromeOS reset.
In this guide
1. Decide whether a key is absent by design
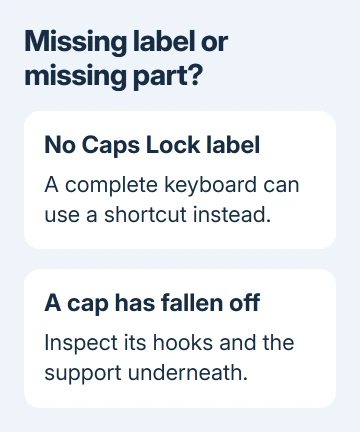
Look at the keyboard before changing settings. A complete row of fitted keys with no Caps Lock label is normal on many Chromebooks. A hole surrounded by other keycaps, or a loose key in your bag, is physical damage or a detached part.
For Caps Lock, use Alt+Search or Alt+Launcher on keyboards with those keys. Some newer layouts use Fn+Quick Insert. The key names depend on the Chromebook, so match the labels on your model.
For Delete, check the Chromebook's shortcut list and keyboard settings rather than looking for a key that the model never included. Current layouts let you choose combinations for Delete, Insert, Home, End, Page Up, and Page Down.
Open Settings > Device > Keyboard > Built-in keyboard > Remap keyboard keys for supported key assignments. The Chromebook shortcut guide covers everyday combinations without treating a compact layout as broken hardware.
If all the caps are present but letters don't register, use the nonworking Chromebook key checks. Those checks help when a key won't type; the repair steps here are for a cap that has actually come off.
2. Save the loose pieces and inspect the attachment
Shut the Chromebook down before handling a loose key. Keep the cap and any tiny detached parts together. Note which key they came from, especially if more than one has fallen off.
The keycap is the labeled piece you touch. Many laptop caps sit on a plastic scissor mechanism, an X-shaped support that guides movement. A rubber dome provides resistance and helps register a press.
Check the underside of the loose cap for broken hooks. Then inspect the empty space: is the scissor mechanism still attached and intact, loose but complete, or broken? Look at the rubber dome without pulling it out.
Dell's detached-key instructions include Chromebook models and distinguish those conditions. A cracked cap or damaged or missing mechanism won't be fully repaired just by pushing the cap back.
Don't remove a neighboring key to compare its underside. That can turn a single missing cap into another loose key. Use the model's service information or a clear photo for support instead.
3. Reseat only an intact cap on a supported mechanism
For a Dell model covered by the reseating instructions, first check that the scissor mechanism is firmly attached to the keyboard. Hold the cap with its printed character facing upward and center it over the mechanism.
Align it with the surrounding keys, then press gently and evenly with one or two fingers until it snaps into place. The cap should sit level and move normally rather than remaining raised on one edge.
If a corner hasn't caught, the linked procedure allows gentle pressure at the top and bottom attachment points. Stop if it needs force or won't align; a cap resting on the keyboard isn't necessarily attached correctly.

For a loose scissor mechanism, follow your model's bracket instructions. The linked procedure fits the lower clips before the upper edge. The correctly oriented support should move but stay attached.
Acer, ASUS, HP, and Lenovo keyboards don't all attach that way. Find the Chromebook's full model number and use its manufacturer's repair guidance before trying to attach a loose mechanism.
I'd ask for model-specific help if the hinge came away in pieces. Those small clips have to hold the cap level, and repeatedly pressing a misaligned assembly doesn't repair them.
4. Treat Space, Enter, and Shift as larger assemblies
A large key can have an extra stabilizer bar, which keeps it level when pressed away from the center. Space, Shift, Enter, and Backspace can therefore need more than the small-letter-key reseating procedure.
Check the maker's instructions for the bar and its retaining points before fitting the cap. If the bar is loose, bent, or no longer attached at both ends, pushing the cap down can leave one side lifting or sticking.
For that supported mechanism, fit the stabilizer ends into their clips before centering and pressing the cap. Match your model's keyboard: a similarly shaped key on another model can have different fittings.
After the cap is fitted, turn the Chromebook on and type into an ordinary text field to check it. Letter presses should register consistently. A spacebar should register near both ends as well as the middle, without catching or tilting.
If it remains loose or misses presses, stop reseating it repeatedly and ask about replacement. A cap that stays on but doesn't work still needs attention to the mechanism or keyboard underneath.
5. Keep typing while arranging the right repair
For temporary access, open Settings > Accessibility and turn on On-screen keyboard under Keyboard and text input. You can select its keys with the pointer; a touchscreen isn't required for clicking them.
The on-screen keyboard instructions also explain automatic opening in tablet mode on convertible models. This replaces the missing input while you work; it doesn't repair the physical key.
A compatible USB keyboard is another temporary option. Try the affected character there before using it for a long assignment. Keep the loose cap safe so the repair provider can inspect its hooks and match the layout.
For a school Chromebook, report the missing cap to its device team before buying parts. They may have a repair service for your model or a Chromebook you can borrow. Let them arrange service for the school device.
6. Ask for parts using the complete Chromebook model
Give the manufacturer the model number, keyboard language, missing key, and a photo of the exposed attachment. For Dell, have the Service Tag ready. A replacement that looks similar can still use different clips.
Dell says it supplies replacement keyboards rather than separate key components through this route. Ask which assembly fits your model and whether service is covered before buying a loose cap from another seller.
Coverage depends on the damage and service plan. A manufacturing fault and accidental damage aren't handled the same way, so describe what happened and have the provider review your coverage.
Ask for a keycap reseating or keyboard assessment, rather than a factory reset. Erasing ChromeOS won't put a broken hook back onto the cap or replace a missing stabilizer.
The Short Version
Missing Caps Lock or Delete can be normal. For a detached cap, check its hooks, support mechanism, and rubber dome. Reseat only intact supported parts, use temporary input if needed, and request model-specific repair for damage.
Checked November 13, 2026.