A built-in webcam shutter is the best place to start when covering a computer camera. Slide it closed, then check the preview in your camera app.
On a MacBook, avoid leaving an added camera cover between the screen and keyboard when closing the lid; a cover can damage the display in that tight space.
In this guide
Find the camera and any built-in privacy control
Look along the top of the screen for the webcam lens and a small sliding shutter. A desktop webcam may have a hinged cap instead. Check the computer or webcam's model guide before pulling at anything that doesn't move easily.
A shutter blocks the lens. A camera privacy switch or keyboard key can instead disable the camera electronically. Those controls can produce different results in an app, even when both are described as privacy features.
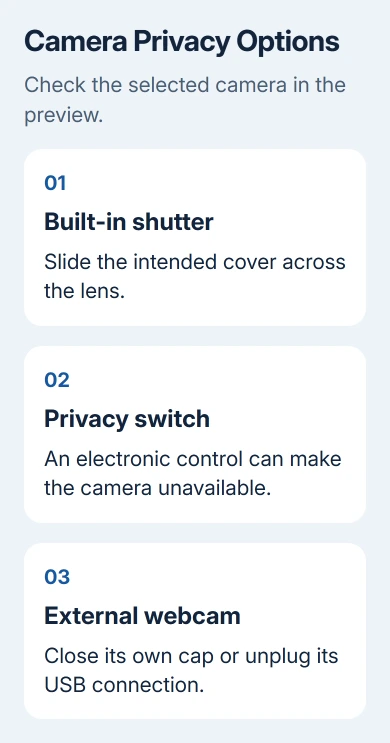
A notebook's privacy control can be beside the camera, on the side of the laptop, or on the keyboard. Look for the camera symbol and your model's instructions rather than assuming every small slider does the same job.
Slide a mechanical shutter fully closed and open the preview in a familiar camera app. The picture should no longer show the room. An electronic privacy switch may instead make the app report that it can't find or access the camera.
If the preview still shows you, check that the app hasn't selected a second camera. A connected USB webcam or another available camera can remain active while the laptop's own lens is covered.
Keep added covers out of a MacBook's lid gap
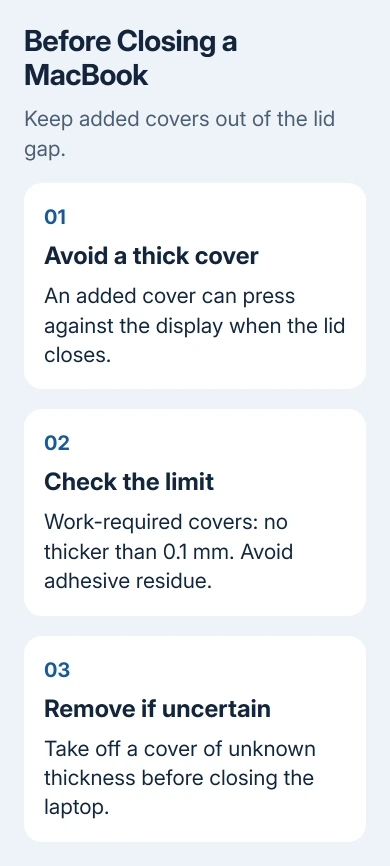
Apple's MacBook camera-cover guidance warns that closing the lid with a cover installed might damage the display. The camera area doesn't have spare room for an arbitrary plastic slider or clip.
An added cover can also interfere with the ambient light sensor, affecting automatic brightness and True Tone. Keeping the lens blocked isn't the only thing to consider when deciding where you place a cover.
If a workplace requires a physical cover, use a cover no thicker than ordinary printer paper, 0.1 mm, and one that doesn't leave adhesive residue. A cover thicker than 0.1 mm must come off before the laptop closes.
I'd remove an added cover before shutting the lid whenever its thickness is uncertain. Guessing from how thin it looks isn't a useful way to judge the space between a screen and keyboard.
The built-in indicator is another useful check. The FaceTime HD camera described in that guidance can't activate without its green light coming on. Keep the light visible rather than covering the whole area around the lens.
Use a separate webcam's own cap or disconnect it
An external webcam usually gives you another simple option: unplug the USB cable between calls. That avoids putting an accessory against a laptop display and removes that webcam from the computer's available devices.
If the webcam has its own cap, close it the way the manufacturer designed it to fit. Check the preview once to see that the cap covers the lens properly. A cap hanging beside the camera doesn't block the image.
In a meeting app, open the camera selection menu and read the selected device's name. Covering the laptop camera won't block an external camera that the meeting app is using instead.
The webcam video recording guide explains selecting the camera and checking its preview. Use that selection check before deciding whether the cover has worked.
A lens cover doesn't mute a microphone. End the call, mute audio in the app, or use the microphone's own controls when you also need to stop sound. Keep the camera and microphone checks separate.
Limit camera access in Windows without adding a cover
In Windows 11, open Settings > Privacy & security > Camera. Review the Camera access switch. The separate control named Let apps access your camera manages application access; turn off permission for apps that don't need it.
In Windows 10, the corresponding page is Settings > Privacy > Camera. It has an Allow apps camera-access switch. Follow that Windows 10 path; its Settings layout differs from Windows 11.
Desktop apps can be handled differently from Store apps. Look for the desktop-app access control and any individual controls your build offers. Don't assume every installed program appears in the same per-app list.
The Windows camera-permission instructions explain those differences. Those privacy controls may not work the same way for some desktop apps as they do for supported apps.
If you want to disable a camera device in Windows 11, open Settings > Bluetooth & devices > Cameras, choose the camera, and select Disable. Confirm the prompt. This requires administrator access and can require a restart.
Check the confirmation carefully: on some systems, disabling one camera also disables others that share hardware. To block just a meeting app, change its access rather than disabling the camera for other apps too.
To restore a camera disabled through this page, return to Cameras, find Disabled cameras, and choose Enable beside it. A camera disabled elsewhere may need to be enabled through that same tool instead.
Limit which Mac apps can use video
On a Mac with System Settings, open Apple menu > System Settings > Privacy & Security > Camera. Review the apps listed and turn off access for those that don't need it.
On older macOS versions using System Preferences, open Security & Privacy > Privacy > Camera. The controls are in a different place on these older versions. Changing the desktop wallpaper or screen saver doesn't affect camera permission.
After a permission change, follow any prompt to quit and reopen the app. Then try its camera preview. The app may show a permission warning or explain that camera access is unavailable.
A website also needs camera permission in your browser. Review that website in the browser if you want to keep video calls working elsewhere. Denying the whole browser affects more than a single meeting site.
Check the next call before it starts
Before a call, open the shutter, reconnect the external camera if needed, and check the chosen camera's preview. If you disabled access, restore only the permission or device you intend to use.
For a Chromebook that remains black after reopening the shutter, the Chromebook camera checks cover device and app access. A closed shutter and a blocked permission can look similar to a caller.
If the shutter is jammed, don't force it against the display. Ask the laptop or webcam maker for help and give them the model. Explain whether the slider moves, the preview is black, or the app can't detect the camera.
The Short Version
Use a built-in shutter or the external webcam's own cap, and check the selected camera's preview. Keep added covers out of a MacBook's closing lid gap. Review app access separately, and remember that covering a lens doesn't mute sound.
Checked November 10, 2026.