Recording video from a webcam needs a recording control, not just a live preview. For a quick Windows clip, open Camera, select Video, start the recording and stop it when finished. Open the resulting thumbnail to check the saved clip.
For selectable camera and microphone inputs with editing afterward, Clipchamp provides a separate webcam recorder. Choose the workflow before making a long recording.
In this guide
Choose Camera for a quick clip or Clipchamp for editing
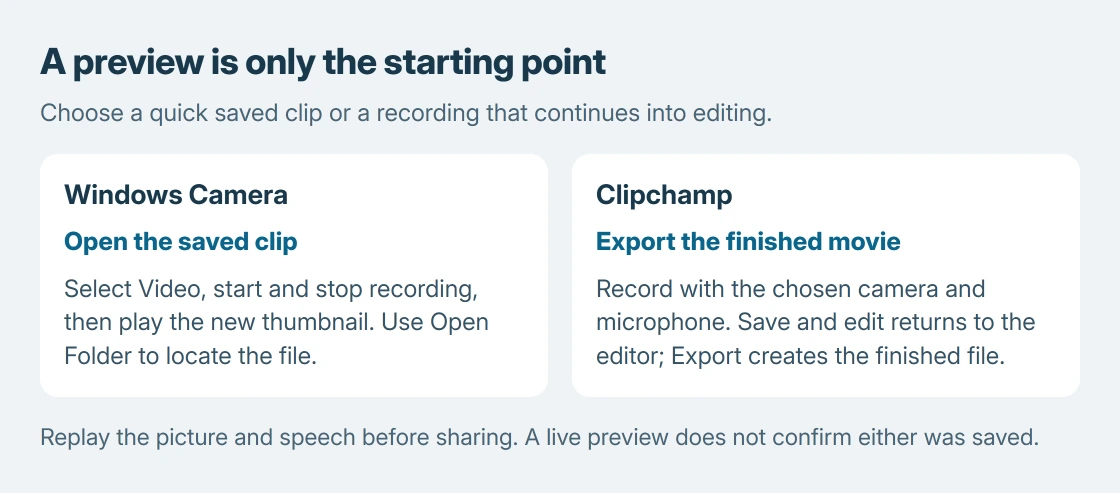
The Windows Camera app records a clip directly. Clipchamp records into its editing workflow, where the finished movie must also be exported. Seeing a recording in an editor is different from having a finished file to attach.
Microsoft says both a built-in camera and a connected webcam can work with its Camera app. If several cameras are available, Change camera selects the intended picture.
Between recordings, covering the camera safely means checking the active lens and keeping added accessories clear of a closing laptop lid.
Status: Microsoft's Windows Camera and Clipchamp recording procedures reviewed October 25, 2026. No video or audio was captured during this research.
For a newly connected NexiGo model, complete its camera connection and input checks first. Picture-adjustment software does not itself start a recording.
A Canon camera can supply video through EOS Webcam Utility; configure its USB source and separate microphone before recording.
Make a short recording in Windows Camera
Open Start, search for Camera and open the app. Check its preview, then select the Video control on the right. It changes to Take video when video mode is selected.
Select Take video to begin. The recording control changes to a red stop button. Speak a short sentence, then select Stop taking video to finish.
Select the lower-right thumbnail for the latest recording and play it. Check both the picture and the sound before committing to a longer take. A preview before recording cannot confirm that speech was saved.
An older VX-1000 with no usable preview needs driver compatibility checked before recording can begin.
When that saved clip has backward writing, compare webcam mirroring and rotation before making the longer take.
Bands or pulsing brightness in that clip call for matching webcam anti-flicker to the lighting before the next take.
To locate that exact file, select the ellipsis while viewing the clip, then Open Folder. This also works when the account stores pictures somewhere other than the usual location.
The completion check is ours: locate the file and play it once before attaching it or closing the recording task. A visible camera image alone does not establish a usable saved recording.
Use Clipchamp when the inputs or editing matter
The following personal-account workflow is documented by Microsoft. Open app.clipchamp.com in Edge or Chrome, or use the Windows Clipchamp app, and create or open a project.
- Select Record & create, then Camera. Work or school interfaces can label the option Webcam.
- Approve Clipchamp's request to use the camera and microphone. Verify both selectors; the desired webcam does not automatically establish the desired microphone.
- Select the red recording button. After the countdown, record the clip and select the red stop control when finished.
- Play the recording. Choose Retake recording if necessary, or Save and edit to return to the editor.
Microsoft lists a 30-minute limit per webcam recording and recording resolution up to 1080p, subject to the camera. Longer material needs separate takes rather than assuming one continuous capture.
Finish with an exported file
Clipchamp's export procedure saves the edited movie as a downloadable file. Finish any edits, choose Export, select an available quality, and save the completed video.
To use the exported clip in a slide deck, embed the local movie in PowerPoint so it can travel with the presentation.
No speech or no picture? Check the failed stage
A silent clip needs an audio check even when its picture is correct. Use the Windows microphone test to check the intended input, then verify the recording app uses that same microphone.
For denied access, check Windows camera and microphone privacy settings and, in a browser, that site's permissions. A browser prompt and a Windows permission are separate controls.
If recording works in Camera but fails in Clipchamp, report the browser, selected inputs and error to Microsoft. If neither receives an image, give the webcam maker its model and Windows error before replacing recording software repeatedly.
The Short Version
Use Camera's video control for a quick saved clip, or Clipchamp for input selection and editing. Play the recording, verify speech, and locate the finished file. Clipchamp's editor recording still needs an export for sharing.