An Excel drop-down list lets people choose from entries you supply. Type the choices in a source range, select the cells that need the list, then open Data > Data Validation and choose List.
The arrow makes entries easier to select. To reject other typed values too, set the rule's error style to Stop.
In this guide
Prepare the choices in their own cells
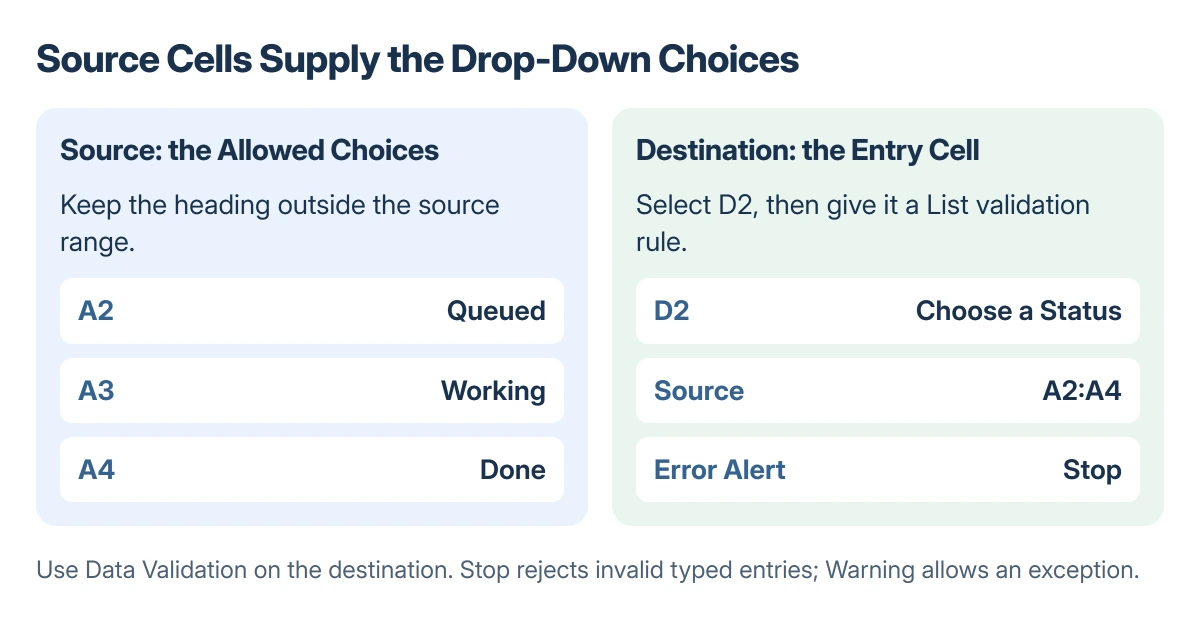
On an unused part of a worksheet, type one choice per row. For example, put Queued, Working and Done in A2:A4, with a heading in A1.
Leave the heading out of the choices. Check for unwanted spaces and blank cells now, so they do not become confusing entries in the finished list.
Before sharing those choices, check spelling within the source cells so a typo does not become an allowed entry.
Status: Excel list-validation instructions checked 22 October 2026 for Windows, Mac and the web. The example cells are illustrative; no workbook was edited.
A source list can grow more easily when it is an Excel table. On Windows, select a cell in that list, press Ctrl + T and confirm whether the selection includes a heading.
For a source with gaps or new records, check the full Excel table range so later choices stay inside its boundaries.
Microsoft's drop-down instructions describe automatic updates from a source table. With a fixed cell range, check the reference when adding or removing choices.
For repeated choices, check the Remove Duplicates consequences before deleting anything. Clean the list of choices without removing records from another table.
Apply validation to the destination cells
Select D2, or whichever cell needs the list. For several cells with the same choices, select the whole destination range before creating the rule.
Open the Data tab and choose Data Validation. On its Settings tab, set Allow to List.
Click Source, then select only the cells containing the choices. In the example, that is A2:A4, excluding the A1 heading. Excel can display the reference as =$A$2:$A$4.
Keep In-cell dropdown selected. Use Ignore blank when an empty destination is acceptable, then confirm with OK.
Open the arrow in a destination cell. It should offer Queued, Working and Done. If the heading is included, reopen Data Validation and exclude A1 from the source reference.
For a short list that rarely changes, type the choices directly into Source using the separator Excel expects. A range of cells is easier to maintain when the list will grow.
When those choices are no longer needed, remove the cell list while keeping its entries through Data Validation.
Decide whether other typed values are allowed
Reopen the destination's validation rule and select Error Alert. Enable the alert for invalid entries, then choose the required style.
Microsoft says Stop rejects a typed entry that is outside the list. Warning and Information display an alert but let the person continue.
Choose Stop for a status column that must use agreed spellings. Choose a warning style only when exceptions are intentional. Type an invalid example into a spare destination cell to verify the behavior before sharing the workbook.
Use the optional Input Message to explain what the cell expects. Error Alert handles invalid entries; an input message alone does not reject them.
A field with only a checked or unchecked state may suit an in-cell Excel checkbox instead. Its TRUE/FALSE value can feed another formula.
Mac and browser differences
On Mac, Microsoft documents Data Validation or Validate under the Data tab, depending on the interface shown. Choose the Settings tab, set List and select the source entries.
In Excel for the web, open Data > Data Tools > Data Validation. The list rule still needs the source and the in-cell option. Check its alert settings before expecting desktop-like rejection behavior.
Microsoft states that worksheet protection or workbook sharing can make Data Validation unavailable. Get the workbook owner's permission to change the protection or sharing arrangement instead of removing controls blindly.
For a long worksheet, freeze the header row and first column so the field name stays visible while people fill the validated cells.
If the result is wrong
For a blank option, inspect the source for empty cells. For a missing new choice, check the range or table. If the arrow is absent, check the destination selection and In-cell dropdown setting.
If a shared or protected workbook prevents the change, give its owner the destination range and the intended source range. Those addresses make the request specific without altering the rest of the workbook.
The Short Version
Type the choices in a source range, select the destination and create a List rule in Data Validation. Exclude the heading and enable the in-cell arrow.
Use Stop when invalid typed entries must be refused, then verify the rule in the destination.
Where to Next
Save the workbook after checking a valid choice and an invalid entry. Recheck the source after adding a new option so the shared copy offers the complete list.