Desktop Word gets its fonts from Windows or macOS, so install the font on your computer and then reopen Word. There isn't a font-upload button inside the ordinary font list.
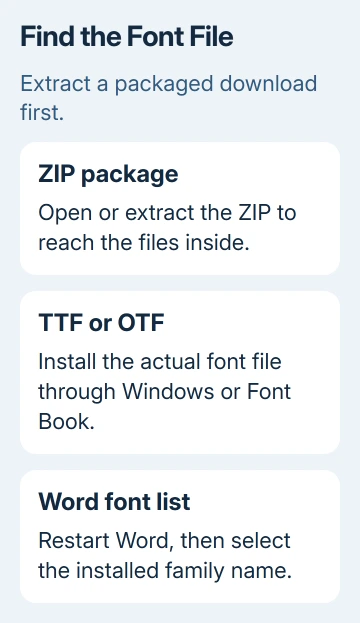
A downloaded ZIP file needs to be opened or extracted first; the font itself is usually a TTF or OTF file. Word in a browser and Word on a phone don't use the same desktop installation process.
In this guide
Start with the actual font file
Find your downloaded files using File Explorer in Windows, or Finder in macOS. A font family can include several files for regular, bold, italic and other styles.
Keep those files together until you've decided which styles the document needs.
Look at the file extension. .ttf means TrueType and .otf means OpenType; both are common desktop font formats. A file ending in .zip is a package holding the font files, rather than a font you select directly in Word.
Use a font from a source you trust and check its license for your intended use. A free download can still have limits on business work, redistribution or embedding. Installing the file doesn't remove those license conditions.
On Windows, right-click the ZIP and choose Extract All, then follow the extraction prompt. On Mac, double-click the ZIP in Finder to unpack it. Open the resulting folder and find the TTF or OTF files.
Microsoft says fonts must be installed through the system in its Office custom-font instructions. That is why the same installed font can become available in Word and other desktop apps.
If the download contains only instructions, a webpage shortcut or an unfamiliar installer, return to the supplier's download information. Changing a filename's ending to .ttf won't turn its contents into a font.
The file itself has to contain a font your system supports.
Add the font to a Windows computer
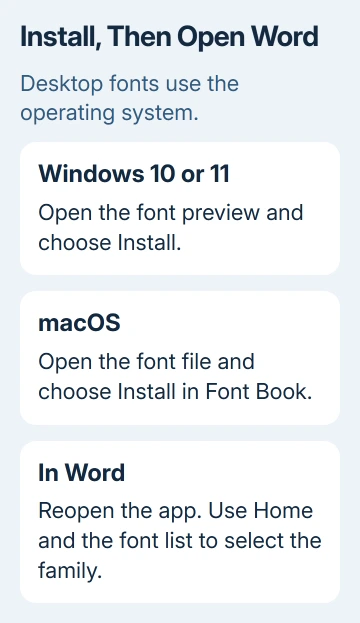
Close Word after saving your documents. In File Explorer, double-click the extracted font file. Windows should open a font preview showing sample characters, with an Install button near the top.
Choose Install and let the installation finish. Another route is to right-click the font file and choose Install. On Windows 11, Show more options can reveal commands that aren't in the first shortcut menu.
For a shared computer, Install for all users is a separate choice. It can require administrator approval.
An installation for your own account is normally enough when you're the person opening Word, so don't change permissions just to reach the all-users option.
Repeat the installation for the styles you need. If a family supplies separate regular and bold files, installing only the regular file doesn't install the separate bold font file too.
Use the supplier's included family files rather than guessing from filenames alone.
To check the result, open Start > Settings > Personalization > Fonts and search for the family. That screen shows installed fonts in either Windows version. Check there before changing anything inside Office.
If Windows refuses the file, follow the separate not a valid font file checks. Word can't use a font that Windows hasn't accepted, so reinstalling Office isn't the first response to that message.
Add the font to a Mac with Font Book
Save your Word documents and quit Word. In Finder, double-click the extracted TTF or OTF file. The font preview opens; click Install to add it through Font Book.
Font Book checks fonts during installation and can report problems or duplicate copies. Read a warning before proceeding.
Installing another copy of the same family can make troubleshooting harder when you don't know which version an app is using.
Another current route is Font Book > File > Add Fonts to Current User. Select the font file in the window that opens.
Older releases can use different wording for the add-font command, while opening the font in Finder remains a direct route.
In Font Book, search for the family and make sure it appears. Fonts installed for the current user belong to that user's account; a different person signing into the same Mac doesn't automatically get that installation.
If the font displays incorrectly, highlight its entry, then use Font Book's File > Validate Selection. The results tell you whether the font passed the check or has a warning or failure.
Deal with failed checks or duplicate fonts in Font Book before changing your Word document's formatting.
Reopen Word and choose the family name
Start Word again and open a blank document. Go to Home and open the font list, then search or type the installed family's name. The name shown inside Word can differ from the downloaded filename.
Select the font and type a short sample. Include the letters, numbers and punctuation your document needs. A decorative font can install correctly yet lack a particular character or writing system.
If the font is missing, first confirm it appears in Windows Fonts or Mac Font Book under the same user account. Then quit and reopen Word completely. Closing one document window might leave the application running, especially on Mac.
An installed font that triggers a memory warning needs the Word requested-font permission checks before another installation.
In Word 2011 for Mac, select Segoe UI through Format > Font if Font Book has the family but the ribbon omits it.
I'd test in a blank file before changing an important document. That helps you tell an installation problem from formatting in an existing file. You can also check whether the family's regular and bold styles work as expected.
Installing the font doesn't apply it to existing text automatically. Select the text and choose the family from the font list.
If the downloaded family should start every new blank file, set Word's default font after installation.
A document's styles can switch the font again. Select the text and check its font name instead of judging only by how the page looks.
A matching font name with the wrong appearance in Word 2010 calls for the Print Layout font checks before changing styles.
Keep the font when sharing the document
Sending someone your document doesn't install its custom font on their computer. If they don't have that font, Word can substitute another one, changing line breaks and page layout.
Font embedding saves the font inside your document. In desktop Word versions that support it, Windows uses File > Options > Save > Embed fonts in the file.
In Word for Microsoft 365 for Mac, find the embedding controls in Word > Preferences > Save.
Whether embedding works depends on the font's permissions and your Word version. If the font doesn't allow embedding, don't assume a checked box will override that.
Ask the recipient to install a properly licensed copy or agree on a font both computers have.
For slides using the same family, the separate guide to adding fonts to PowerPoint covers the presentation workflow. A document and a slide deck can need separate sharing checks even when they use one installed family.
Word for the web doesn't offer this same local font-installation route. If a browser document needs a desktop-installed custom font, open it in desktop Word and check it there.
For an iPad document, check Word custom-font access separately; the old iOS 11 failure eventually cleared with a Word update.
Use your organization's IT team for installation on a managed computer.
If a correctly installed font is missing only from Word, give Microsoft Support your operating system, Word version, font family and whether another desktop app can use it.
For a font rejected by the system, ask its supplier for a supported, undamaged file.
The Short Version
Extract the download, install the TTF or OTF through Windows or Font Book, then restart Word and select the family from Home's font list.
Check the license and sharing options before sending the document to someone who doesn't have that font.
Checked November 13, 2026.