
Installing Node.js also installs npm on your Mac, so you usually don't need a separate npm download. Run node -v and npm -v in Terminal first. If either is missing, choose one way to install Node, then check both again.
For development work, use a Node version manager to switch Node versions without installing npm across the whole system. If a version manager doesn't suit your setup, use the official Node installer.
Check what's already installed
Open Terminal from Finder > Applications > Utilities, or use Spotlight. Apple's Terminal guide shows both ways to open it.
Run these separately, pressing Return after each line:
node -v
npm -v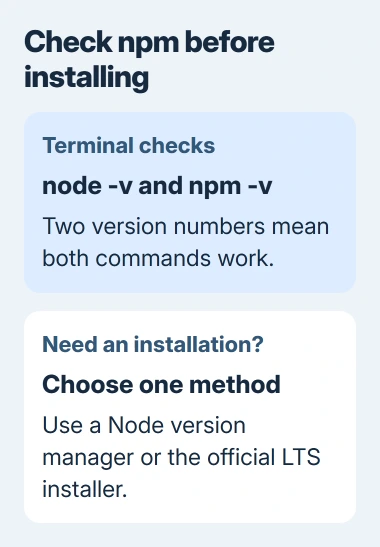
If each command returns a version number, both tools work in this Terminal window. The numbers don't need to match because Node and npm are separate programs.
If your project asks for a particular Node release, choose that version. Picking the newest release won't necessarily give the project the version it needs.
When both commands already work, check where they come from before adding another installation:
command -v node
command -v npm
Keep those paths along with any installation error. They show whether Terminal is using the copy you intended or an older one installed another way.
Choose a version manager for ongoing development
The npm project's installation guidance recommends a Node version manager such as nvm. It installs Node versions for your account and lets you choose the version your project needs in Terminal.
Open the official nvm installation instructions and use the current installer. Follow the Mac instructions for installing Command Line Tools if you don't have them yet.
The current nvm installer command is:
curl -o- https://raw.githubusercontent.com/nvm-sh/nvm/v0.40.8/install.sh | bashThe installer updates the startup file for your shell, the program that reads Terminal commands. Read its messages, then open a new Terminal window to load the changes. Check nvm with:
command -v nvmThe response should be nvm. Use this check instead of which nvm because nvm runs as a shell function: it's loaded into your shell, rather than kept as a separate program file.
Then install a supported long-term support (LTS) release:
nvm install --ltsWhen installation finishes, run node -v and npm -v again. If you've already installed an LTS version but it isn't active in this window, select it with nvm use --lts.
If you already manage tools with Homebrew on the Mac, choose which method you'll use for Node before adding another. Otherwise, different Terminal windows can end up using different copies.
I'd stick to one method on a new setup. When you need to update Node or report an error, the path will make it clear which installation you're using.
Use the official Node installer when appropriate
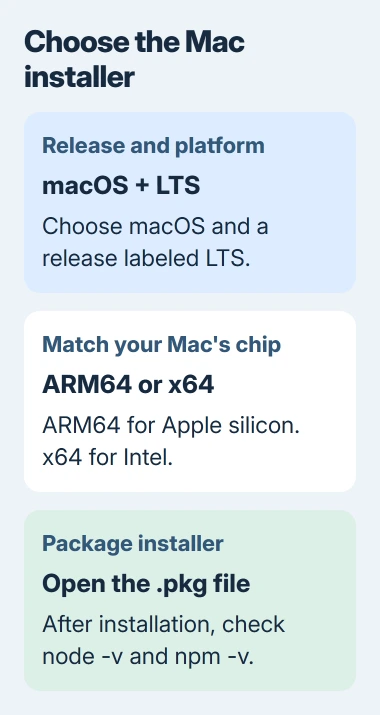
If you can't use a version manager, open the Node.js download page. Choose a release labeled LTS, set the operating system to macOS, and use the offered macOS installer.
On an older Mac, check the release's system requirements before downloading. A machine running Mac OS X may be too old for a currently supported Node release.
If the page asks for architecture, choose ARM64 for Apple silicon or x64 for Intel. Check your chip in Apple menu > About This Mac instead of guessing from how the laptop looks.
Open the downloaded .pkg installer and follow its screens. Unlike an app supplied as a disk image, Node doesn't have an app icon for you to drag into Applications.
The Chrome-on-Mac installation guide shows how that disk-image process works. Node's package installer puts its commands where Terminal can use them.
If the Mac is managed at work, use the installation method its administrator approves. After the package installer finishes, open a new Terminal window and run the two version commands from the first section.
Fix a command that stays missing in a new Terminal
If you see nvm: command not found, check how the installer set up your shell. Current Macs use zsh by default, with nvm setup in ~/.zshrc. An older Bash setup uses different startup files.
For a missing startup file, follow the nvm Mac troubleshooting section to create it and load nvm. Use the steps for your shell instead of pasting every suggested setup into several files.
If nvm works but you get node: command not found, install or select the Node version you need. Having nvm available doesn't mean you've installed and selected Node yet.
If Node works but npm doesn't, note the Node version and the paths from command -v. Follow the repair instructions for the method you used to install it instead of choosing an unrelated npm installer from search.
Your shell's PATH lists the folders it searches for commands. Even after a successful install, it may find another copy first. The reported paths help you see which copy it's using.
Treat permission errors as a separate next step
An EACCES error when installing a package globally means npm couldn't access a folder. That's different from npm being missing, especially if npm -v already gives you a version number.
Use a version manager or a global installation folder your account owns, following the npm permissions guidance. Try that before changing permissions across system folders.
If setup still fails, tell the project's support team your macOS version, chip, install method, command paths and exact error. That helps them check for an unsupported release, shell setup that hasn't loaded or a permission problem.
The Short Version
Run node -v and npm -v first. Choose one way to install Node, then check both in a new Terminal window. For missing commands, check your shell setup and paths. For EACCES, follow the permission-error steps.
Checked November 5, 2026.

Isaac Smith is the founder and editor of PC Glance, a website that covers computers, laptops, and technology. He is a tech enthusiast and a computer geek who loves to share his insights and help his readers make smart choices when buying tech gadgets or laptops. He is always curious and updated about the latest tech trends.