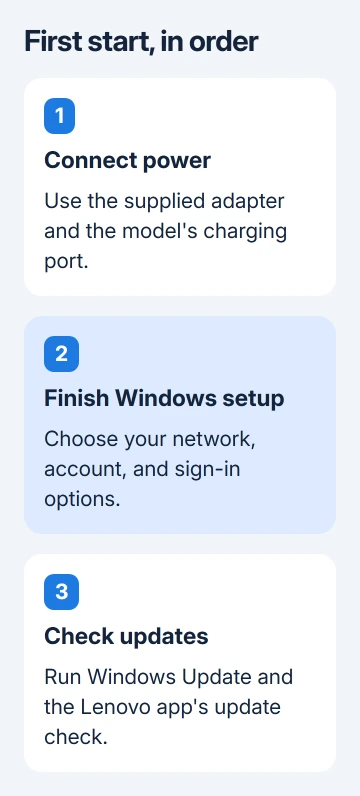
A new Lenovo laptop normally starts with its charger connected and Windows 11 asking for network and Microsoft account details. Finish those setup screens first, then update the machine before moving your files or installing apps.
Windows setup works much the same way on ThinkPad, IdeaPad, Yoga, and Legion laptops, though their ports, buttons, and sign-in hardware differ. Follow your organization's enrollment instructions for a work-issued laptop.
In this guide
1. Attach the supplied charger and turn it on
Set the laptop on a hard surface with clear vents. Attach its supplied adapter to the port identified in the setup guide, then plug it into an outlet. Leave the dock disconnected until the laptop works on its own.
Don't assume every USB-C socket can charge the laptop. Some Lenovo models use USB-C power, while others have a separate power connector. Check the model's full name on its label or box, then use it to look up the required port and adapter.
Once you've found the power button, open the lid and give it one normal press. Some models start when you open the lid because Flip to Start is enabled. That automatic start doesn't mean the power button is missing or faulty.
Look for a Lenovo logo followed by Windows setup. A light with no picture needs different checks from a laptop showing no response at all. Use the Lenovo no-power checks if setup never appears.
2. Choose the language, keyboard, and network
Choose the correct region, then match the keyboard layout to your physical keys. If setup offers a second keyboard layout, add one only if you use it; otherwise choose the option to skip it.
Connect to your Wi-Fi network and enter its password. Keep the laptop plugged in while Windows checks for updates or restarts during setup. Don't interrupt an update just because setup hasn't reached the desktop yet.
A missing Wi-Fi network and a rejected Wi-Fi password need different checks. Confirm another device sees the network. On the laptop, check your network selection and the password you've typed against the router's details.
If no networks appear while other devices can see them, note the exact Lenovo model and setup screen. Ask Lenovo for the network driver or setup instructions for that model instead of downloading an unrelated wireless package.
Setup wording and screen order can change with Windows releases. Follow the prompts on your laptop. Its screens don't have to match older screenshots.
Once setup reaches the desktop, practice opening apps and saving your first file before adding more software.
3. Sign in and choose new setup or a restore
For a personal laptop, use your chosen Microsoft account when setup asks you to sign in, or create one when offered. Lenovo's Windows 11 guide says the personal setup uses a Microsoft account; switching to a local account comes afterward.
Use your own account rather than asking a shop or friend to finish setup under theirs. You'll need access to that account if you need its backups or recovery information later.
If Windows offers an existing backup, check the computer name and date before choosing it. Choose a fresh setup if you don't want the old computer's saved settings and supported restore items brought across.
Keep the old computer as it is after choosing a restore, until you've checked the documents and apps you need on the Lenovo. Some programs still need their own installation and sign-in.
For an employer's machine, use the work or school details supplied by IT. If an apparently new personal purchase demands sign-in to an unfamiliar organization, contact the seller about its enrollment before proceeding.
4. Set up your PIN and available Windows Hello options
Follow setup's prompts to create a Windows Hello PIN. This is the sign-in code for the device. Keep your Microsoft account password available as well; the PIN doesn't replace that account's password everywhere.
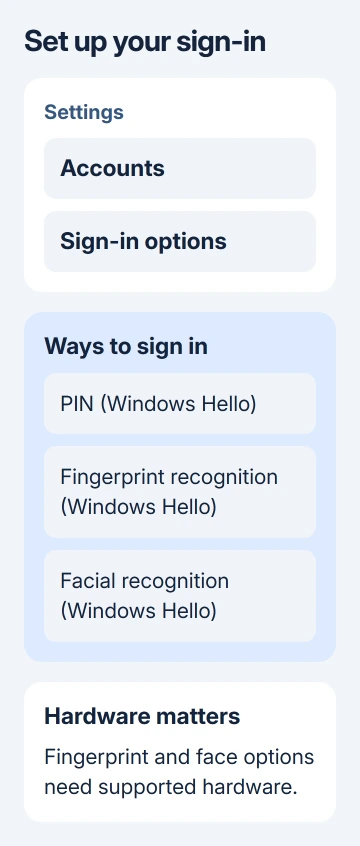
On models with supported hardware, setup may also offer fingerprint or facial recognition. A normal webcam doesn't automatically support face sign-in, and a fingerprint reader isn't fitted to every version of a model.
After reaching the desktop, open Settings > Accounts > Sign-in options. Under Ways to sign in, choose Fingerprint recognition (Windows Hello) or Facial recognition (Windows Hello) if it's available, then follow the prompts to set it up.
The Yoga 7/7i guide requires a PIN before fingerprint enrollment. If the reader is built into the power button, the same physical control can turn on the laptop and read an enrolled finger, but those are separate functions.
Read the privacy choices during setup. Make choices about location and diagnostics based on how you'll use the laptop, rather than accepting them just to reach the desktop a few seconds sooner.
5. Check Windows updates and Lenovo updates
On Windows 11, open Settings > Windows Update > Check for updates. Download and install the offered updates, restart when requested, and return to the page to check the result.
For a refurbished Lenovo still running Windows 10, the path is Settings > Update & Security > Windows Update. Its standard support ended October 14, 2025, so check its support options and whether it can upgrade before relying on it.
The Windows update procedure includes those two menu paths. When you're done, check that the page isn't asking for a restart or showing an update error.
Search Start for Lenovo Vantage and open it if installed. Its update area is called System Update on supported versions; choose Check for updates, review the offered packages, and follow the installation instructions.
Some regions and models use Lenovo PC Manager instead. Available features differ, so don't assume its controls match Vantage. Vantage is available through the Microsoft Store if the model's instructions call for it.
While firmware is updating, keep the charger connected until its instructions say the process has finished. Firmware is the software that starts the hardware; interrupting its update carries different risks from closing an app installer.
6. Check recovery access and everyday functions
On a supported Windows 11 laptop, open Settings > Privacy & security > Device encryption. Device Encryption can turn on when you set up the computer with a Microsoft or work account, with its recovery key attached to that account.
Check that you can access that account and its recovery information. The BitLocker recovery-key guidance explains backup options. Store any extra copy away from the laptop.
I'd check recovery access before a major file transfer. If Windows later asks for the key, you'll need that recovery key, rather than your account password or device PIN.
Test the keyboard, touchpad, speakers, camera, and charging before relying on the laptop for work. Then install your usual apps, transfer files, and open a few important documents to confirm the transfer completed.
If you're setting up the laptop again after recovery, the Lenovo reset guide explains that earlier stage. Ask Lenovo support for help with the precise failing setup screen, model, and error rather than resetting repeatedly.
The Short Version
Connect the supplied charger, finish Windows network and account setup, and configure your sign-in options. Install Windows and Lenovo updates, check recovery-key access, then test the laptop and transfer your files.
Checked November 10, 2026.