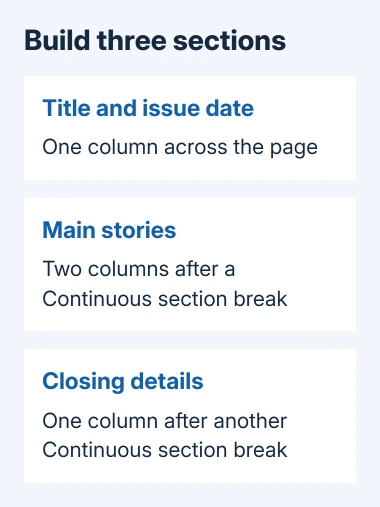
A practical Word newsletter uses a full-width title and issue date, followed by a two-column story section. Set those areas up with section breaks so changing the story columns doesn't squeeze the title into one narrow column.
Start with the Windows or Mac desktop Word app and keep an editable copy for the next issue. Word for the web has fewer layout controls, so use the desktop app when the browser can't create or adjust the columns you need.
In this guide
Plan the page before arranging the stories
Save a new blank document with an issue name. Choose your paper size through Layout > Size, then check Layout > Margins. Do this before balancing the stories: a later paper change alters the space available to every column.
For a simple first issue, use two equal columns for the main stories and keep the newsletter title across the page. Two columns leave more room for ordinary text than a crowded three-column page.
Use a readable body font and a larger title. Keep the issue date nearby so readers know which edition they have. Match these design choices to the audience; a sample font size isn't a requirement.
Type the title and date as normal paragraphs first. Don't use spaces to center a heading or tabs to create the story columns. Use the alignment and layout controls so the page still works when you replace the text for the next issue.
Separate the title from the column section
Place the cursor after the title and issue-date paragraphs, where the stories should begin. Choose Layout > Breaks > Continuous to insert a section break without forcing a new page.
A section is a part of the document that can have its own layout. Microsoft describes Continuous section breaks as a way to change columns on the same page.
Click in the new section and choose Layout > Columns > Two. The title should stay full-width while the story section becomes two columns. Type a few sample paragraphs to check that separation before adding all the content.
In desktop Word for Mac, use Layout > Breaks to choose the continuous section break too. The ribbon's appearance can differ, but it serves the same purpose: start a new layout section while keeping it on the current page.
If the title becomes narrow as well, undo the column change and check where the section break sits. The cursor must be in the story section when you apply its columns. Changing the whole document's columns affects the title too.
For existing text, select just the intended paragraphs before choosing Columns to put that text into columns. If you switch between these two methods, check the section marks before applying columns to the same text again.
Adjust the columns and let text flow naturally
In the story section, open Layout > Columns > More Columns. Keep equal column widths for a simple layout, and adjust the space between them if the stories look cramped.
Use the Width and spacing controls for that adjustment. A gap made by spaces inside the text won't behave like an actual column gap and can break when a story is edited or the paper size changes.
Leave Line between cleared. Open space is enough to separate the columns, and it keeps the page calm. Check the result at a normal reading size rather than relying on a tiny preview of the whole page.
Text normally flows down the first column and continues into the next. Write the story in reading order rather than clicking around the page trying to position every paragraph independently.
I'd finish the text before fine-tuning where each column ends. Editing the opening story can move everything after it, so polishing those endings too early often creates extra work.
The editable code formatting guide shows a similar principle for technical newsletters: format text as text when readers need to select or reuse it, rather than replacing every example with a picture.
Start a story in the next column with a column break
Click just before the story heading or paragraph that should start the next column. Choose Layout > Breaks > Column. In Windows desktop Word, Ctrl + Shift + Enter inserts a column break too.
A column break moves the text after it to the next column. It doesn't start a section with its own layout settings. Use it when a story needs a clear starting point, rather than pressing Enter until the text reaches the right place.
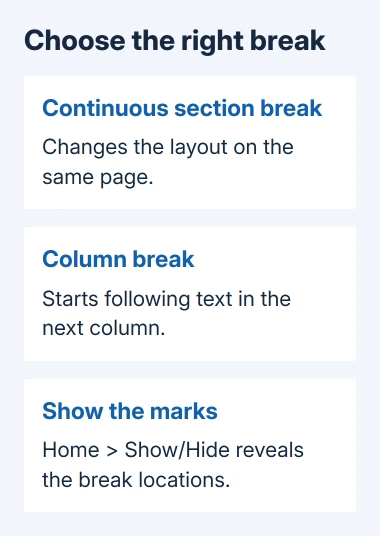
Turn on Home > Show/Hide to see the formatting marks. A visible column-break marker helps explain why the next story moved. Paragraph marks also reveal empty lines that were added to push content down.
Review the page after editing a story's length. A break stays in place even when earlier edits leave unexpected space. Remove or reposition an unwanted break rather than filling its gap with blank paragraphs.
If your Mac version shows a different break control, use the ribbon command rather than assuming the Windows shortcut will work. Check the resulting story position and visible formatting marker before you carry on.
Return to one column for the closing information
At the end of the stories, insert another Continuous section break. Click in that new section and choose Layout > Columns > One. Use that area for a full-width contact paragraph, next-issue note or short closing announcement.
Check that the closing text spans the page while the stories retain their columns. If a column setting changes earlier content, undo it and check where the sections start and end before editing the stories themselves.
Keep important contact details in readable text and test any email or website link in the finished copy. A link that looks correct in the editing window can still point to an old address carried over from a previous issue.
Review the issue and keep a reusable copy
Open File > Print to inspect the complete pages. Check the title, story order, last lines of columns and closing section. Look for a heading stranded at the foot of a column or an extra page containing only a few words.
Save the editable Word document before making a PDF to share. Windows desktop Word offers PDF through Save As and Export.
On Mac, open Save As or use Save a Copy for a saved file. Choose PDF under File Format, then save it.
Inspect those pages again in the exported PDF. Check that its text, page count and links match the issue you meant to send. For print copies, print one copy to check before printing the full run.
Save another copy for the next edition. Keep the sections you've set up while replacing the stories and date. If layout keeps breaking, send Word support a sample and explain which change moves the wrong content.
The Short Version
Keep the title full-width, then give stories two columns in a new Continuous section. Use column breaks to position stories and a one-column closing section. Review the pages and keep both editable and distribution copies.
Checked November 15, 2026.
 If you have any business, I can build it online