A MacBook already has the Notes app for typed notes, lists and quick reminders. Open Notes, choose a folder for the note, then click the new-note button and start typing. Notes saves changes automatically as you work.
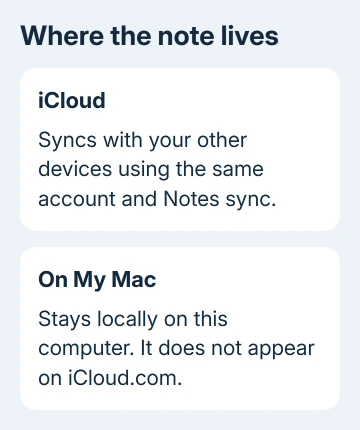
Choose an iCloud folder for access across your Apple devices. A local On My Mac note stays on that Mac. For a thought you need to catch while using another app, use Quick Note instead of searching for the main Notes window.
In this guide
Choose the account before writing the note
Find Notes in Applications, or type its name into Spotlight. If the folder sidebar is hidden, choose View > Show Sidebar. Look at the account headings before clicking a folder, so you know where your note will be stored.
For notes that should reach your iPhone or iPad, select a folder under iCloud. Use the same Apple Account across your devices so they can share the note. Another mail account's Notes folder can offer fewer features than iCloud notes.
If iCloud Notes isn't enabled, open Apple menu > System Settings, select your name, then iCloud. Select See All beside Saved to iCloud, open Notes, and turn on Sync this Mac.
Some macOS releases arrange the iCloud list differently, so open the Notes entry within iCloud if See All isn't shown. The setting you need is the one that enables Notes on this Mac, rather than a general storage upgrade button.
For local notes, check Notes > Settings > Enable the On My Mac account if you don't see that heading. Older macOS releases call the app's settings Preferences. Local storage is useful when the note should remain on this computer.
Pick the note's location before writing anything. A note can save correctly on the Mac without appearing on a phone because you wrote it under the local heading. Auto-save and syncing are separate parts of the job.
Give the first line a title you can recognize
Select the intended folder, then click the new-note button in the toolbar. Type a useful first line, such as a project name and meeting date. The first line becomes the note's title in the list.
Press Return and continue with the note's contents. Keep the title short enough to recognize in the sidebar. A dozen notes titled Meeting are harder to find than notes that identify the project and the decision being discussed.
Apple says Notes saves your edits automatically while you work. There isn't a separate Save As step each time you add a sentence.
Click another note, then reopen your new entry. Check its title and last sentence so you know you've reopened the right note, rather than another one with a similar name.
For meeting notes, I'd keep decisions and next actions in their own short paragraphs. A long transcript can hold the discussion, but a clear action line makes the note useful when you return to it a week later.
Add structure without formatting every sentence
Use the toolbar's Format control to choose a heading or other text style. Put a heading before a new subject, then continue with ordinary body text. You don't need a separate note for every point in one meeting.
Use a bulleted or numbered list when the order or grouping matters. Click the Format control and choose the list type. Press Return for the next item; press Return twice after the last item to return to a normal paragraph.
For tasks you want to mark complete, use the Checklist button. Type one task, press Return for the next, then click the empty circle beside a completed task. Checklists are available with iCloud notes and notes stored on your Mac.
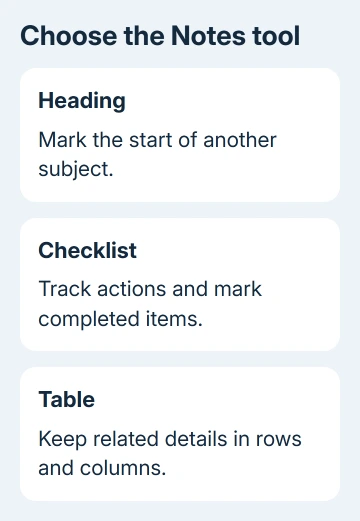
Use Add table to keep related details together, such as a person's name and what they're responsible for. Use it for short comparisons. A normal list is easier to read when each item is just one sentence without related columns.
If a toolbar feature is missing only in one account, compare an iCloud note. Notes from other providers don't include every feature. Moving from a Gmail note to an iCloud note can give you those tools without having to repair the app.
Catch a thought with Quick Note
On macOS Monterey or later, press Fn+Q to open Quick Note. Another route is to point at the lower-right screen corner and click the note that appears, when that Hot Corner is configured for Quick Note.
Type the thought in the small window, then return to your other work. Quick Notes appear in the Quick Notes folder in Notes, so reopen them there instead of looking for a separate file on the desktop.
If the shortcut keeps opening your previous Quick Note, open Notes > Settings and clear Always resume to last Quick Note. That changes whether the shortcut starts a fresh item or returns to the last one you used.
In Safari, select text from a page, Control-click it, and choose Add to Quick Note. This keeps the selected text with a link to its source. The link helps you return to the page, instead of leaving you with copied text and no context.
Quick Note opens in its own Mac window, even when it collects a webpage link. The Safari command adds that reference to the note; it doesn't save the entire website as a standalone document.
Reopen and check the note where you need it
Use Notes' search field with a distinctive word from the title or content. Check the folder and account of the result, especially if similar notes exist in several accounts. Open it before deciding that an item is missing.
For a synced note, open Notes on the other Apple device and check the matching iCloud folder. If a note exists on the Mac but not there, confirm the account and Notes syncing on each device before creating another copy.
A browser can provide another way to edit iCloud notes when you need access away from the Mac. That route requires signing in and doesn't include notes stored only under On My Mac.
When another person needs to work on the same content, use Notes sharing and collaboration rather than sending repeated copies. Decide whether they need an invitation to collaborate or just the text of the current note.
If notes still won't save or sync, send Apple Support your macOS release, account type, affected folder and whether other notes work. Describe whether the text disappears on this Mac or simply fails to arrive on another device.
The Short Version
Pick a folder for your note, give the note a recognizable first line, and start typing. Saving is automatic. Use headings and checklists to organize it, Fn+Q to catch a thought, and iCloud for notes needed on other Apple devices.
Checked November 15, 2026.
 If you have any business, I can build it online