Add references in desktop Word through References > Insert Citation > Add New Source, then create the final list with References > Bibliography. Saving a source lets you cite it again without retyping its details.
Word for Mac also has a Citations pane to reuse and edit sources. Word for the web needs the desktop app for built-in bibliography tools. If Insert Citation is missing, check which version of Word you're using.
In this guide
Choose the citation style before adding a source
Open your document in desktop Word and select References. In the Style list, choose the citation style your assignment or publisher requires, such as APA or MLA. Check the required style and edition before choosing one with a similar name.
The style tells Word how to format your source details. You'll still need to enter those details yourself. Have the source open so you can enter its author, title, publication information, and any other details that kind of work needs.
For references already saved in Mendeley, add its Cite panel to Word instead of entering each source again in Source Manager.
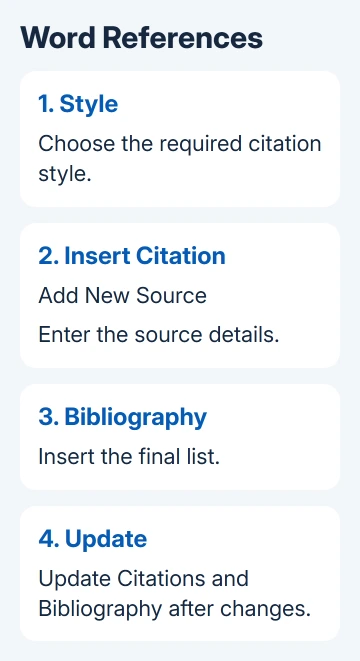
Microsoft says the built-in citation workflow starts with a style and a source, then uses those records to create the bibliography. Choose one source to begin, rather than typing a whole reference list manually.
A citation is the short reference beside the passage that uses a source. The bibliography is the longer list of source details, usually at the end. Word connects them through the saved source information.
Insert the first reference in Word for Windows
Click at the end of the sentence or passage that needs the citation. Follow your assignment's rules about whether the reference belongs before or after punctuation. Word inserts the citation at the cursor, so place it carefully.
- Open References > Insert Citation and choose Add New Source.
- In Create Source, choose Type of Source. Select the kind you actually used, such as a book, book section, journal article, or website.
- Fill in the details from that source. Use Show All Bibliography Fields if you need a field that isn't initially visible.
- Click OK. Check that Word added a citation beside the passage you meant to reference.
The source type changes which details matter. A journal article accessed through a web page may need a journal article entry rather than a website entry. Match the record to the work you used, not just the app that displayed it.
Don't fill an unknown publication date with the site's footer year. Check the source or citation guidance for missing information. Word formats what you enter, mistakes included. Get the details right before worrying about punctuation.
For the next mention of the same work, put the cursor at the new passage and choose References > Insert Citation again. Select the existing source from the list instead of creating a second record for the same work.
Add page numbers and correct the source record
To cite a specific passage, select its citation, open Citation Options, then choose Edit Citation. Add a page number or other details offered there. The saved source details and the citation beside this passage do different jobs.
A book's publication details belong to the shared source. The page you used for one paragraph belongs to that paragraph's citation. Another reference to the same book can cite a different page without needing another book record.
To correct an author, title, or date on Windows, choose References > Manage Sources. Select the source and click Edit. Make the correction in the fields, then confirm with OK, rather than fixing only the visible bibliography text.
Current List contains the document's sources. Master List also holds sources from other documents on that computer. If a long list is hard to scan, use Source Manager's search box to find an author or title.
A placeholder leaves a spot for a source whose details you haven't entered yet. If you used Add New Placeholder while drafting, return to its entry in Current List and choose Edit to complete the information before submitting the document.
Generate the reference list and keep it current
Place the cursor where the final source list should appear. Open References > Bibliography, then choose the format you need. Check the heading as well as the entries, since your assignment may ask for a particular name for that list.
Review the output against the original sources. Check names, dates, titles, and publication details. I'd inspect one complete entry before adding more sources, especially when the required citation style is unfamiliar.
After citing a new source, click inside the bibliography and choose Update Citations and Bibliography. Repeat that update before your final review so the list reflects changes made while writing.
To correct source details, edit the saved source, then update the bibliography. If you type the correction straight into the bibliography, the saved source can stay wrong. A later update can undo what you typed.
An older Mendeley plug-in reporting a citation in an index area needs a check of the document fields before more sources are added.
For a manually prepared list that needs different alignment, the Word hanging-indent steps explain paragraph formatting. Changing the alignment won't add or fix the saved source details that an automatic bibliography uses.
Use the Mac Citations pane for repeated references
In Word for Mac, choose the required Style on References, place the cursor at the passage, then use Insert Citation > Add new source. Choose the source type, enter its details, and click OK.
To reuse a saved source, click where its next citation belongs and open References > Citations. In the pane at the right, double-click the source you want. This inserts another citation from that record.
To change a record, point to its source in the Citations pane, open its menu, and choose Edit Source. Correct the fields and click OK. Manage Sources lets you work with the wider source list when needed.
For the final list, position the cursor at the end of the document, open References > Bibliography, and select Bibliography or Works Cited. Use the list type and style your document requires.
Check the app version and the kind of reference
Word for the web can display existing bibliography features, but it doesn't provide the desktop tools to create and update them. Use the installed Word application to manage these citations, then save your changes.
If the assignment needs numbered notes, use the separate Word footnote procedure. A citation from Source Manager doesn't automatically become a footnote or endnote, even when a style is called Chicago.
For a missing command, check your Word version and whether the file allows editing. If the controls are still missing in an editable file, tell Microsoft support your app version, operating system, and which References commands you can see.
When the entire tab has disappeared, check References in the ribbon settings and confirm that the installed edition includes it.
The Short Version
Choose the style, save each source through Insert Citation, then insert a Bibliography. Reuse source records for later citations, edit records when details change, and update the final list. Use desktop Word for these built-in tools.
Checked November 12, 2026.