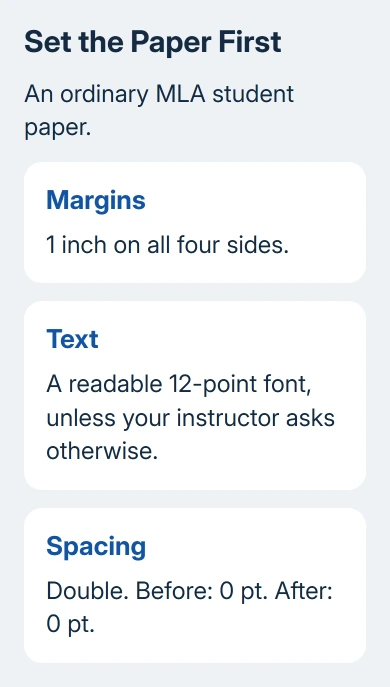
MLA format in Microsoft Word starts with one-inch margins, double-spaced text, and a readable font. Set those first, then add your name-and-course heading and a surname with an automatic page number in the header.
Follow your teacher's instructions if they request another font, cover page, or first-page header. These steps cover a standard student paper in desktop Word for Windows or Mac, with browser differences explained as they come up.
In this guide
Set the page before typing the paper
Open a blank Word document and save it with a useful name. For an existing draft, make a backup copy before reformatting. That gives you the original if the document already contains complicated sections or a teacher's template.
Go to Layout > Margins > Normal. Check that the setting gives 1 inch on all four sides. In a document with multiple sections, review the later pages too; their margins can differ from the first section.
For a standard US assignment, choose Layout > Size > Letter, which is 8.5 by 11 inches. Use a different paper size when the assignment asks for it. Changing page size after writing can change where the pages end.
Select the main document text with Ctrl + A on Windows or Command + A on Mac. On Home, choose a readable font and size. Times New Roman, 12 is a straightforward choice unless your instructor specifies another.
Microsoft says the margin controls let you choose preset or custom measurements. The important check is the actual measurement, rather than whether a template has MLA in its name.
Apply double spacing without extra gaps
Keep the main text selected. On Home, open Line and Paragraph Spacing and choose 2.0. Double spacing affects the distance between lines inside a paragraph; paragraph spacing is a separate setting.
Open the paragraph settings and set Before and After to 0 pt. On Windows, open these settings with the Paragraph group's small dialog launcher. On Mac, Format > Paragraph opens the paragraph controls.
Choose Double for line spacing if you're using that settings window. The paragraph spacing instructions explain these separate controls. In Word for the web, use Home's spacing menu and the paragraph options available there.
Press Enter once between ordinary paragraphs. An empty paragraph creates another gap even when Before and After are zero. Turn on Home > Show/Hide if unexplained spaces remain, and remove the extra empty paragraph marks.
I'd fix this before working on the title or page count. A paper can look double-spaced while still adding an extra gap after every paragraph, which changes both its appearance and its length.
Build the first-page heading and title
At the document's beginning, align the text left. Type your name, your instructor's name, the course, and the date on separate lines. Keep this block double-spaced, using the same font as the paper.
For the date, use the form requested for the course. A common MLA example is 12 November 2026. The heading is part of the document's main text, so don't put this four-line block in Word's repeating header area.
On the next line, center the title using Home > Center. Type the title in title case. Keep the same font and size as the paper; don't automatically make it bold, larger, or decorated.
Press Enter, return to Align Left, and begin the essay. An ordinary MLA student paper doesn't need a separate cover unless the assignment requests one. The Word cover-page procedure is for that separate requirement.
Give body paragraphs a half-inch first-line indent
Select only the essay's body paragraphs, leaving out the heading and centered title. Open the paragraph settings, find Special, select First line, and set the amount to 0.5 inches. Confirm with OK.
This moves the first line of each selected paragraph while leaving the remaining lines against the left margin. It isn't the same as moving the whole paragraph inward with the left-indent control.
For a new paragraph, a single Tab at the default half-inch tab stop can also create the first-line indent. Don't add a Tab when a first-line paragraph setting is already doing the job, or the line can move too far.
Check a paragraph long enough to wrap. Its first line should begin farther right; the second should start at the left margin. The reference list later uses the opposite arrangement, called a hanging indent.
Add a surname and an automatic page number
Double-click near the top of the page to open the header. Align that paragraph right, type your surname, then type one space. Insert a plain automatic page number rather than typing the number 1 yourself.
On Windows, choose Insert > Page Number or Page Numbering > Current Position, then a plain number. On Mac, use the header's Field control, choose Page, and confirm. Ribbon labels can vary between Word releases.
The header page-number steps also cover the Mac field route. Set the header's distance from the top to 0.5 inches, and match its font to the paper.
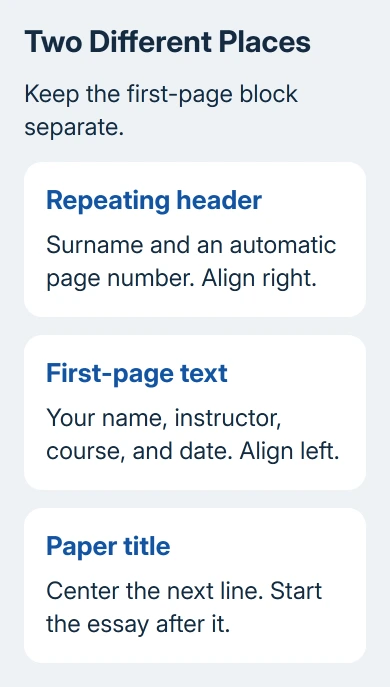
Unless the instructor wants the first page different, leave Different First Page off. Close the header, add enough text to reach a second page, and check that the number changes while your surname stays the same.
In Word for the web, use Insert > Header & Footer to add text with the page number. Check the result in Reading View or print preview. Use desktop Word if the browser version doesn't let you set a measurement your assignment requires.
Start Works Cited and check the final file
At the end of the paper, insert a page break, then center Works Cited on the new page. Keep the same margins, running header, font, and double spacing. Return to left alignment for the entries.
Select the entries and apply a 0.5-inch Hanging indent. This leaves each entry's first line at the margin and moves its remaining lines inward. The hanging-indent instructions cover Windows, Mac, and the browser controls.
Review the paper in File > Print before submitting it. Check the first and second headers, paragraph spacing, title alignment, and reference-page break.
For a dark editing page, switch Word to a light view before judging its appearance separately from the paper's formatting.
If the assignment asks for different formatting, check with your teacher. If a Word control won't work, ask Word support about that specific control.
The Short Version
Use one-inch margins, readable 12-point text, double spacing, and zero extra paragraph spacing. Add the heading, centered title, half-inch first-line indents, and surname/page-number header. Format Works Cited with hanging indents.
Checked November 12, 2026.