
Set up a TP-Link Wi-Fi extender beside your router with the Tether app, then move it toward the room with poor reception. Choose Add a Range Extender, connect the app to the extender and select the router's Wi-Fi network.
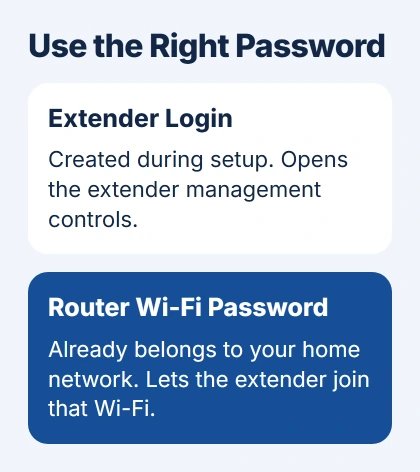
During setup, you'll create a password for the extender's settings. It's separate from your existing Wi-Fi password, so check which one the app is asking for.
Prepare the extender close to the router
Check that your extender model supports TP-Link Tether. Install Tether through your phone's official app store, then sign in with your TP-Link ID. Have your router's Wi-Fi name and password ready.
Plug the extender in near the router for setup. The Tether setup instructions say within 10 feet, with a clear path between them. Wait for the power light to become steady before looking for it in the app.
Check internet access while your phone is connected to the router's Wi-Fi. A working cellular connection doesn't tell you whether that Wi-Fi works. The extender needs a working connection from your router.
For a computer that connects to Wi-Fi but can't load anything near the router either, use the Wi-Fi versus internet checks. Finish that repair before expecting the extender to carry working internet into another room.
These steps use wireless extender mode. If you connect the extender to your router with an Ethernet cable, it may use Access Point mode instead. Follow your model's instructions for that connection when choosing the mode.
Add the extender and create its management login
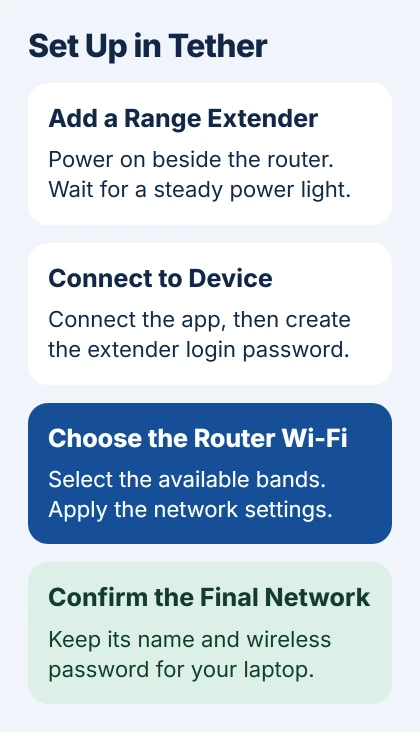
Open Tether, tap + in the upper-right corner and choose Add a Range Extender. Follow the preparation screens. When the power light is steady, tap Already Solid.
At Connect to Device, tap Connect and let the app connect your phone to the extender. When asked, create and confirm a password for the extender's settings. This is separate from your TP-Link account password.
If the app can't find the extender, open your phone's Wi-Fi settings and join TP-Link_Extender. Some models use a name ending in 2.4GHz or 5GHz. After connecting, return to Tether and tap Try Again.
This temporary network is for setup; your extended Wi-Fi may have a different name when you're done. Stay connected until the app finishes setting up the extender instead of switching back to your router halfway through.
If the app still can't find the extender, turn cellular data off temporarily, reconnect to its setup network and try again. Turn cellular data back on after setup. Restart the extender if the app still can't find it.
Select the router's network and apply the settings
Tether looks for your router's Wi-Fi networks. Select the correct 5 GHz network, enter its Wi-Fi password and choose Join. Repeat for 2.4 GHz if the app offers that band, or frequency range.
A router with only 2.4 GHz doesn't need a 5 GHz selection. Skip the unsupported band rather than picking a neighbor's similarly named network. The router band comparison explains which connection your devices can use.
Confirm the Wi-Fi password, then tap Next. If you see Edit for the extended Wi-Fi name, choose the name you want and continue. Note the final name the app shows so you can find it later.
TP-Link says applying the settings takes one to two minutes. Leave the extender powered on while it works. The power light and signal light tell you different things, so check the signal light when setup finishes.
With EasyMesh or OneMesh, the extender can use your router's Wi-Fi settings without offering a separate name to edit. The Tether guide also includes a 5 GHz-only setup for this arrangement. Follow the mesh prompts the app shows you.
Use WPS if that method suits both devices
WPS lets you set up the connection with buttons if both devices support it. Leave the extender beside the router. Press the router's WPS button, then the extender's WPS button within two minutes.
Wait for pairing to finish and read the extender's signal light using its model guide. A power light alone only tells you the unit is on. If pairing fails, return to Tether instead of repeatedly pressing different buttons.
On some dual-band routers, one WPS attempt connects only one band. Check which band connected instead of assuming both did. Use the app to check the result or finish setup if needed.
Don't hold a combined WPS/Reset button without checking its instructions. A long press can have a different action from the pairing press. The router's button timing isn't universal across models.
Move the extender and connect the laptop
Once setup works, move the extender to an outlet partway toward the room with poor reception, still within your router's coverage. Wait for it to reconnect. A red signal light generally means you need to move it closer to the router.
In Tether, Tools > Location Assistant can help you choose a spot on supported models. Check your model's light guide too. The current app walkthrough uses solid blue for a good connection, but older models can have different lights.
On a Windows laptop, open the taskbar's network controls, select the extended Wi-Fi name and choose Connect. Enter its wireless password. Microsoft's Windows Wi-Fi connection steps cover that final device connection.
Use the Wi-Fi name and password shown at the end of setup, rather than the password for the extender's settings. If the extender and router share a Wi-Fi name, your laptop may choose between them automatically.
I'd check the laptop in the target room before changing more settings. If coverage is still poor, use the extender placement and speed guide. For failed setup, give TP-Link Support the model, hardware version and stage that failed.
The Short Version
Set up the extender near your router through Tether, create its login password and connect it to your home Wi-Fi bands. Then move it to a spot with good coverage and connect your laptop using the final Wi-Fi name and password.
Checked November 5, 2026.

Isaac Smith is the founder and editor of PC Glance, a website that covers computers, laptops, and technology. He is a tech enthusiast and a computer geek who loves to share his insights and help his readers make smart choices when buying tech gadgets or laptops. He is always curious and updated about the latest tech trends.